
We enjoy taking our grandchildren to visit various zoos and aquariums across the east coast. Every time we're at one they're always drawn to those adorable black and white penguins. Matter of fact, penguins are one of their favorite animals to see! For part of our winter season decor we decided to … [Read more...] about DIY Painted Penguin Large Clam Seashells
kid's crafts
Perler Melted Beads DIY Christmas Ornaments
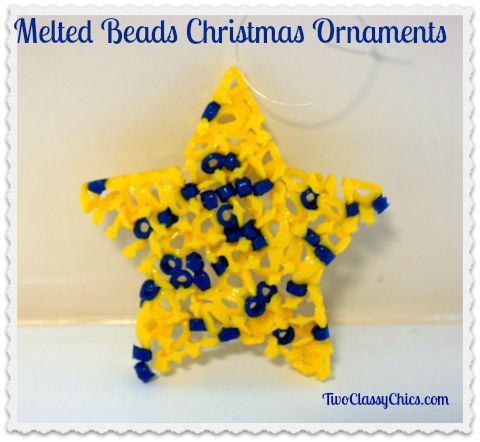
Time for another Crafting with Kids feature here on the Two Classy Chics blog and today's Christmas craft project is really easy to do! You can make these fun and colorful ornaments in a wide variety of different holiday shapes and you'll only need a handful of supplies to make them. Kids will need … [Read more...] about Perler Melted Beads DIY Christmas Ornaments
Craft Project: The GRINCH Painted Seashells

During the holiday season my grandchildren enjoy sitting down and watching all of the animated holiday specials. One of their favorite Christmas TV specials is "How the Grinch Stole Christmas", so we decided to come up with a painted seashell design to represent one of their favorite holiday … [Read more...] about Craft Project: The GRINCH Painted Seashells
Kid’s Crafts: Bottle Cap Snowman Christmas Ornaments

As Christmas approaches we'll be sharing more and more holiday theme'd craft projects with the readers of the Two Classy Chics blog. Today's project is geared towards children, but they will need some adult supervision and help. * This post contains affiliate links. We made these cute Bottle … [Read more...] about Kid’s Crafts: Bottle Cap Snowman Christmas Ornaments
Craft Project: Oyster Shell Trinket Dish

Last month we were down at the beach and I collected 4 additional boxes of seashells, sea glass and driftwood. After cleaning them up and sorting them, I found several seashells that were in "imperfect" condition. Even though they're not perfect, you're still able to use them in your crafting … [Read more...] about Craft Project: Oyster Shell Trinket Dish
Kid’s Crafts: Wooden Spoon Snowman Ornaments

The holiday season is upon us and it's time to get busy working on some Christmas crafts with the kids. Today's project is an easy one and great to do with preschoolers and elementary-aged school children. These Wooden Spoon Snowman Ornaments can be made in one afternoon and you'll only need a few … [Read more...] about Kid’s Crafts: Wooden Spoon Snowman Ornaments
Rudolph the Red-Nosed Reindeer Painted Seashells

The holiday season is finally here and now it's time to get busy with all of our holiday crafts. Last week my 9 year old granddaughter and I sat down and made a few of these adorable Rudolph the Red-Nosed Reindeer Painted Seashells. Kids can make them but they will need some help from … [Read more...] about Rudolph the Red-Nosed Reindeer Painted Seashells
Kid’s Thanksgiving Crafts Pinecone Turkey
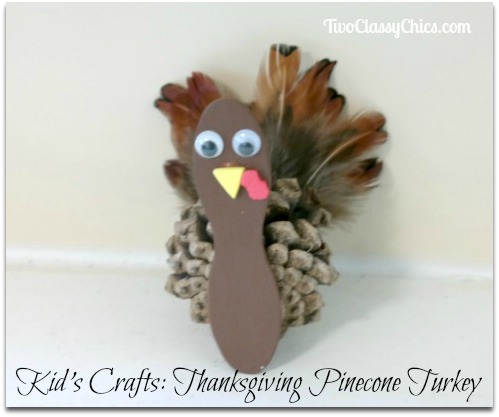
Thanksgiving is just around the corner and these easy-to-make Pinecone Turkey's work up quickly. They're the perfect craft to make with preschooler's and elementary-aged children. You'll only need a few basic craft supplies to make them. Once completed they would look super-cute decorating your … [Read more...] about Kid’s Thanksgiving Crafts Pinecone Turkey