
Summer is just around the corner and many families will be heading out on a summer vacation and while traveling the kids need to be kept busy. I always pack a travel bag for each child that contains sticker & activity books, reading books, colored pencils, a drawing pad, puzzle books & … [Read more...] about Curious Creatures Stickers and Activities Book for Kids
kid's crafts
Kid’s Crafts Photo Frame Refrigerator Magnets for Mother’s Day
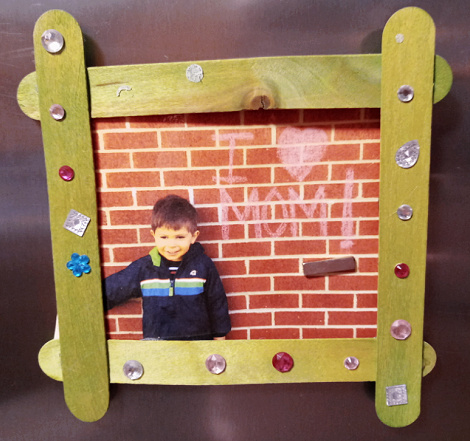
Last weekend my grandson was over for an Arts and Crafts play date. Twice a month I like to have the kids come over to work on fun projects with me. We sat down and made these adorable Mother's Day Photo Frame Refrigerator Magnets out of wooden craft sticks. The project shown in my photograph was … [Read more...] about Kid’s Crafts Photo Frame Refrigerator Magnets for Mother’s Day
Craft Project: Painted Soup Can Lids Garden Markers

Looking for a way to recycle those soup can lids? Mason jar lids? If so, these Painted Soup Can Lids Garden Markers craft project is for you! This project can be easily made by older children, adults and seniors with basic art and crafts supplies. I enlisted a few kids in our family ages 8 to 13 … [Read more...] about Craft Project: Painted Soup Can Lids Garden Markers
How to Hollow and Dye Eggs for Easter
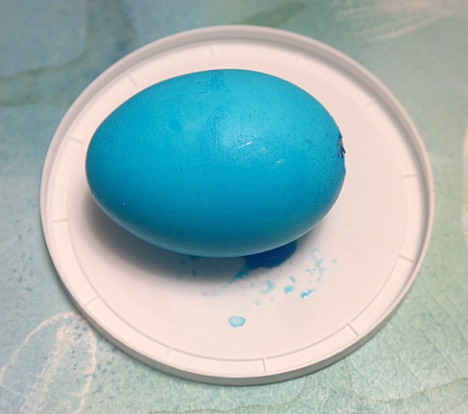
Every year we love to sit down and paint Easter Eggs with the grandchildren. When we're working with fresh eggs (not hard-boiled) we like to hollow them out and then paint or dye them. It's a fairly easy process and the kids really enjoy making them. You'll want to wash the eggs under cool … [Read more...] about How to Hollow and Dye Eggs for Easter
Kid’s Crafts – Puppy Dog Painted Seashells

These puppy dog painted seashells are super easy to make! We had several of them completed in one weekend. We decided to keep the pattern simple since we were working with 3 children between the ages of 5 and 11. You can do them in any color that you would like (light gray with black features would … [Read more...] about Kid’s Crafts – Puppy Dog Painted Seashells
Painted Easter Eggs with Egg Dying Tips

Are you getting ready for Easter? We've been ready since Mid-March. We like to plan ahead and get things done. Last weekend we had the grandkids over to the house for a play date and we painted Easter Eggs. Oh my gosh, we had so much! To prepare I purchased an extra dozen of eggs at the grocery … [Read more...] about Painted Easter Eggs with Egg Dying Tips
Mason Jar Lid Travel Size Tic-Tac-Toe Game

When we travel with our grandkids we always take along plenty of games to keep them occupied. The games have to be light-weight and compact in size. Games are a great way to pass the time during long car rides, air travel, rainy days when you're stuck inside a hotel, etc. This travel size … [Read more...] about Mason Jar Lid Travel Size Tic-Tac-Toe Game
Kid’s Crafts – Tissue Paper Snowflakes
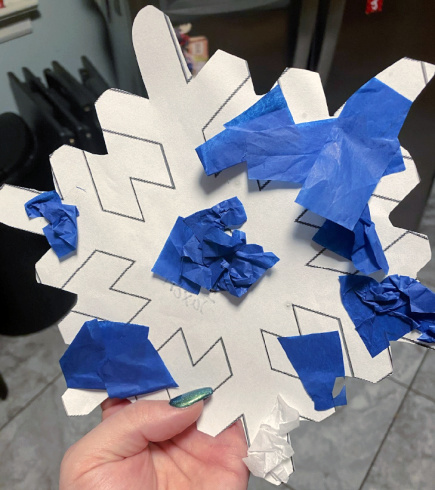
My grandson is 5 year's old and loves to work on arts & craft projects with me. He will sit for hours painting, working with clay, folding papercrafts, gluing things together, etc. Crafting together is a great way for us to bond and it teaches him valuable skills that he can use later in … [Read more...] about Kid’s Crafts – Tissue Paper Snowflakes