Tag: Christmas

Hand-Crafted Ribbon Coastal Christmas Tree

Hand-Crafted Ribbon Coastal Christmas Tree

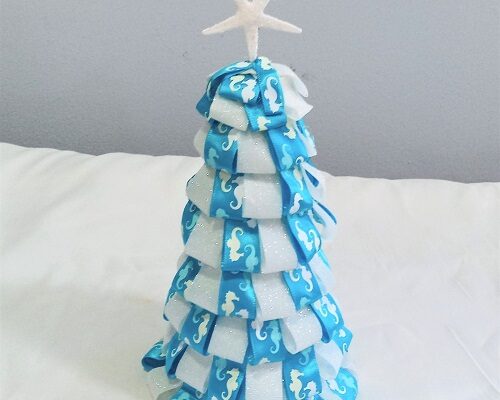
This hand-crafted ribbon coastal theme Christmas tree was made in one afternoon using a lot of craft supplies that I picked up at my local Dollar Tree store. Below I’ll list the craft supplies and where I purchased them. If you don’t live nearby any 

Make Your Own Christmas Holiday Door Wreath

Make Your Own Christmas Holiday Door Wreath

Every few years I like to update the Christmas wreaths that I hang up on our front, side, and back doors. Making your own holiday wreaths is easy and affordable! You can typically find everything you need at your local craft supply store or online 

Painted Metal Coffee Cans Snowman Winter Decoration

Painted Metal Coffee Cans Snowman Winter Decoration

Painted Metal Coffee Cans Snowman Winter DecorationThis adorable snowman was made with mostly upcycled items. He was made in one afternoon and can be decorated for the Christmas holiday or just decorated in a classic winter theme like mine. I plan on letting mine out for most of the winter as part of my front porch winter decor.

A few tips before you get started. You don’t want to use hot glue. It doesn’t work great for the long term with metal. I recommend using Gorilla Glue. Be careful to not get it onto your skin. The small plate used for the brim of the hat should be made out of plastic or a lighter-weight ceramic. Don’t use glass which is too fragile. Say away from heavy pottery pieces which will throw the snowman tower off-balance. I purchased the ceramic plate at Dollar Tree.

*** This post contains affiliate links.

Painted Metal Coffee Cans Snowman Winter Decoration

3 Metal Coffee Cans
1 Metal Soup Can
1 Plastic or Ceramic Saucer or Small Dessert Plate
White and Black Spray Paint
Black and Orange Acrylic Craft Paint
Paint Brush, Water Dish, Paper Towels
Gorilla Glue (super glue)
All-Purpose, Quick Drying Craft Glue
Fat-Quarter of Cotton Homespun Fabric
Scissors
Clear Acrylic Spray Sealer – Glossy or Matte Finish
12″ Long Piece of Jute Rope

Take the metal cans outside after they’ve been cleaned and dried. Spray all 3 of the metal coffee cans with 2-3 coats of white spray paint. Repeat with the soup can but using black spray paint. You need to cover the bottom and sides of each can with paint. Use the black spray paint to paint the smaller sized plate. You need to spray the top with 2 coats, let dry and then flip it over to spray the bottom with 2 coats of paint. Let dry until no longer tacky.

While those items are drying you want to cut the cotton homespun cloth to fit around the metal can. I cut mine 4″ wide by the length needed (I forget the length), folded it in half and used all-purpose craft glue to tack it together in half to form one strip. Having it doubled gave it more strength and form. Set aside. Cut another strip 1″ wide by about 10″ in size. This may vary a little bit. It will be glued around the soup can when making the hat. You’ll need about a 16″ long piece of Jute which will go around the hat and be tied into a bow.

Painted Metal Coffee Cans Snowman Winter Decoration

Bring the painted metal cans inside. Time to assemble them. Use Gorilla Glue to glue all three of the coffee cans together. Use a paper towel to dab-up any of the excess glue so you don’t have drips running down the sides of the cans. Stack the 3 cans together using the glue. Use Gorilla Glue to adhere the soup can to the top of the black plate. Let sit for about 30 minutes or until it starts bonding and then add Gorilla Glue to the rim of the top white can so that you’re gluing the hat to the top of the snowman. Let the entire stack of cans sit for 2-3 hours so that the glue gets a good bond.

Painted Snowman Recycled Coffee Cans Craft Project

Use black acrylic paint to paint on the eyes, mouth and 3 black buttons. Use orange acrylic craft paint to make the carrot-shaped nose. You may need to use 2 coats of paint. While the paint is drying carefully tie the scarf around his neck and knot the two ends together. Use scissors to trim the scarf ends to a reasonable size. Glue the fabric strip around his hat…followed up the jute rope tied into a bow. Let everything dry for 2-3 hours.

You can leave him as-is or add pine sprigs, red berries, or other decor around the hat brim. I personally liked a very “clean” look with mine. Once you’re done I recommend taking it back outside and spraying it with 2-3 light coats of a clear acrylic spray sealer. This will help protect all of the paint from chipping, cracking, and crazing over time.

What I love about this project? It’s made with mostly upcycled items keeping those items out of our landfills. Next…the project is easy to do and you don’t need to be an artist to paint on simple facial features. Finally, they’re tall and slender so they don’t take up much storage room after the season is over. You can pull it out year after year to decorate during the winter season. I’m currently working on a female version and BOTH will be displayed on my front porch!

* This post contains affiliate links. If you make a purchase, we may or may not receive a small commission which helps to support this site. Thank you!

Shelly's Signature

Hand Painted Glitter Wood Snowflakes Ornaments

Hand Painted Glitter Wood Snowflakes Ornaments

I found unfinished wooden snowflake ornaments at my local craft supply store for a dollar each. They’re on the larger size compared to a traditional Christmas tree ornament. I decided to paint them and add glitter for the sparkly effect. I’m going to hang them 

Hand Painted Seashell Angel Christmas Tree Ornament

Hand Painted Seashell Angel Christmas Tree Ornament

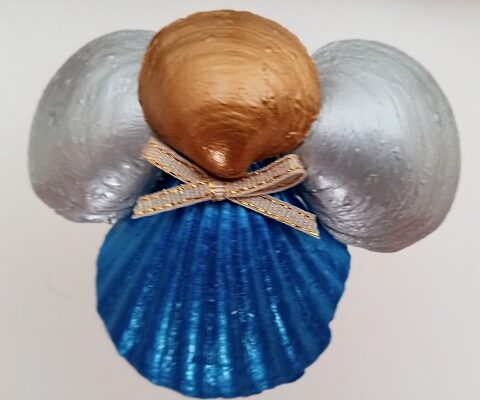
This hand painted seashell angel Christmas tree ornament is really easy to make! You can make several of them in just one weekend! Once completed they look beautiful hanging on a coastal themed Christmas tree, used at package toppers, hung off the handles of gift 

Painted Wood Snowman Family Shelf Sitters

Painted Wood Snowman Family Shelf Sitters

Painted Wood Snowman Family Shelf SittersThis hand painted snowman family set of shelf sitters was made out of scrap wood (pine wood) from my husband’s scrap pile. I made this set for my daughter who was loves displaying snowmen throughout the holiday and winter seasons. All four of the figures are a different size to represent a Dad, Mom, Daughter, and a Son…her family size.

What’s nice about this craft project is that you can make each figure any size that you want. The Dad measures 12″ tall and then each one is smaller in size in the set that I made. You can make them smaller or larger depending on your decorating needs.

The body is one pine board of varying heights. The snowmen have squared-off top hats while the snow women have rounded corners on their hats. The bases (so they will stand upright) are made out of scraps of wood too! The bases are about an inch thick and stick out an additional inch on each side. Tiny nails were used to secure it to the base of each figure. The hat brims are made out of 1/4″ thick pine wood with varying lengths depending on the width of your figure (the body) and attached with tiny nails. A little wood putting was used to cover up the nail holes and then sanded smooth.

I used 2 cans of white spray paint to make all four figures shown as each one got 2 coats of paint with 30 minutes of drying time between coats. Once they were dry I did the rest of the painting by hand with acrylic craft paints. She wanted each one to have a different colored hat and scarf and selected the colors.

Painted Wood Snowman Family Shelf Sitters

Take them outside and spray them on all sides with 1-2 light coats of a clear acrylic spray sealer. This will protect the painted finished. Real buttons were used on all of the snowmen (opted to leave the buttons off for the girls) and homespun fabric was used for the scarves.

Overall, I’m really pleased with how the snow family turned out! I used scraps of wood, fabric, buttons, and acrylic craft paint that I already had on hand. The ONLY things I had to go out and buy were the 2 cans of white spray paint and the 1 can of clear acrylic spray sealer. I love frugal craft projects like this!

If you want to personalize them you can take a paint pen and write the names and dates on the base of each figure or underneath the platform base that they stand on. Cute!

* This post contains affiliate links. If you make a purchase, we may or may not receive a small commission which helps to support this site. Thank you!

Shelly's Signature

Elegear Christmas Surfing Santa Inflatable Outdoor Decoration

Elegear Christmas Surfing Santa Inflatable Outdoor Decoration

Every year I start our outdoor Christmas decorating around November 1st and finish up in early December. I put up over 10,000 holiday lights, several inflatables, wreaths, and other decorations. It takes me weeks, but I really enjoy doing it. People particularly drive through our 

The Classic Christmas Specials Collection on DVD

The Classic Christmas Specials Collection on DVD

Every holiday season my family enjoys sitting down and watching all of those classic Christmas specials on TV. We pop the popcorn, put on our holiday PJ’s, and enjoy that family time together. It’s a tradition in our home and we’ve been doing it with