Tag: Christmas

Easy-to-Make Old Fashion Pom-Pom Gnomes

Easy-to-Make Old Fashion Pom-Pom Gnomes

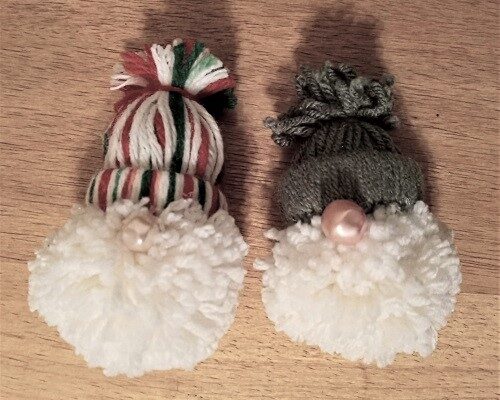
Gnomes have made a big comeback the past 2 years and AGAIN are all of the rage in home and garden decor. Every time I walk into a department store or discount store I see all kinds of home decor in a Gnome theme! Heck, 

Shopping Secondhand Stores for Seasonal Holiday Decor

Shopping Secondhand Stores for Seasonal Holiday Decor

Last week I noticed a secondhand store in the shopping plaza where I go to do my grocery shopping. I enjoy going into gently-used stores from time to time to hunt for bargains. With that said, I’m picky about the stores that I visit. I 

How to Make a Coastal Tree from Tumbling Tower Wood Blocks

How to Make a Coastal Tree from Tumbling Tower Wood Blocks

How to Make a Coastal Tree from Tumbling Tower Wood BlocksTumbling Tower Blocks are wooden game blocks sold at your local Dollar Tree store. They’re smaller in size than a traditional Jenga block. If you can’t find them there…check out 5 and Below. They sell their version of the wood blocks game but their in a little bit of a larger size. I used DT Tumbling Tower Blocks to make the tree and trunk. I used 5 and Below game blocks to make the base.

These trees can be decorated in a wide variety of different styles. You can make them shabby chic, country primitive, classic & modern, southwest, and I chose to make one in a fun Coastal Beach style. Just change up the garland, tree topper and the little decorative accents on the base to fit within your decorating style.

** This post contains affiliate links.

You will need to set aside a few days to make one. Why? I found that hot glue didn’t work well for adhering the wood blocks together. I chose to use Gorilla Glue instead, so I laid out all of the blocks and glued them together in small sections and once dry…then glue those sections to other sections until the entire tree was built (minus the base). I had my husband cut one of the blocks into a square to use at the tippy top of the tree.

How to Make a Coastal Tree from Tumbling Tower Wood Blocks

How to Make a Tree from Tumbling Tower Wood Blocks

Tumbling Tower Wood Game Blocks
4 Wood Game Blocks from 5 & Below
Gorilla Glue
Hot Glue Gun and Glue
Scissors
Clear Fishing Line
Tiny Beads (your choice of colors)
Tiny Seashells
Star Fish
Jute
Mini Conch Shell
Mini Wrapped Present
Beach Sand
Modge Podge – Glossy Finish
Rainbow Shimmer Fine Glitter
White Acrylic Paint
Paint Brush

How to Make a Coastal Tree from Tumbling Tower Wood Blocks

As I explained above…lay the unfinished blocks out in the pattern shown in my photograph. Work in sections gluing them together until the tree has been built. You can paint, stain, wax, etc. the tree into the desired color. I chose to paint mine with white acrylic craft paint (3 coats, front, back and sides) allowing for 40 minutes of drying time between coats.

While the paint was drying I worked on the mini tree garland. I purchased a multi-pack of tiny beads in aqua and seaglass colors. I measured the width of each section on my tree and added 2″ to that length. Knotted the fishing line end and started stringing the beads. Once I reached the desired width…knotted the end again and used scissors to trim. You’ll need 4 garlands in 4 different sizes.

How to Make a Coastal Tree from Tumbling Tower Wood Blocks

The starfish that I used was in a natural beige color which I didn’t like. I painted it with 2 colors of white paint. Once dry, I painted on clear Modge Podge. While it was still wet I sprinkled on the fine rainbow glitter and set it aside to dry.

I used 4 of the larger wood blocks (glued together with Gorilla Glue) to form the base. I then used Modge Podge (heavy coat of it) and sprinkled on natural beach sand. I left it dry for 2 hours. Once it’s dry use Gorilla Glue to glue the trunk of the tree down onto the base. I had to prop up the tree (near the top) to get everything to lay flat while it was drying. It took about 3 hours.

How to Make a Coastal Tree from Tumbling Tower Wood Blocks

Plug in the glue gun. Start by gluing on the beaded garlands with the knotted ends glue to the back. Start at the bottom and move up toward’s the top as you go. Then add the tree topper. The garlands looked plain so I opted to glue on tiny seashells that look like they’re dangling from it.

For the finishing touches I glued natural colored jute around the tree’s trunk. Then used the hot glue gun to add a mini wrapped present and baby conch shell onto the base. You can add more decorations or less, whatever you prefer.

* This post contains affiliate links. If you make a purchase, we may or may not receive a small commission which helps to support this site. Thank you!

Shelly's Signature

Big Lots After Christmas Holiday Deals

Big Lots After Christmas Holiday Deals

Last week I hit up Big Lots looking for after Christmas holiday deals and found a ton! I was really surprised that they weren’t picked over by now. They had 3 full aisles of Christmas and holiday decor marked down 50-75% off. Hubby and I 

How to Make Gnome Ornaments from Oyster Shells

How to Make Gnome Ornaments from Oyster Shells

Gnomes…they’ve been a HOT decorating craze for the past few years. I’ve seen people decorating every room in their home with gnomes…including their Christmas trees. They’re cute and show off a part of your whimsy side. I can walk in just about any department store 

Get Your Wrapping Paper and Gift Bags Organized with a Storage Container

Get Your Wrapping Paper and Gift Bags Organized with a Storage Container

Wrapping Paper and Gift Bags Organized with a Storage ContainerOne thing I realized during the Christmas season was that I was very unorganized when it came to my wrapping paper, bows, gift bags, ribbons, to and from tags, etc. I wasted a lot of time trying to find things and when I did find them they were often damaged. Everything was a mess and I vowed to get everything organized after the holiday season.

* Post contains affiliate links.

The old way was tossing everything into 3 large plastic tubs (like Rubbermaid storage bins) that had no organization at all. Things were mixed together and a nightmare to find. When it comes to getting organized, you don’t have to spend a fortune…even affordable products will work. Here’s how I got things cleaned up and organized.

Gift Wrapping Paper Storage Organizer Containers

1. Take everything out of those containers and sort items on the top of a large table or the floor. Like items should be sorted together ie. wrapping paper rolls, large gift bags, medium gift bags, small gift bags, cellophane bags, ribbons, to and from tags, gift boxes, etc.

2. Toss out anything that is damaged or items you know you’ll never use. Get rid of them!

3. Secure the items. I placed hair ties around each roll of wrapping paper to keep the roll secure (better than rubberbands which dig into the paper). I placed all of the to and from tags into a gallon size zipper close bag. Gift bags should be sorted and stacked according to size. Go through the gift boxes and make sure that you have a base and a lid for each one. Then flatten them (shirt boxes) paired together. Once flattened…tie a ribbon around the stack to keep them secure.

4. To store the wrapping paper I placed all of the rolls in a container made specifically for wrapping paper rolls. I placed the partially used ones in the front (on top) and the unused/unopened ones on the bottom (the back). You want to use up what’s opened when you start wrapping again the following year.

5. I opted to store the gift bags in a multi-purpose gift wrap and bag organizer. It has 2 pockets for storing bags and then a big area for the rolls with velcro-close straps. However, I use ALL areas to store ALL of the gift bags (no rolls). The one in my photograph is holding 50+ gift bags (of various sizes), 2 bags of bows,  and 2 bags of to and from gift tags. I could stuff a little more in it if I wanted to.

Holiday Christmas Gift Wrap Organizer

6. Label your storage containers and/or bags with what’s inside them. I have one labeled for wrapping paper, one for gift bags, and one labeled for wrapping accessories.

Once everything is sorted and organized you’ll need to store them. I like storage organizers that can fit underneath a bed (like underneath a bed in one of our guest rooms) or in the back of a closet. Storage organizers like the ones that I’m using can go just about anywhere unlike those hard plastic containers which take up too much space.

* This post contains affiliate links. If you make a purchase, we may or may not receive a small commission which helps to support this site. Thank you!
Shelly's Signature

Upcycled Empty Pill Bottle Snowman Ornament

Upcycled Empty Pill Bottle Snowman Ornament

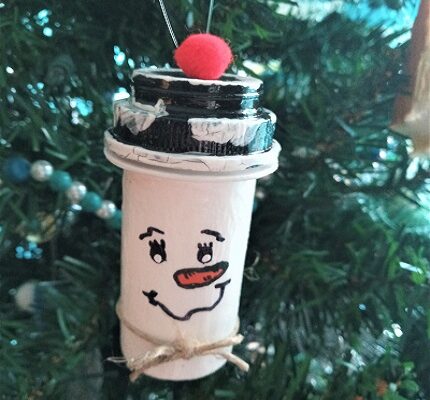
Looking for a way to upcycle all of those empty pill bottles and prescription medication bottles that you get at the pharmacy? If so, we’ve got a cute and easy craft project for you today that utilizes them to make a fun Snowman Christmas Tree 

How to Make a Christmas Ornament Ball Door Wreath

How to Make a Christmas Ornament Ball Door Wreath

Two weeks ago I went into Dollar Tree to pick up supplies to make a holiday door wreath for my daughter. This year she’s decorating in a beautiful pink blush color, champagne, and gold color scheme. I love shopping at the Dollar Tree for affordable