As the holiday season approaches, finding the best Christmas tree store in Los Angeles can transform your home into a luxurious winter wonderland. This guide provides insights into selecting premium holiday decor, ensuring your space exudes elegance and charm. Los Angeles is home to some of the … [Read more...] about The Best Christmas Tree Store in Los Angeles for Luxury Holiday Decor
Christmas
6 Creative Ideas for Memorable Holiday Presents

The holiday season is here, and with it comes the excitement—and stress—of finding the perfect gifts. Thinking about what to give your friends, family, or colleagues can feel overwhelming. There are countless options, and the pressure to choose something meaningful often makes the task daunting. You … [Read more...] about 6 Creative Ideas for Memorable Holiday Presents
Top 4 Outdoor Christmas Lighting Ideas for Your House
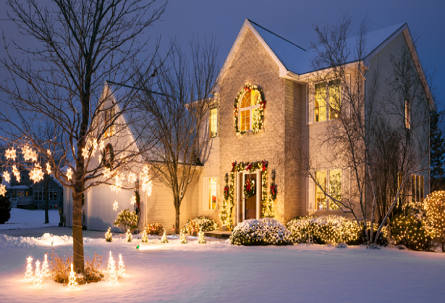
You know that feeling when you're driving home after dark in December and suddenly catch sight of a house that's lit up like pure magic? That's the power of well-executed outdoor Christmas lighting. It turns regular suburban homes into something people actually slow down to admire. If you've been … [Read more...] about Top 4 Outdoor Christmas Lighting Ideas for Your House
Top Fabrics and Styles for Christmas Pyjamas in 2025
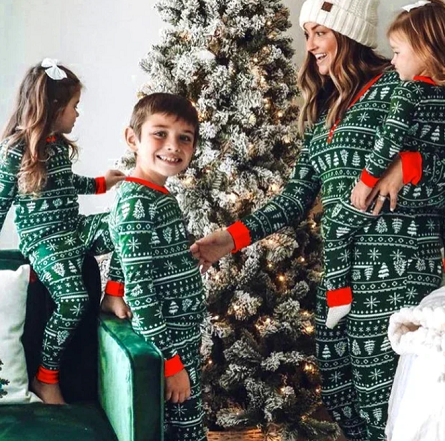
As we wrap ourselves in the enchantment of the festive season, nothing encapsulates the spirit of Christmas quite like the coziest of bedtimes. Our Christmas PJs not only offer warmth but also embody the festive flair and style that many look forward to each December. As we head into 2025, a … [Read more...] about Top Fabrics and Styles for Christmas Pyjamas in 2025
Merry Christmas and Happy Holidays 2024

We wanted to take the time to wish all of our readers a Merry Christmas and Happy Holiday! Please remember the real reason for the season. We hope you take time today to reflect on Christmas. Reach out to family and friends to tell them that you love them. Every day we have on Earth and every day we … [Read more...] about Merry Christmas and Happy Holidays 2024
Family Traditions on Christmas Eve

We're a family that's big on family traditions...especially during the holiday season. The day before Christmas aka Christmas Eve the girls get together to help one another finish wrapping gifts and baking desserts for our holiday meal. During that time the guys in the family host a game day with … [Read more...] about Family Traditions on Christmas Eve
Hand Painted Gingerbread House Clam Shells Seashells

Decorate your home for the holidays in a Gingerbread House theme? Just love the cuteness of gingerbread? If so, check out these easy-to-make Gingerbread House painted clam shells! You can use these painted seashells as Christmas decor accents, as table settings, Christmas tree ornaments and all … [Read more...] about Hand Painted Gingerbread House Clam Shells Seashells
Easy Painted Christmas Themed Clam Shells Seashells

Looking for a few last-minute homemade gifts to make this holiday season? If so, these hand-painted Christmas themed clam shells take only 1 day to make. You don't need any artistic skills to make them! A great project for older children, adults and seniors to make. They can be used as home decor … [Read more...] about Easy Painted Christmas Themed Clam Shells Seashells