Tag: arts and crafts

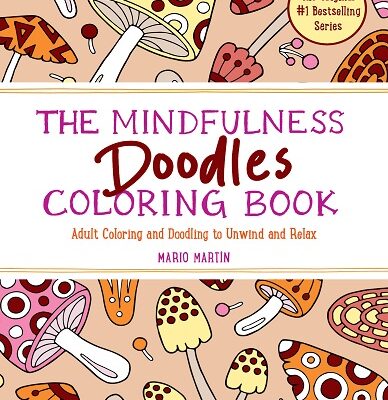
The Mindfulness Doodles Coloring Book

The Mindfulness Doodles Coloring Book

The bestselling Mindfulness Coloring series books are the perfect size to slip into any handbag, briefcase, backpack or travel bag. They’re compact in size, so all you need to go along with it is a pack of colored pencils or gel ink pens. There are 

The Art of Saying Goodbye: Creative Ways to Celebrate Life’s Precious Moments

The Art of Saying Goodbye: Creative Ways to Celebrate Life’s Precious Moments

Saying goodbye to a loved one is a deeply personal experience, one that reflects the unique life and memories shared. The way we choose to honor and remember those who have passed plays a crucial role in the healing process. Personalized memorials offer a special 

Hand Painted Southwest Cactus Desert Scene Seashells

Hand Painted Southwest Cactus Desert Scene Seashells

Hand Painted Southwest Cactus Desert Scene SeashellsThese southwest cactus desert scene painted seashells are so pretty! The best thing about them is that the design is easy-to-make and you don’t have to be a professional artist to make them. That’s right…this design is for any skill level and for older kids ages 10 up to senior-aged adults. The design depicts a Saguaro cactus during a colorful sunset.

* Post may contain affiliate links.

We painted the design onto 4″ and 5″ wide clam shells that we collected from the beach. Wash them in warm, soapy water with Dawn Liquid Dish Soap. Why Dawn? It’s the best for removing sand and fishy odors. Rinse with clean water. Air dry for 2-3 days (quicker if you air dry outside in the sunshine during a warm day).

The background was made using a combination of acrylic paint colors: yellow, orange, and dark red. Squirt 2 drops of yellow at the bottom edge of the shell, then 2 squirts of orange in the middle and 2 quirts of dark red at the top. Starting at the top of the shell and with the dark red color…swiril the orange and red together. You want a gradient…dark red, dark orange, medium orange and then orange yellow at the bottom. You mix and swirl the colors together while wet until you get a pattern that you like. Let dry for 60-90 minutes or until the paint is no longer tacky.

Next is making the cactus. Use black acrylic craft paint and the paint brush to make a small section of the desert floor (ground) at the bottom of the shell. Then make a verticle line about the width of a popsicle stick (depending on the size of the clam shell). Now you want to add the arms to the cactus. I found that less is best. In other words, don’t over-load the cactus with arms. They shouldn’t all be the same size…so vary that to make it look more realistic.

Optional: You can add a moon up in the sky or make them without it. My photograph shows it both ways to give you an idea on how it may look. Let dry.

Time to seal the paint. I like using Modge Podge Clear Sealer and a foam brush. I brush 2 coats of Modge Podge over the entire front of the shell (the painted side). Let dry. Flip the seashell over and add 1 coat to the unpainted side to just help preserve and strengthen the clam shell. Let dry.

These gorgeous painted seashells can be displayed inside or outside of the home. They look gorgeous outside in your flower beds, garden, displayed on a front porch, back deck or around a swimming pool.

* This post contains affiliate links. If you make a purchase, we may or may not receive a small commission which helps to support this site. Thank you!

Shelly's Signature

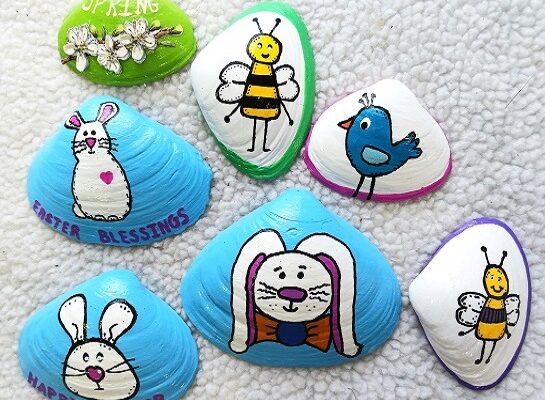
Easter Bunny and Spring Season Designs Painted Clam Shells Seashells

Easter Bunny and Spring Season Designs Painted Clam Shells Seashells

These adorable Easter Bunny painted clam shells are perfect to add to the little one’s Easter baskets this year. They’re also fun additions to add to your inside or outside Easter decor. You can paint several of them in one weekend and you don’t have 

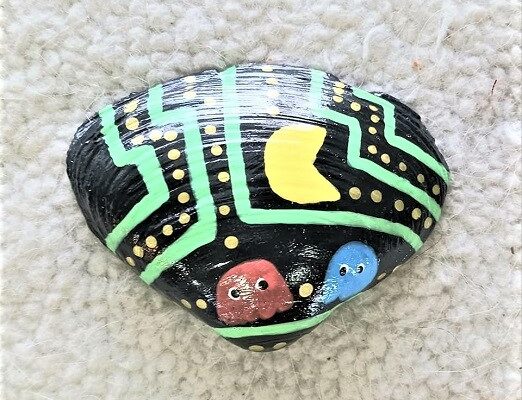
Hand Painted Pac Man Game Themed Seashell Designs

Hand Painted Pac Man Game Themed Seashell Designs

When I was a teenager Pac Man was the HOTTEST game to play. I admit, I enjoyed playing it too. Even at the age of 55…I still enjoy sitting down to play a few games of Pac Mac. It’s a classic and even my grandchildren 

3 Easy Hand Painted Clam Shell Designs

3 Easy Hand Painted Clam Shell Designs

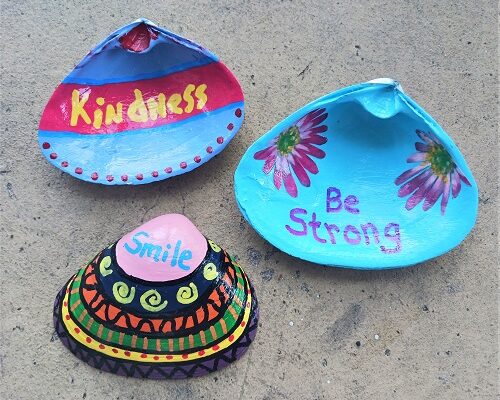
3 Easy Hand Painted Clam Shell DesignsOver the past 12 years I’ve posted 150+ painted seashell designs on the Two Classy Chics blog. You can find designs that are seasonal, holiday related, animals, flowers, or designs that are just colorful and fun! With that said, I’m often asked about EASY designs that any skill level could do. Well, today…I’ve got 3 designs that are easy to make. You can make them in any color combination that you like.

* Post contains affiliate links.

You’ll need clean clam shells that measure 3″ to 5″ in width. We collected them from the beach and washed them in warm, soapy water using Dawn Liquid Dish Soap. Rinse with clean water and air dry for 1-2 days. They need to be clean and dry before painting on them.

Star off by base coating the seashell in your desired color. You can do the entire shell in that color or split it into two. Think about the color scheme that you want to use and colors that work well together. These designs are simple because all you’re doing is making dots and circles. That’s right…dots and circles!

We used acrylic craft paint and a paint brush to make the circles but used a black acrylic paint pen to outline those circles and to make the polka dots. Using a paint pen gives you better control and the best thing for outlining or writing wordage. You can follow the patterns in my photograph or come up with your own.

Tips – Limit the color choices that you’re using on one shell. Make sure those 2-3 colors work well together. Let the base coat thoroughly dry before decorating it with circles and dots. You can make all of your circles the same size or vary them but don’t use too many different sized circles at one time. You want a cohesive look. Don’t be afraid to mix 2-3 colors together and swirl them around on the shell to come up with your own unique color pattern when base coating. The purple shell has swirls of pink within it.

Once the seashells are completely dry you need to seal them using Modge Podge Clear Sealer and a foam brush. I like to give them 2 light coats of Modge Podge to seal the painted design. You’ll need to allow 30-45 minutes between the 2 coats. If you’re going to be displaying them outside…I recommend sealing the unpainted side too…so that you’re protecting the seashell 360 degrees around.

* This post contains affiliate links. If you make a purchase, we may or may not receive a small commission which helps to support this site. Thank you!

Shelly's Signature

Painting Kindness Rocks and Seashells

Painting Kindness Rocks and Seashells

Painting kindess rocks and seashells is a fun hobby to get into. It doesn’t cost a lot of money and allows you to explore your creativity. What is it exactly? Well, I’m going to tell you! Love to paint on shells? You’ll find 100+ painted 

Bunny Rabbit and Panda Bear Painted Clam Shell Seashell Designs

Bunny Rabbit and Panda Bear Painted Clam Shell Seashell Designs

Check out these adorable Bunny Rabbit and Panda Bear painted seashell designs! They were made using a large 4″ wide clam shell and a few other supplies. They’re easy to make and you can make several in just one afternoon. A Great craft project for