Often times when we’re walking the beach we find broken seashells. The majority of people who collect shells are looking for ones in perfect condition. While perfect is great….broken shells are great too! Instead of letting they lay on the beach pick them up and get creative with them! Broken shells aren’t just for your landscaping projects but for your art and craft projects too!
** This post contains affiliate links.
When it comes to collecting broken shells I look for large Atlantic Clam Shells and Whelk Shells. I bring them home and give them a good cleaning in hot soapy water using Dawn Powerwash Dish Soap Spray. Why Dawn? I feel it does the best job at removing sand, debris and fishy odors. Rinse with clean water. Lay them out to air dry overnight.
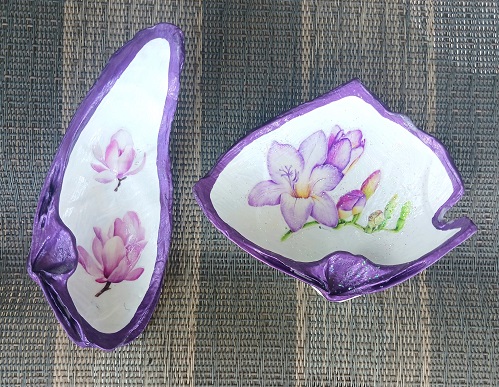
Look at my photograph which depicts two broken clam shells. Hard to tell that they’re imperfect shells. Base coat all of your seashells in your desired color of paint. I like to base coat all of them with 2 coats of white acrylic craft paint allowing for 45 minutes of drying time between coats.
Next…you can paint any design that you would like using paint and a brush, Betem Acrylic Paint Markers or you can use inexpensive rub-on craft transfers like the ones that I used to decorate these two shells. I purchased the paint markers and rub-on transfers from Amazon for an affordable price. To disguise the broken edges of the shell I like to trim them out in a paint color. You can use whatever color that coordinates with your design. Let dry.
You need to seal the artwork by brushing on 1-2 light coats of Clear Mod Podge Sealer. It goes on white but will dry crystal clear. If you don’t want brush marks…use a foam brush instead of a bristle paint brush. Let them dry overnight.
I personally think they turned out beautifully and they certainly don’t look broken now. You probably wouldn’t notice if it wasn’t the FACT that I pointed it out in my post. So shell collectors…pick up those broken seashells too!