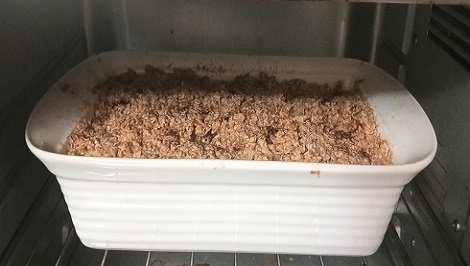
Last month we were without a stove and oven for 4 days while we waited for our new range to arrive. Over the course of those 4 days I had to cook and bake using our toaster oven and microwave. Don't get me wrong, I use them but they're NOT the main ways we cook and reheat food in our home. I had to … [Read more...] about Apple Crisp Made in a Toaster Oven
Recipes
Homemade Hot Chocolate Recipe

The temperatures are dropping and the chill is in the air. During the fall and winter season I enjoy drinking homemade hot chocolate, especially toward's the end of my day. I'll drink it plain but I really enjoy experimenting by adding goodies to it such as: peppermint sticks, redhot candies, mini … [Read more...] about Homemade Hot Chocolate Recipe
Stonewall Kitchen Farmhouse Pancake & Waffle Mix
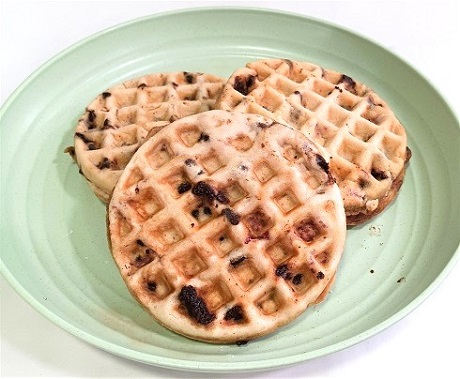
One of my pantry staples is a big container of Stonewall Kitchen Farmhouse Pancake & Waffle Mix. It's one of the best pre-packaged pancake and waffle mixes that I've ever tried. It was 5-6 years ago when I was gifted a large canister of it and since then we've been using it. It's a basic mix but … [Read more...] about Stonewall Kitchen Farmhouse Pancake & Waffle Mix
The Classic Gin and Tonic Cocktail Recipe

A Gin and Tonic is one of the easiest cocktails you can make. Not only is it easy-to-make...it's popular, especially among my friends and family. Have you ever wondered how to make one at home? If so, here's the recipe that you'll need. This cocktail recipe requires no cocktail shaker or fancy … [Read more...] about The Classic Gin and Tonic Cocktail Recipe
Make Your Own Peach Iced Tea at Home with Adagio Teas
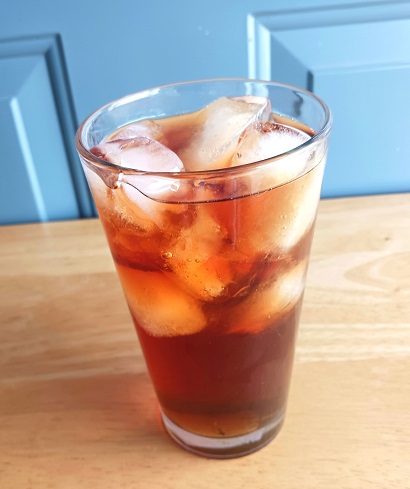
Iced tea is one of the preferred beverages in our home. We primarily drink sweet tea but also enjoy some of the fruit flavored iced teas too. With that said, We’ve tried many brew-at-home brands over the years and never found one that we liked. Well, until now. Let me introduce you to the Peach … [Read more...] about Make Your Own Peach Iced Tea at Home with Adagio Teas
Moist Double Chocolate Chip Cookies Recipe

Holiday cookie baking is getting into full swing in my family. Every holiday season we'll bake a dozen different type's of cookies. We get together 3-4 times throughout the month to bake together as a family. This makes it much easier on all of us to get it done! These double chocolate chip cookies … [Read more...] about Moist Double Chocolate Chip Cookies Recipe
Homemade BBQ Sauce Recipe for Ribs

Every month we enjoy cooking a rack of ribs for dinner. It's one of our favorite meals to enjoy. When we make ribs we use a homemade bbq sauce that we personally make. You'll need some basic ingredients along with your blender. Once you have the sauce made...marinate the ribs in the sauce for at … [Read more...] about Homemade BBQ Sauce Recipe for Ribs
Roasted Whole Chicken with Carrots and Potatoes
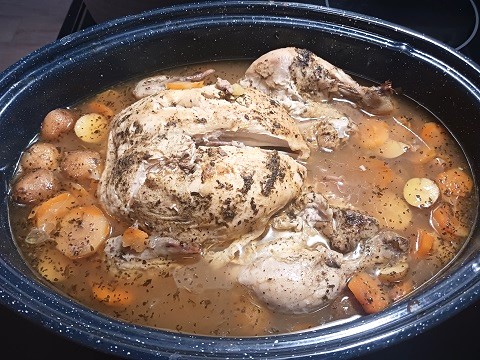
Our local grocery store had whole chickens on sale, so I picked up 3 to add to our freezer. I always stock-up on meat, fish and poultry when it's on sale. The best time for me to roast an entire chicken is during the weekend. I like to slow cook it in the oven over several hours to give it the best … [Read more...] about Roasted Whole Chicken with Carrots and Potatoes