
Handmade refrigerator magnets are a great way to decorate the front of your refrigerator for the holiday season. They're a "respin" on the traditional Applesauce Cinnamon Dough Christmas Ornaments that many of you are already familiar with. A few days ago I posted instructions on how to make … [Read more...] about Handmade Painted Cinnamon Applesauce Refrigerator Magnets
kid's crafts
Puzzle Pieces Christmas Refrigerator Magnets

Last weekend the grandchildren came over for a Crafting with Nanny play date. We sat down and decided to make these adorable Christmas refrigerator magnets from upcycled puzzle pieces! Don't throw those old puzzles out, they can be used in all kinds of different craft projects like this one! These … [Read more...] about Puzzle Pieces Christmas Refrigerator Magnets
A Very Special Gift Love Poem Paper Craft Project

Every year the women at my church get together to make hundreds of the A Very Special Gift Love Poems that we print out on cardstock and then decorate with a little paper gift package. Many of us then use them as inserts in greeting cards that we send throughout the year. Appropriate to send out or … [Read more...] about A Very Special Gift Love Poem Paper Craft Project
Puzzle Pieces Halloween Refrigerator Magnets
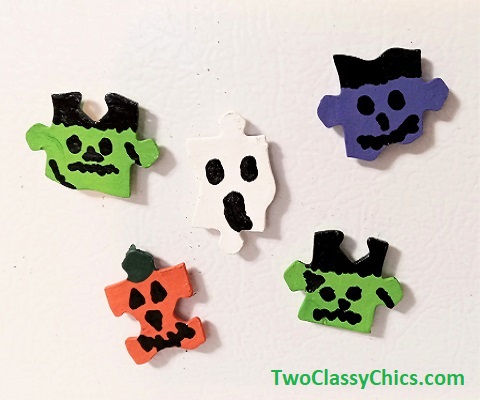
Halloween is just around the corner and these puzzle pieces refrigerator magnets are super easy-to-make! We made them with a group of kids ages 6 to 13 years of age. All you need are old cardboard puzzle pieces, painting supplies, and a few other things. Puzzle Pieces Halloween Refrigerator … [Read more...] about Puzzle Pieces Halloween Refrigerator Magnets
How to Make Paper Clip Angel Ornaments

My family has been making Paperclip Angel Ornaments for decades! They're easy-to-make and you only need 3 items to make each one! The project is simple enough for kids to do and you can make dozens of them in just one afternoon! Use them as Christmas ornaments, package tie-ons, place in greeting … [Read more...] about How to Make Paper Clip Angel Ornaments
Painted Mouse, Turtle, and Hedgehog Walnut Shells Kid’s Craft Project
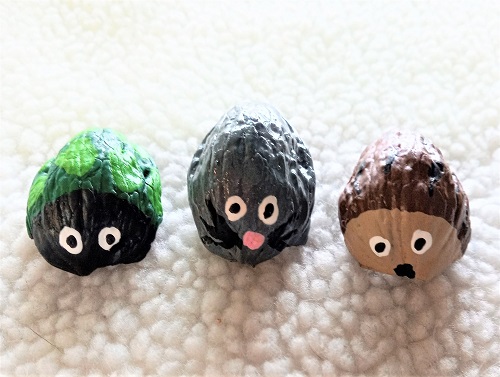
These hand painted Mouse, Turtle, and Hedgehog are so cute! This kid's craft project is inexpensive and easy to do. All you need are acrylic craft paints, paint brushes, halved walnut shells, and clear acrylic spray sealer. Don't let those walnut shells hit the trash...let the kids use them in a … [Read more...] about Painted Mouse, Turtle, and Hedgehog Walnut Shells Kid’s Craft Project
Peppa Pig Foam Refrigerator Magnets Kid’s Craft Project
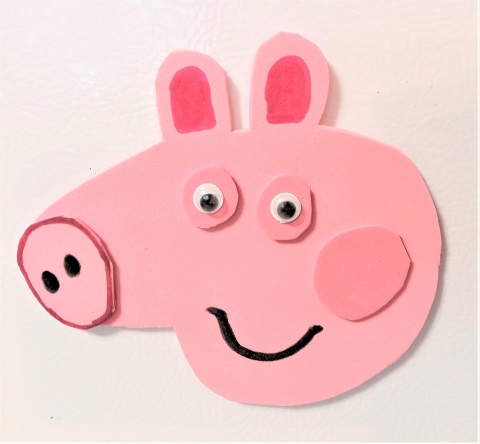
Do your kids or grandchildren love Peppa Pig? Looking for a quick and easy craft project to do with the kids? If so, this Peppa Pig refrigerator magnet is made out of craft foam and is super easy to make! You'll only need a few craft supplies to make it. Peppa Pig Foam Refrigerator Magnets Kid's … [Read more...] about Peppa Pig Foam Refrigerator Magnets Kid’s Craft Project
Summer Craft Project – Hand Painted Seashells

Over the years we've shared hundreds of different seashell craft projects on the TwoClassyChics blog. Those posts are some of our most favorited posts on the blog! Today we're back again with 3 more hand painted designs that are perfect for summer decorating. The hand-painted dolphin, sun, and … [Read more...] about Summer Craft Project – Hand Painted Seashells