Tag: kid’s crafts

Lady Bugs and Bumble Bees Painted Walnut Shells Kid’s Crafts

Lady Bugs and Bumble Bees Painted Walnut Shells Kid’s Crafts

These hand painted lady bugs and bumble bees are the perfect craft to make with young children. Acrylic craft paint, paint brushes, and halved walnut shells are all you need to make them. You can make several of them in just one afternoon! A group 

Snowman Refrigerator Magnets Made with Tumbling Tower Blocks

Snowman Refrigerator Magnets Made with Tumbling Tower Blocks

Tumbling Tower wood blocks are from a game that is sold by Dollar Tree. You can find them in the kid’s toys aisle. Our local DT store sells out of them often…so at those times I have to purchase them from Amazon. If you want 

Kid’s Craft Project – Painted Elf Seashell Christmas Tree Ornament

Kid’s Craft Project – Painted Elf Seashell Christmas Tree Ornament

Kid's Craft Project - Painted Elf Seashell Christmas Tree OrnamentLooking for a fun Christmas craft project to make with the kids? These painted elf seashell Christmas tree ornaments only cost pennies to make! You don’t have to be an expert artist to make them. We made them with a group of children 7-13 years of age. The one shown in the photo was made by a 12 year old.

You’ll need spiral shaped seashells, acrylic craft paints, paint brushes, paper towels, water dishes, clear fishing line, clear paint with micro-fine glitter, clear fishing line, glue, and scissors. Oh yeah, I recommend laying down a few sheets of aluminum foil to use as a non-stick surface while the ornaments are drying.

Paint all of the spirals with 2 coats of red acrylic craft paint. The larger spiral at the bottom of the shell gets painted with 2 coats of white paint. Let them dry on the sheet of aluminum foil for about an hour.

We found a bottle of clear acrylic paint at the craft store that contains micro-fine silver glitter. Once the red paint was dry we went back over with the clear glitter paint to add a little pizzazz to the elf’s hat. The facial features were kept simple since we were working with kids. You can use paint pens or acrylic craft paint to add the facial features (see photograph for placement). Let dry.

Once they’re all dry they need to be taken outside and sprayed with 1-2 coats of clear acrylic spray sealer, allowing for 30 minutes of drying time between coats. This will protect the painted finish from chipping, cracking, or the color from fading. Let dry until no longer tacky.

To finish up you need to cut a 6″ long piece of clear fishing line. Knot the two ends together to form a hanging loop. Glue to the top of the hat and let dry. That’s it, they’re done!

Use the Painted Elf Seashell Ornaments to hang on a Christmas Tree, as Package Toppers, tied onto holiday gift pags, hanging off a peg shelf, etc. The kids really enjoyed making them!

* This post contains affiliate links. If you make a purchase, we may or may not receive a small commission which helps to support this site. Thank you!

Shelly's Signature

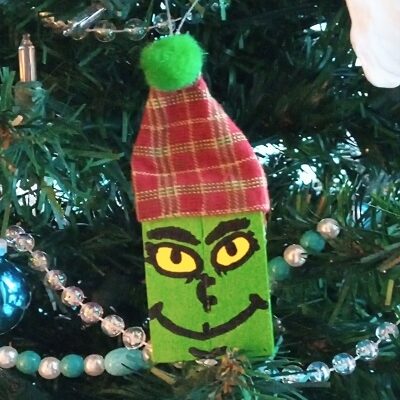
Grinch Christmas Tree Ornaments Made with Tumbling Tower Blocks

Grinch Christmas Tree Ornaments Made with Tumbling Tower Blocks

Tumbling Tower Blocks are wood game blocks that you can buy at Dollar Tree for $1.25 per box. They’re smaller in size compared to the name brand Jenga Blocks and you get 77 mini blocks in the package. The Tumbling Tower Blocks are all the 

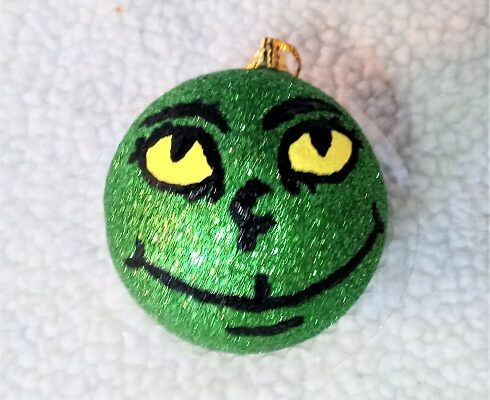
Quick and Easy Grinch Christmas Tree Ornaments Kid’s Craft Project

Quick and Easy Grinch Christmas Tree Ornaments Kid’s Craft Project

Last weekend we made these Grinch themed Christmas tree ornaments with the grandkids and they turned out adorable. You can make several of them in just one afternoon and guess what? They’re affordable to make! The ones shown in my photos were made by a 

Pine Cone Christmas Trees Preschool Kid’s Craft Project

Pine Cone Christmas Trees Preschool Kid’s Craft Project

These adorable Pine Cone Christmas Trees are the perfect craft project for little kids ages 3-8 years of age. One of the best things about it is that each one only costs a few pennies to make and can be completed in just 1-2 hours depending on paint drying time.

* This post may contain affiliate links.

Go outside for a nature walk to collect small pine cones. Each one needs to be the diameter (at the base) to fit inside a soda bottle or water bottle cap. We used soda bottle caps from 1 and 2 liter bottles in our project.

Pine Cone Christmas Trees Preschool Kid's Craft Project

Preschool Craft Project – Pine Cone Christmas Trees

Natural Pine Cones (small size)
Sequins in Different Colors
Soda Bottle or Water Bottle Plastic Cap
Quick-Drying All Purpose Craft Glue
Green and Brown Acrylic Craft Paint
Paint Brush, Water Dish, Paper Towels

Tips: Kids can be messy painters so I recommend protecting your work surface with an old plastic table cloth, drop cloth, plastic placemats, sheet of waxed paper or aluminum foil. They should wear an old t-shirt or crafting apron when working on  this project. Keep a pack of moist hand wipes nearby for quick clean-ups.

Start by painting the plastic soda bottle cap a dark brown. Depending on the color of the cap you may need to use 2 coats of paint to get good coverage. Only the outside of the cap needs to be painted.

Paint the pine cones a dark green color. Make sure to get the entire outside of the cone along with a little bit of the inside. You want very little of the natural brown color to show. You may need 2 coats of paint to get the desired coverage. Let dry for about 35-45 minutes or until paint is no longer tacky.

Use all-purpose craft glue to add the colorful sequins. Kids can choose their own colors and add as many as they would like. This will represent ornaments or lights on the tree. Suggest that they top the tree with a yellow sequin to represent a star at the top. You only need a tiny dab of glue for each one.

Squirt a generous amount of glue inside the painted bottle cap. Push the plump end of the pine cone down into the cap as shown in the photograph. Straighten up the tree and let dry for 3-4 hours.

Variations:  If you don’t want to use sequins you can use colorful beads, rhinestones, mini pom-poms, charms, etc. to decorate the trees. Have the child sign their name and date on the bottom of the bottle cap with a Sharpie Marker to preserve the memory.

* This post contains affiliate links. If you make a purchase, we may or may not receive a small commission which helps to support this site. Thank you!

Shelly's Signature

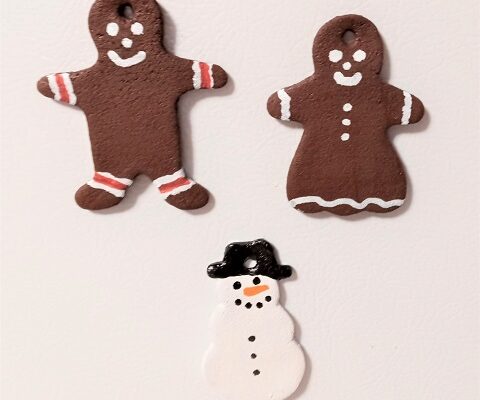
Handmade Painted Cinnamon Applesauce Refrigerator Magnets

Handmade Painted Cinnamon Applesauce Refrigerator Magnets

Handmade refrigerator magnets are a great way to decorate the front of your refrigerator for the holiday season. They’re a “respin” on the traditional Applesauce Cinnamon Dough Christmas Ornaments that many of you are already familiar with. A few days ago I posted instructions on 

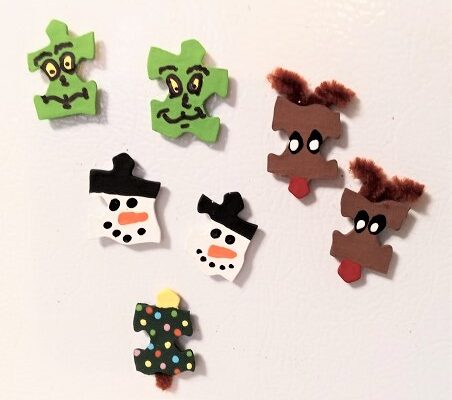
Puzzle Pieces Christmas Refrigerator Magnets

Puzzle Pieces Christmas Refrigerator Magnets

Last weekend the grandchildren came over for a Crafting with Nanny play date. We sat down and decided to make these adorable Christmas refrigerator magnets from upcycled puzzle pieces! Don’t throw those old puzzles out, they can be used in all kinds of different craft