Tag: kid’s crafts

Hand Painted Teddy Bear Desgin Seashells Kid’s Craft Project

Hand Painted Teddy Bear Desgin Seashells Kid’s Craft Project

Kids love to dabble in arts & crafts and this hand-painted Teddy Bear seashell is an easy project for them to complete. You’ll only need a few basic painting supplies along with a large 4″ to 5″ wide clam seashell that we collected from the 

Kid’s Crafts – Faux Stained Glass Suncatchers

Kid’s Crafts – Faux Stained Glass Suncatchers

A few weeks ago I was in Dollar Tree and purchased a few packages of the plastic suncatchers that you can find in their arts and crafts aisle. They come in various designs and are made out of a clear plastic material. Depending on the 

How to Make Colorful Sidewalk Chalk

How to Make Colorful Sidewalk Chalk

My kids enjoy playing outside and will often create artwork, holiday messages, and make a hopscotch on our front sidewalk using homemade sidewalk chalk. Making your own sidewalk chalk is easy and you can make only the colors that you need. Once it’s mixed up it will take 1-3 days for the chalk to dry in the silicone molds before you can pop them out and use them.

Adults should be the ones making the chalk but you can do this project with older children that you supervise closely. Plaster of Paris can be dangerous if ingested, so I don’t recommend this project for the little ones. I picked up the Plaster of Paris from my local craft supply store along with silicone soap molds. The Tempra Paint, box of popsicle sticks and zipper closure bags I picked up from our local Dollar Tree store.

How to Make Colorful Sidewalk Chalk

How to Make Colorful Sidewalk Chalk

Plaster of Paris
Water
Temepra Paint
Wood Popsicle Sticks or Craft Sticks
Zipper Closure Quart or Gallon Size Bags
Silicone Ice Cube, Chocolate Candy Molds or Soap Molds
Measuring Cup
Measuring Spoons
Scissors

Place 3 cups of Plaster of Paris into a zipper closure bag. Measure out 1 1/2 cups of water using a measuring cup and pour it into the bag. Hold the bag in an upright position and use a popsicle stick to stir everything together. Add 3-4 teaspoons of Temepra Paint. If you want a darker, more vivid color you may need to add more Tempra paint. I find that 3-4 teaspoons works well. Stir up the mixture again. Zip the bag close. Shake things around to make sure everything is mixed well.

Use scissors to cut the corner off of the bag and pipe the solution into your silicone molds. You can fill them so that it’s even with the top of each cavity in the mold. Continue until it’s all used up. Toss bag into the trash. Don’t pour any Plaster of Paris mixture down your drains as it can clog up your pipes. Wipe up any messes with a damp rag and then toss away in the trash.

Repeat the process to make different colors. Lay the molds on a flat surface out of the reach from children and pets. It will take a few days for it to dry. You’ll know it’s done curing because it will look lighter in color and be dry. Once it’s ready…pop out of the silicone molds. Store all sidewalk chalk in an airtight container or zipper closure bag.

When children are using sidewalk chalk they need to be supervised by an adult. Ingestion can be very harmful, so please keep an eye on children who are using it.

Additional Tips: This can be a messy project. Wear an old t-shirt or craft apron. Clean up drips and spills immediately as you go. If you want them to dry faster…have a household fan blow air on them or take them outside to a safe location to dry out in the sunlight and warm air. Toss all disposeable products into a trash bag and dispose of quickly. Don’t pour any Plaster of Paris down your drains. If needed, take things outside and clean-up with a garden hose.

* This post contains affiliate links. If you make a purchase, we may or may not receive a small commission which helps to support this site. Thank you!

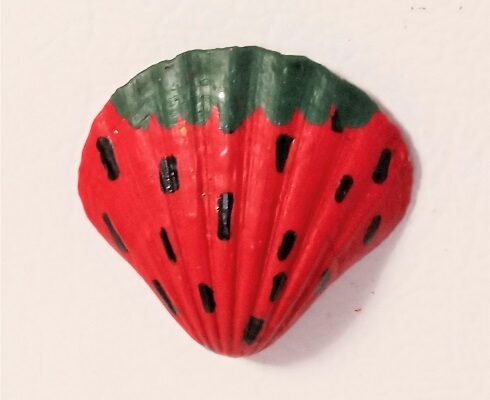
Hand Painted Strawberry Seashell Refrigerator Magnets

Hand Painted Strawberry Seashell Refrigerator Magnets

These strawberry refrigerator magnets are super cute and made with a scallop seashell. You’ll need just a few basic craft supplies to make them. A great project for older kids and adults. Once completed you can place them on a metal file cabinet, school or 

Scrap Wood Painted Easter Bunny Shelf Sitter

Scrap Wood Painted Easter Bunny Shelf Sitter

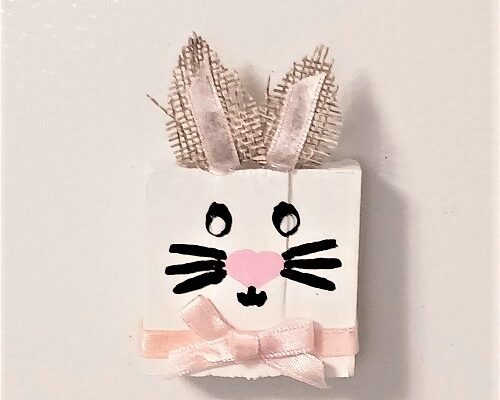
This hand painted Easter Bunny shelf sitter is easy-to-make! We made them with a group of 13 year old Girl Scouts using inexpensive art and craft supplies. My husband cut all of the wood blocks ahead of time from his scrap wood pile. They can 

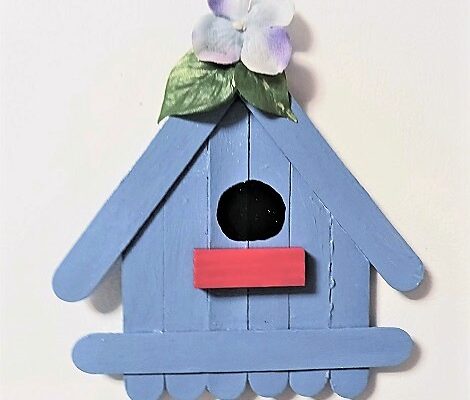
Craft Stick Spring Bird House Refrigerator Magnet for Kids

Craft Stick Spring Bird House Refrigerator Magnet for Kids

In honor of the first official day of Spring we have a great Kid’s craft project to share with you today. This project will cost less than $1.00 to make. It’s made with basic craft supplies and they can be decorated any way that the child likes. Keep them simple (as shown) or let them get fancy.

* This post contains Amazon affiliate links.

If you’re working with young kids I recommend having an adult cut and preassemble the birdhouse first. Then just let the little ones paint and decorate it. If you’re working with older kids (like 10 years of age and up) they can cut and assemble it with adult supervision. Best time saver – You can use colored wood craft sticks and skip most of the painting!

Craft Stick Spring Bird House Refrigerator Magnet for Kids

Craft Stick Spring Bird House Refrigerator Magnet

11 Wood Craft Sticks
1 Mini Tumbling Tower Wood Game Block
Acrylic Craft Paints
Paint Brush, Water Dish, Paper Towels
Hot Glue Gun and Glue Sticks
Artificial Flowers with Green Leaves
3 Round Craft Magnet Disks
Sharp Scissors
* Optional – Modge Podge

Cut 2 of the wood craft sticks in half. Those pieces will be used as the base of the birdhouse that you can’t see. Lay the 4 halves down onto the table horizontally. Use a hot glue gun to glue the 6 full size sticks vertically onto them to form the BODY of the house. Glue one full siize stick across the bottom as shown in the photograph. Glue 2 sticks diagonally to form the roof.

Use acrylic craft paints to paint it in the color that you like. We used a country blue. While the paint is drying you need to paint 5 sides of the Tumbling Tower Wood Game Block. We painted it in red. Once it is dry glue it onto the house with the unpainted side facing down.

You need to add the faux opening to the house by painting a black circle right above the ledge. While that’s drying glue an artificial flower and a few artificial green leaves to the top of the roof. We kept it simple and clean looking. Once everything is dry…flip it over and glue 3 round craft magnet disks onto the back.

Optional: If you want to protect the paint and give it a glossy looking appearance brush a thin coat of Modge Podge over all of the painted areas. Let dry for 1-2 hours.

* This post contains affiliate links. If you make a purchase, we may or may not receive a small commission which helps to support this site. Thank you!

Shelly's Signature

Dollar Tree Tumbling Tower Blocks Easter Bunny Refrigerator Magnet

Dollar Tree Tumbling Tower Blocks Easter Bunny Refrigerator Magnet

These Easter Bunny refrigerator magnets are made with almost all supplies purchased at the Dollar Tree. The one shown in my photograph was made by my 13 year old granddaughter who did a great job! You can make several of them in one weekend. Below 

Organize Kid’s Nerf Toys with Plastic Laundry Pod Containers

Organize Kid’s Nerf Toys with Plastic Laundry Pod Containers

My 7 year old son has a ton of Nerf guns, footballs, and other toys. The Nerf guns shoot foam bullets or darts. Those pieces get all over my house and backyard. He’s always losing them and I’m always the one finding them and picking