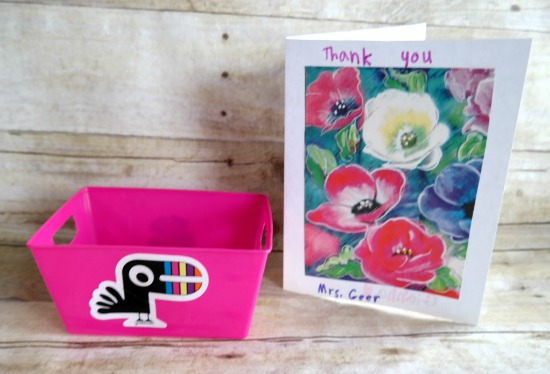
Tag: kid’s crafts

Kids Crafts: Valentine’s Day Keepsake Card Box

Kids Crafts: Valentine’s Day Keepsake Card Box

Today is February 6th and Valentine’s Day is just about a week away. This coming week the Princess has a Valentine’s Day party at school and one at Girl Scout’s to attend. One of the things she needed was a card collection box, so we 

Craft Project – Clothespin Snowflake Christmas Tree Ornaments

Craft Project – Clothespin Snowflake Christmas Tree Ornaments

For the past few months I’ve been featuring various craft projects on the blog that you can do with the kids. This one is one you can do with older kids, but you will need to supervise them while they are making them. In addition, 

Craft Project – Popsicle Stick Sled Christmas Tree Ornaments

Craft Project – Popsicle Stick Sled Christmas Tree Ornaments

Popsicle Stick Sled Christmas OrnamentI’ve got another great Christmas craft project for all of you today. This project can be made with older children with the help from an adult since cutting is involved. It’s a frugal project and you can make several of these adorable little popsicle stick sleds up in one afternoon. Use them as Christmas tree ornaments or as package toppers. As you can see by the date on this one, we’ve been making them for years!

Popsicle Stick Sled Christmas Tree Ornaments


6 wooden popsicle sticks
acrylic paints and paint brush
wood glue
scissors
razor blade knife
embroidery floss
small diameter drill bit & drill
newspaper
water dish & paper towels

Popsicle Stick Sled Christmas Ornament

You will need 2 completely un-cut popsicle sticks for the side runners of the sled. For the top portion of the sled you will need to cut off 1/3 of two sticks for the outer wood pieces and cut them off at an angle/slant. The center stick of the sled is another popsicle stick that hasn’t been cut. The “foot rest” area of the sled is a stick that has it’s ends cut off and each end is cut into a point. From point to point this piece measures 3″ long. You will need two scrap pieces of sticks that each measure 1″ long to use as supports underneath the sled.

Once all of your pieces have been cut out (refer to the photos in this post) let the kids paint all of the sides in their choice of color. In this case, all of our pieces were painted a dark barn red color. Let them dry thoroughly.

Now it’s time to assemble your sled. Lay one stick down onto the table and place one of the angled sticks on each side. You are building the seat of the sled. The ends of the stick should line up evenly along the back-end. Using glue, add the two 1″ support sticks underneath by placing one in the middle and one towards the back. These support sticks just hold the top 3 sticks together to form the seat. Take the two un-cut full-size popsicle sticks and glue them on each side of the sled to form the runners. Let dry.

* This post contains affiliate links. If you make a purchase, we may or may not receive a small commission which helps to support this site. Thank you!

While everything is drying…you’ll need to drill or poke a tiny hole in each end of the foot rest piece (stick) because these holes will be used to threat the embroidery floss through for hanging of the ornament. Glue the foot rest onto the center popsicle stick that makes up the seat/base of your sled (see photo for placement). Once it has dried…thread through some matching colored embroidery floss to serve as the ornament hanger.

Sorry if my directions sound a little confusing but use the photos as a guide for assembling your pieces. It’s really quite simple when you sit down to make them! You can write names, dates, places or decorate your little sleds any way that you would like! Enjoy!

Shelly's Signature

Kid’s Craft Project – Penguin Craft Stick Christmas Tree Ornaments

Kid’s Craft Project – Penguin Craft Stick Christmas Tree Ornaments

Today’s Crafting with Kids craft project is one that has been around for many years! I remember making these with my daughter and now I’m making them again with my 6 1/2 year old grand daughter. These craft stick ornaments only take a handful of 

Kid’s Craft Project Snowman Snowball Holiday Ornaments

Kid’s Craft Project Snowman Snowball Holiday Ornaments

It’s time for another Crafting with Kids feature here on the TwoClassyChics blog. I hope you all have been enjoying these regular features because I’ve got many more coming your way! Today’s project is a quick and easy one that you can make with the 

Kid’s Crafts Airplane Christmas Tree Ornaments

Kid’s Crafts Airplane Christmas Tree Ornaments

When the kids are cooped up during the cold winter season it’s important to keep them busy. One way we like to keep the Princess busy is by regularly holding arts & crafts play dates. These “dates” don’t have to be an all day long thing…matter of fact, I recommend keeping them 90 minutes or less so that they hold their attention.

On one recent arts & crafts play date she made these adorable wooden clothespin airplanes. It took her less than 90 minutes to make two of them and here is how she did it.

Kids Crafts Clothespin Airplanes

Kid’s Crafts: Wooden Clothespin Airplanes

Wooden Clothespin
Popsicle & Craft Sticks
Craft Paint (2 or more colors)
Paint Brush, Water, Old Butter Tub Lid
Newspaper
Craft Glue
String or Ribbon

Lay down some old newspaper on the table. Use an old plastic butter tub for a water dish and use the lid for a paint palette. Let the kids paint the craft sticks, popsicle sticks and the wooden clothespins any colors that they would like. The Princess opted for two-tone colored airplanes. Let the pain dry for 30 minutes.

* This post contains affiliate links. If you make a purchase, we may or may not receive a small commission which helps to support this site. Thank you!

Once everything is dry…let them glue the craft & popsicle sticks onto the wooden clothespins as plane wings. Let dry for 30-45 minutes or let an adult use a hot glue gun which takes only a few minutes. Tie a 6″ piece of string or ribbon around the center body area of the plane (if you want it to be a hanging ornament or omit it if the kids are just playing with their new planes).

That’s it. A quick and in-expensive craft project to do with the kids!

Shelly's Signature


Kid’s Craft Project Ribbon Christmas Tree Ornaments

Kid’s Craft Project Ribbon Christmas Tree Ornaments

Back in early November I had my 6 year old grand daughter over for the weekend. Every time we get together…we always set aside some time for crafting. Just like her Nanny (me) She loves to sit down and be creative! One of the projects 

Kid’s Craft Project Painted Ceramic Tile Beverage Coasters

Kid’s Craft Project Painted Ceramic Tile Beverage Coasters

A few months ago we started a bi-monthly series here on the Two Classy Chics blog were we feature a kid’s craft project with all of you. Today’s project is very easy to make and you can make one for less than $1.00. Kid’s Craft