Tag: kid’s crafts

Snowman Painted Clam Shells Kid’s Craft Project

Snowman Painted Clam Shells Kid’s Craft Project

The Christmas holiday is less than 8 weeks away, so it’s time to ramp up all of your holiday craft-making into high gear. Over the next 7 weeks we’ll be sharing about a dozen holiday craft projects with all of you and most of them 

Craft Project Painted Seashells for Halloween Decorating

Craft Project Painted Seashells for Halloween Decorating

Earlier this month we published our craft project post on how to paint Halloween designs onto collected seashells from the beach. Those same designs can also be painted on smooth river rocks, if you don’t have access to clam shells. You can find our original Halloween 

Halloween Craft Project Glow-in-the-Dark Painted Seashells

Halloween Craft Project Glow-in-the-Dark Painted Seashells

Halloween Craft Project Glow-in-the-Dark Painted SeashellsTwice a month I get together with my 8 year old granddaughter and work on various arts and crafts projects. Its a great way for the two of us to spend time together and to teach her some important life skills along the way.

When we were down at the beach house a few weeks ago we collected two large baskets full of clam shells and seashells. We washed them up, dried them and brought them home to use in various craft projects throughout the year. We love crafting with seashells that we find on the beach, plus they’re FREE!

Halloween is just around the corner, so we decided to paint some Halloween designs onto the large clam shells and we used a combination of regular paint and glow-in-the-dark paint. Love this idea? Check out our spooky skeleton design and our other hand-painted seashell designs too! It’s super-easy to make and the kids love them!

Halloween Craft Project Glow-in-the-Dark Painted Seashells

Glow-in-the-Dark Painted Seashells

Large Clam Shells
Acrylic Paint (in desired colors)
Glow-in-the-Dark Acrylic Paint (yellow-lime)
Clear Acrylic Spray Sealer
Foam Paint Brush and Reg. Paint Brush
Water Dish, Paint Pallet, Paper Towels
Newspaper

Lay newspaper down on your work surface. You’ll want to use large clam shells that has been washed and thoroughly dried. Our clam shells measure at least 6″ in width and are ones that we found & collected while on the beach.

Using a foam paint brush, have the child paint the outside of one clam shell. Let it dry for 10-15 minutes and then paint a second coat to get good coverage. While one seashell was drying, we painted coats (or second coats) of paint on the other shells. Acrylic paint dries pretty quickly and at-most we waited 30 minutes between coats.

Halloween Craft Project Glow-in-the-Dark Painted Seashells

Change over to a regular (thin) paint brush and let the child paint their design onto the shell. The Princess painted a few in Jack-o-Lantern designs, a few in Ghost & Graveyard designs and then a snowy night with bats design. Let the paint set until it’s thoroughly dried.

We used glow-in-the-dark acrylic paint to add little accents onto each seashell. For the Jack-o-Lanterns we added the lemon-lime glow-in-the-dark paint to the eyes, nose and mouth. On the ghost design she added it to the ghost’s eyes and mouth and she added the white glow-in-the-dark snowballs to her bat design.

Allow your children to be creative all on their own! It’s important to let them come up with their own creative designs, instead of yours! Way too often I see parents posting craft projects on their blogs that were CLEARLY not made by a child. I dislike that. You can add input and guidance, but I feel it’s important to let the child run free with their own creative designs, even if it’s designs we wouldn’t choose.

Let the painted shells dry overnight. Take them outside and spray them with 1-2 coats of clear acrylic spray sealer. Let them dry for several hours or overnight. You can now display them in your yard, garden, front porch, back porch or on your deck. Cute!

* This post contains affiliate links. If you make a purchase, we may or may not receive a small commission which helps to support this site. Thank you!

Shelly's Signature

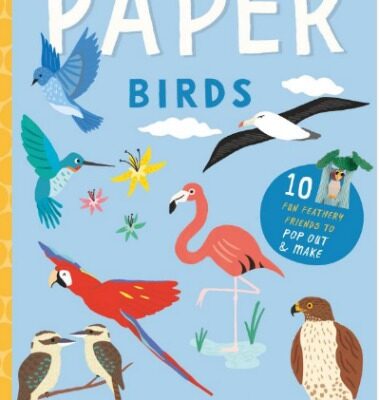
Paper Birds 10 Feathery Projects to Pop Out and Make

Paper Birds 10 Feathery Projects to Pop Out and Make

My granddaughter is 8 years old and loves to work on arts and crafts projects when over at our home. We’ve shared many of our creations here on the blog over the past few years and today, we’ve got another really cool kid’s craft project 

Teaching Kids About Rocks, Minerals and Fossils

Teaching Kids About Rocks, Minerals and Fossils

During the summertime we’re always looking for fun and educational things to do with our grandchildren. Just because school’s out for the summer (and soon the kids will be going back), doesn’t mean that learning ends! Nope, it doesn’t and it’s our job to continue 

Kid’s Craft Project: Beaded ID Name Bracelets

Kid’s Craft Project: Beaded ID Name Bracelets

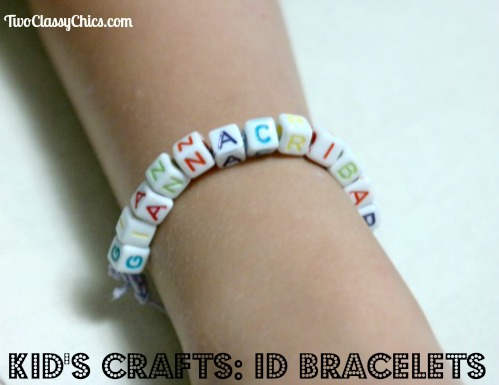
Kid's Craft Project: Beaded ID Name BraceletsEvery time I visit one of our local dollar-type’s of stores, I check out their craft supplies department. I keep a big plastic bin at home fully stocked with craft supplies for when my granddaughter is over visiting. It’s the perfect way to keep her entertained and to teach her valuable crafting skills at the same time.

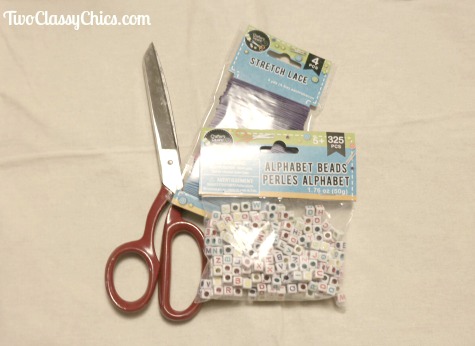
Two weeks ago I found a package of square-shaped alphabet beads and a package of elastic cording at that type of store for $1.00 per package. I knew as soon as I saw them that she would use them to make beaded ID name bracelets and necklaces. Yup, I was right and that’s exactly what she did. She was able to make 4 bracelets and 3 necklaces for just $2.00 total. Now…that’s what I call frugal crafting for kids!

Kid's Craft Project: Beaded ID Name Bracelets

Kid’s Craft Project: Beaded ID Name Bracelets

1 pkg. square-shaped alphabet beads
1 pkg. elastic cording (for jewelry making)
Scissors
Measuring Tape

We used a measuring tape to measure around the wrist (or the neck) and then doubled that measurement. We then cut the elastic cording to equal that measurement. If making a bracelet, you’ll want to place a large knot in the elastic cording about 3 to 4″ in from one end. Thread on your beads to spell out the desired name. You can knot in-between each bead if desired. We tried that and didn’t like the look of it, so we omitted the knots. Spell out the name and then make another knot after the last bead has been placed onto the cording.

Kid's Craft Project: Beaded ID Name Bracelets

Tie the beaded cording around the wrist, leaving 3″ to 4″ un-beaded at each end. Knot together both ends securely. We knotted about 4 times to make sure it wouldn’t come undone. You can also add a spot of tacky glue and let it dry to make sure the knot/ends are secure. You want the bracelet to fit snuggly since it’s on a stretchy elastic cord. Once you have your sizing correct you can knot and cut off the excess length.

You will follow the same process to make a necklace. When we made the necklace, the Princess decided to spell out her first name, middle name and last name with a blank square bead in-between each name. This filled up the necklace space nicely.

* This post contains affiliate links. If you make a purchase, we may or may not receive a small commission which helps to support this site. Thank you!

Shelly's Signature

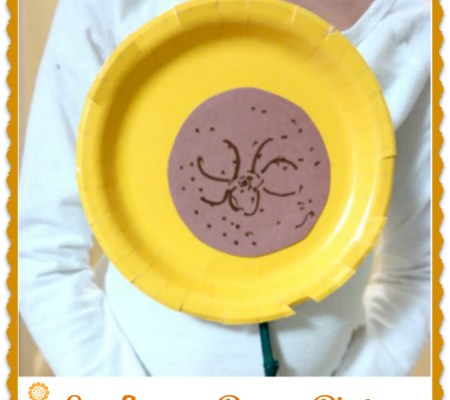
Kid’s Craft Project: Sunflower Paper Plate

Kid’s Craft Project: Sunflower Paper Plate

The summer season has been flying by pretty quickly this year. Two to three times a month I enjoy hosting “craft dates” with my granddaughter and godson. It’s a great way to bond with the kids and it’s a great way to teach them things, 

Mom and Me: An Art Journal to Share Book

Mom and Me: An Art Journal to Share Book

I’m the mother to two beautiful children. My daughter is 8 years old and my son is 21 months old. To be honest, sometimes I feel like I neglect my daughter a little bit since my young son requires so much of my attention. When