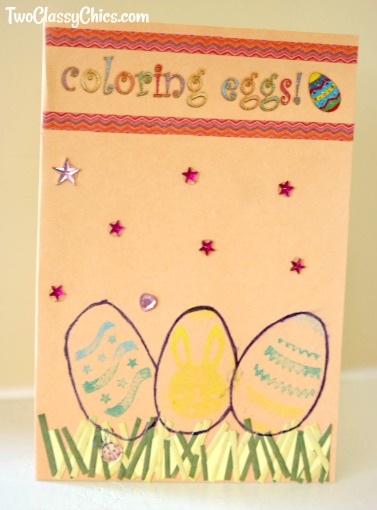
My granddaughter is almost 9 years old and twice a month we get together for arts & crafts play dates. We will sit down to work on painting projects, needle crafts, scrapbooking, wood crafts, and everything in between. These regular play dates are a great way to teach her new educational skills … [Read more...] about Kid’s Crafts – Easy Homemade Happy Easter Greeting Cards
kid's crafts
Hand-Painted Bumble Bee Seashells Craft Project

Last year we started sharing with all of you some frugal craft project ideas that utilize found objects like river rocks and seashells. Some of the designs we've featured included Halloween, Christmas, Spring and Summer themes. All of these craft projects are fun to make, are inexpensive to do and … [Read more...] about Hand-Painted Bumble Bee Seashells Craft Project
Kid’s Crafts – Elmer’s Glow-in-the-Dark Slime
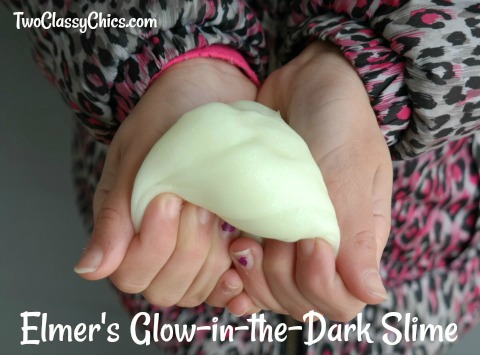
It glimmers, it glues, and it glows in the dark – it’s Glow in the Dark Glue, the latest innovation from Elmer’s®. The specially formulated, washable and non-toxic Glow in the Dark Glue comes in luminous neon colors ideal for brilliant and bright slime creations. With Glow in the Dark Glue, slime … [Read more...] about Kid’s Crafts – Elmer’s Glow-in-the-Dark Slime
Kid’s Craft Project Painted Easter Bunny Seashells

Last year we started sharing with all of you some frugal craft project ideas that utilize found objects like river rocks and seashells. Some of the designs we've featured included Halloween, Christmas, Easter, Spring and Summer themes. All of these craft projects are fun to make, are inexpensive to … [Read more...] about Kid’s Craft Project Painted Easter Bunny Seashells
Hand-Painted Ladybug Clam Shells Craft Project

After a long and cold winter...I'm ready to get outside and into the fresh air. During the month of March I like to get things ready for the upcoming gardening season and that includes making some new yard and garden art. When we were down at the beach a few months ago we collected some really … [Read more...] about Hand-Painted Ladybug Clam Shells Craft Project
Kid’s Birthday Party Favors: Pudding Cup Characters

A few weeks ago we hosted a birthday party for my niece and made up several of these adorable pudding cup characters as fun party favors. They were super easy-to-make and you can make them for kid's holiday parties too, by just changing up the items that your using to fit a particular … [Read more...] about Kid’s Birthday Party Favors: Pudding Cup Characters
Craft Project – Painted Kitty Cat Seashells for Garden Yard Art

For the past 9 months we've been sharing with all of you several seashell and clam shell theme'd craft projects. Every time we go down to the beach house, we come home with several large bags of collected seashells and are always looking for fun ways to use them in our crafting projects. Today's … [Read more...] about Craft Project – Painted Kitty Cat Seashells for Garden Yard Art
Kid’s Craft Project Painted Seashells for Valentine’s Day

Over the past 3 1/2 years we've been running a regular feature here on the blog "Crafting with Kids" and many of our readers have been enjoying the various kid's craft projects that we've been sharing. In addition to that, many of the projects we've shared involved painting large seashells, in this … [Read more...] about Kid’s Craft Project Painted Seashells for Valentine’s Day