
We love to travel and most of our vacation destinations include a beach. While on our vacation, I spend a lot of time out on the beach. I love walking on the beach and looking for seashells. I've amassed a large collection of shells over the years and many of them I use for crafting. One way that … [Read more...] about Preserving Summer Beach Vacation Memories by Painting on Seashells
kid's crafts
Kid’s Crafts – Painted Patriotic USA Flag Mason Jar Lid Ornaments

These painted patriotic USA flag mason jar lid ornaments can be used year round. You can hang them up on peg hooks, knobs, used to decorate during the summer holidays, hang them on your Christmas tree, etc. They're made from recycled metal mason jar lids (seals) along with acrylic craft paint. I … [Read more...] about Kid’s Crafts – Painted Patriotic USA Flag Mason Jar Lid Ornaments
Kid’s Crafts: Painted Popsicle Sticks American Flag Refrigerator Magnet
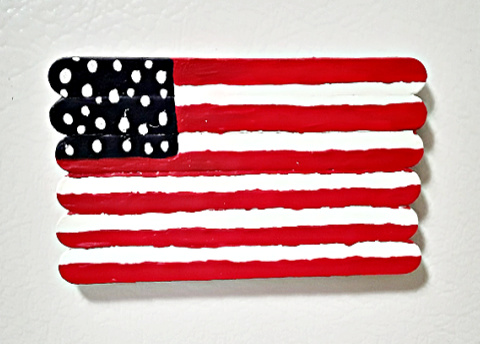
We love popsicles and save all of the wooden popsicle sticks to use in our craft projects! Matter of fact, we have hundreds of them tucked away in a storage box. This kid's craft project requires some adult supervision and help. My two grandchildren had fun making these for the upcoming July 4th … [Read more...] about Kid’s Crafts: Painted Popsicle Sticks American Flag Refrigerator Magnet
Keep Kids Busy This Summer with Art & Craft Kits from Doodle Hog

Summer is finally here and it's important to keep our children busy throughout the summer break. I like to plan various art & craft projects for my kids which helps to stimulate their minds and encourages them to explore their creativity. Arts & crafts are a great way to teach children how … [Read more...] about Keep Kids Busy This Summer with Art & Craft Kits from Doodle Hog
Kid’s Crafts: Plastic Potato Chip Containers Coin Banks
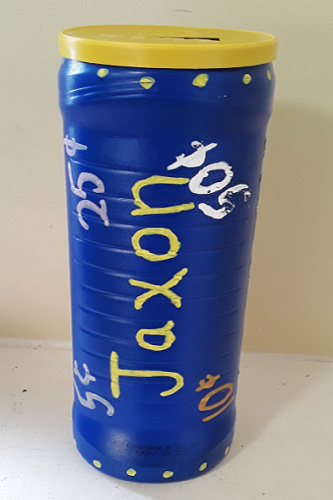
Here's a great way to recycle a few of those plastic potato chip containers. The one we used in our kid's craft project was from Lay's STAX Potato Chips. We removed the paper label and washed it out before beginning the project. Let the kid's get creative! They can use acrylic paint pens, Sharpie … [Read more...] about Kid’s Crafts: Plastic Potato Chip Containers Coin Banks
Habitats and the Animals Who Live in Them Sticker and Activity Book

Summer is just around the corner and many families will be heading out on a summer vacation and while traveling the kids need to be kept busy. I always pack a travel bag for each child that contains sticker & activity books, reading books, colored pencils, a drawing pad, puzzle books & … [Read more...] about Habitats and the Animals Who Live in Them Sticker and Activity Book
Kid’s Crafts – Monogram Puzzle Pieces Refrigerator Magnets

Looking for an easy craft project to teach kids about Monograms? The Alphabet? Last month we made these cute Monogram Puzzle Pieces Refrigerator Magnets with a group of young kids age 4 to 8 years of age. It was a great opportunity to teach them about Monograms and allowed them to get creative with … [Read more...] about Kid’s Crafts – Monogram Puzzle Pieces Refrigerator Magnets
Colorful Creatures Stickers and Activities Book for Kids

Summer is just around the corner and many families will be heading out on a summer vacation and while traveling the kids need to be kept busy. I always pack a travel bag for each child that contains sticker & activity books, reading books, colored pencils, a drawing pad, puzzle books & … [Read more...] about Colorful Creatures Stickers and Activities Book for Kids