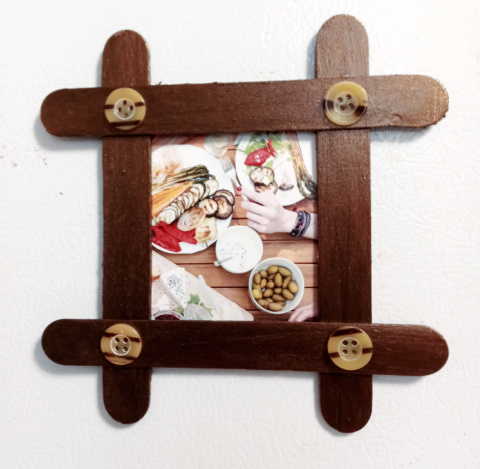
This kid's craft project can be made using wooden popsicle sticks or craft sticks. You can buy unpainted sticks (and paint them) or purchase them in fun colors from your local art & crafts supply store. We made these magnetic photo frames in one afternoon with kids ages 5 through 12 years of … [Read more...] about Popsicle Stick Magnetic Photo Frame Kid’s Craft Project
kid's crafts
Craft Project – Valentine’s Day Conversation Heart Refrigerator Magnets
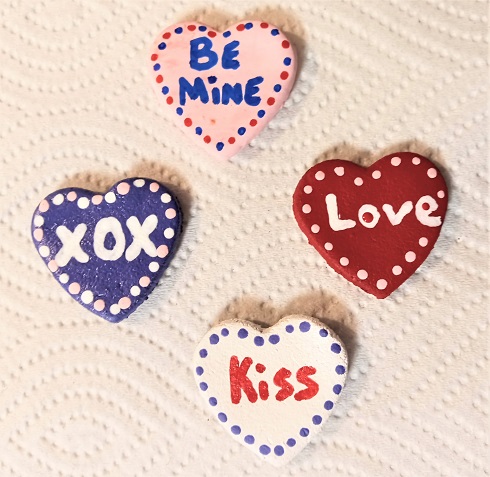
Looking for a fun craft project to do with the kids for Valentine's Day? These Conversation Heart Refrigerator Magnets are easy-to-make and can be made from a variety of different materials. You can use 1 to 1 1/2" diameter unfinished wooden hearts or heart shapes made from saltdough or cinnamon … [Read more...] about Craft Project – Valentine’s Day Conversation Heart Refrigerator Magnets
Kid’s Crafts – Handpainted River Rocks and Seashells for Valentine’s Day

Looking for a few easy to make Valentine's Day kid's craft projects? If so, we've got two for you today. These projects utilize items that are found in nature and acrylic paints. We've made these projects with children ages 4 years to 12 years of age. The little ones can make these too with a little … [Read more...] about Kid’s Crafts – Handpainted River Rocks and Seashells for Valentine’s Day
Preschool Kid’s Craft – A is for Alligator Paper Craft
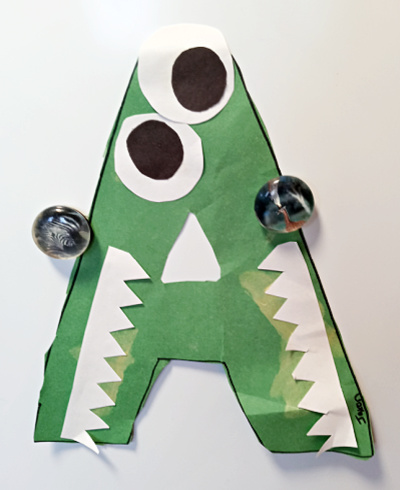
Kids love to dabble in arts and crafts which is a great way to teach them some of the things they need to learn before entering school. For example: Children should be taught their ABC's, Numbers, Colors, and Shapes while in Preschool, along with other things. Giving them a headstart before starting … [Read more...] about Preschool Kid’s Craft – A is for Alligator Paper Craft
Kid’s Crafts – Paper Snowman Refrigerator Art
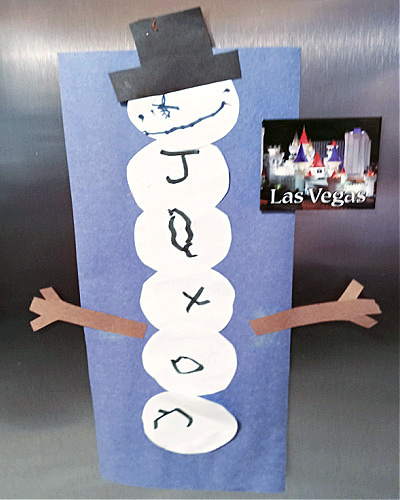
When it comes to arts and crafts for pre-school aged children a pad of construction paper can be your best asset. Kids make all kinds of cool art projects by just using construction paper, scissors, a glue stick and markers. Crafting with the kids doesn't have to be expensive, it just has to be … [Read more...] about Kid’s Crafts – Paper Snowman Refrigerator Art
Mickey Mouse Hand-Painted Mason Jar Lid Ornaments

Mickey Mouse is one of the most recognizable and popular children's cartoon character. A lot of kids just love him! Last year I had shared a Hand-Painted Mickey Mouse Seashell Party Favor craft project on the blog and many people enjoyed that. Today's project is along the same lines except the … [Read more...] about Mickey Mouse Hand-Painted Mason Jar Lid Ornaments
Kid’s Crafts – Painted Mason Jar Lids Christmas Tree Ornaments

Two weeks ago I had my grandchildren come over to my house for a sit-down crafting session with Nanny. We enjoy making frugal craft projects together and came up with these painted mason jar lids Christmas tree ornaments. To make them...you'll need mason jar lids (seals) or smooth-edge soup can … [Read more...] about Kid’s Crafts – Painted Mason Jar Lids Christmas Tree Ornaments
Rudolph Red-Nosed Reindeer Painted Mason Jar Lids Christmas Ornaments

Rudolph the Red-Nosed Reindeer is a classic icon related to the Christmas holiday season. When I was growing up I always looked forward to watching it on TV. Matter of fact, it was my favorite with Frosty the Snowman coming in second place. Now that I'm a grandmother, I enjoy watching those holiday … [Read more...] about Rudolph Red-Nosed Reindeer Painted Mason Jar Lids Christmas Ornaments