Tag: Home Canning Recipes

Canning Homemade Apple Butter

Canning Homemade Apple Butter

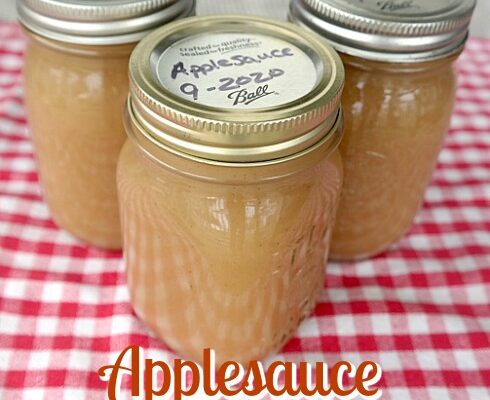
Last month we took the grandchildren out apple picking at a local orchard. Every year we like to go and pick a few bushels of apples. I like to make homemade apple butter, apple sauce and apple pie filling that I can for use during 

Home Canning Sliced Carrots with Recipe and Tips

Home Canning Sliced Carrots with Recipe and Tips

Last month we got a great deal on fresh carrots from a local farmer in our area. We’re not big carrot eaters but I do like having several jars of sliced carrots on hand. They’re great to toss in soups and stews or use them 

Home Canning Succotash with Recipe and Tips

Home Canning Succotash with Recipe and Tips

Home Canning Succotash with Recipe and TipsSuccotash is a combination of whole kernel corn mixed with an equal amount of lima beans. It’s one of our favorite side dish vegetables to enjoy. We like to season our’s with a little bit of butter, granulated sugar, salt and ground black pepper when we prepare it.

* This post contains affiliate links.

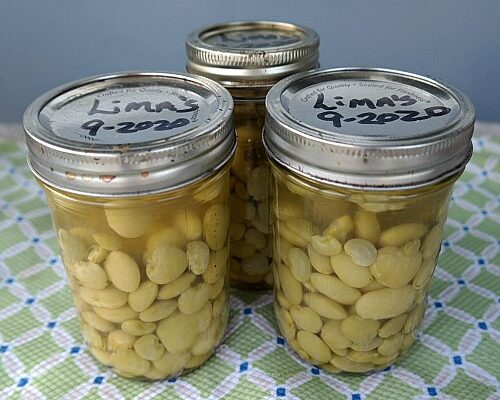
Last month I hit the farmer’s market to buy 2 dozen ears of corn and a bushel basket of freshly picked lima beans. Thankfully, both were on sale so I got them at a great price. When can Succotash I follow the recipe in my Ball Blue Book for Home Canning. You can easily double and triple the recipe depending on your family size. The recipe below will make approximately 6 pint size or 3 quart size jars.

You’ll need a steam pressure canner, glass mason jars, seals & rings, wide mouth funnel, ladle, jar grabber, magnetic seal lifter, stirring spoons, corn stripper, old kitchen linens, cutting board, colander, bowls, large cooking pot, measuring cup and measuring spoons. Lay out all of your canning supplies ahead of time. Make sure you wash jars, seals and rings.

Home Canning Succotash Recipe

3 1/2 cups whole kernel corn
3 1/2 cups shelled lima beans
salt
water

Prep: Remove corn ears from the husk. Remove silk and rinse them under water. Strip the corn off of the cob using a corn stripper. You’ll want to do this on a clean cutting board. Measure out your kernels, you’ll need 3 1/2 cups. Place kernels in a bowl. Set aside.

Lima Beans

Wash lima beans under cold water. De-shell beans from the pods. Toss pods or use for compost. Measure out 3 1/2 cups of lima beans. Place them into a bowl with the corn. Use a spoon to stir everything together. You should have equal parts of corn to lima beans.

Cook: Pour corn and lima beans into a large cooking pot. Add enough water to cover them. Bring mixture to a full boil, reduce heat to a gentle boil and cook for 5 minutes.

Fill: Pack hot veggies into a hot jar, leaving a 1″ headspace. Add a 1/2 teaspoon salt to eat pint jar or 1 teaspoon salt to each quart jar (optional but I think it helps to keep them crispy and not soggy plus adds flavor). Ladle hot cooking liquid (the water from the pot) over the veggies in the jar, leaving 1″ headspace. Remove air bubbles, wipe the jar rim clean with a cotton cloth. Add the warm seal (lid) on top and the ring…adjusted until its fingertip tight. Place on rack in a pressure canner containing 2″ of simmering water (not boiling). Continue until all of your jars are filled.

Process: Place lid on canner and turn to locked position. Adjust heat to medium-high. Vent steam for 10 minutes. Put on weighted gauge on vent and bring the pressure to 10 pounds (psi). Process pint size jars for 1 hour or quart size jars for 1 hour and 25 minutes. Turn off heat. Keep the lid on and let pressure return to zero. Once at zero let them sit with the lid on for an additional 5 minutes. Remove lid. Let jars sit in the hot water (lid off) for 10 additional minutes. Remove jars from canner. Let them cool for 12 hours. Check to make sure they are sealed. Label and store.

Canning Tips: I save all of my old kitchen linens in a bin and use them just for canning. They will get stained up over time. Just launder them after use and place back into your canning bin. I like to lay 2 old kitchen towels out on my counter-top and place my hot jars on them to cool. This helps to protect my conter-top to the extreme heat.

I heat up all of my glass mason jars in an oven set at 170 degrees F. I place them on a cookie sheet and let them sit in the 170 degree F. oven until I’m ready to use them. I don’t recommend heating them up in a microwave oven or on the stove-top. Just my opinion. You never want to re-use seals. Always use brand new seals for the best results. Inspect all of your mason jars for chips, cracks or foggy glass. If they’re damaged in any way…discard them!

It can be messy when it comes to home canning. You’ll want to wear a kitchen apron or an old t-shirt when doing the prep work. I like to wear my husbands old t-shirts which are roomy and comfortable. I recommend cleaning up as you go along. I always start out with an empty dishwasher and fill it as I go along. This saves me time when I’m done for the day and usually exhausted. Try to keep small children and pets out of the kitchen to prevent accidents, tripping, etc.

* This post contains affiliate links. If you make a purchase, we may or may not receive a small commission which helps to support this site. Thank you!

Shelly's Signature

Home Canning Spaghetti Sauce with Recipe and Tips

Home Canning Spaghetti Sauce with Recipe and Tips

This homemade spaghetti sauce recipe is really easy to make. You can customize it by using the spices and herbs listed or use the ones that you personally prefer. It’s a great way to use up a lot of those ripe tomatoes sitting in your 

Home Canning Zucchini Relish with Recipe

Home Canning Zucchini Relish with Recipe

My family enjoys eating zucchini relish. They like mixing it in with their breakfast omelets and scrambled eggs, using it on hot dogs and sausages, tossing it into a wrap or spread on a sandwich. Matter of fact, we prefer zucchini relish over relish made 

Home Canning Aloha Pineapple Jam with Recipe

Home Canning Aloha Pineapple Jam with Recipe

Home Canning Aloha Pineapple Jam with RecipeDuring the canning season I like to make several different type’s of homemade fruit jams. We use the jam throughout the year on our toasted bagels, bread, English Muffins, as a topping on Waffles, Pancakes and French Toast, as a dipper with freshly sliced fruits, as a marinade for meat & fish and as a spread on our favorite artisan cracks & breads. Looking for more great home canning recipes? We have over 75+ right here on the TwoClassyChics blog!

* This post contains affiliate links.

The Aloha Pineapple Jam is very easy-to-make and a great beginner recipe for someone who is just learning how to do home canning. You only need a few ingredients to make it (no pectin is used), basic canning supplies and a water bath canner. Once properly prepared your jam should last 12-18 months stored in your pantry. Recipe will make approximately 3 half-pint jars.

SameTech Stainless Steel Pineapple Peeler, Corer and Slicer

You will need a great Pineapple Peeler, Corer and Slicer. The one that we use was purchased from Amazon at a really great price. Nice quality and easy-to-use!

Aloha Pineapple Jam Recipe

4 cups Fresh Pineapple (peeled, cored, finely chopped)
2 1/2 cups Granulated Sugar
1 Lemon, unpeeled, seeded, thinly sliced
1 cup Water

Prepare water bath canner, glass jars, and lids. Get out all of the supplies that you’ll need (ladle, slotted spoon, jar lifter, lid lifter, wide mouth funnel, hot pads, cotton cloth to wipe rims, old kitchen towels, etc.).

Home Canning Aloha Pineapple Jam with Recipe

In a large saucepan combine together the chopped pineapple, granulated sugar, lemon slices and water. Bring to a boil over medium heat, stirring constantly to dissolve the sugar and to prevent sticking. Boil, stirring frequently until mixture thickens, about 15 minutes. Remove from heat.  Used a large spoon to fish out the sliced lemons and toss them away or into your compost pile. Test for gel stage (Use thermometer to see if it has reached the gel stage at 220 degrees F). If reached, skim off foam in necessary.

Home Canning Aloha Pineapple Jam with Recipe

Ladle hot jam into hot jars, leaving a 1/4″ headspace. Remove air bubbles, wipe the rim clean with a cotton cloth. Add the seal and ring until its fingertip tight.

Place jars in the water bath canner (you should have the water simmering, but not at a rolling boil). You need enough water in it to cover all of the jars by at least 1″. Continue to fill jars and place them one by one into your canner. Lower the rack down into the water. Place cover on the canner. Bring the water to a rolling boil and process for 10 minutes.  Turn off heat, remove the canner lid. Wait 5 minutes, then remove jars. I like to place mine on my countertop with a cotton towel underneath them. Let them cool to room temperature. Test to make sure all jars sealed correctly. Store in a cool, dry place.

* This post contains affiliate links. If you make a purchase, we may or may not receive a small commission which helps to support this site. Thank you!

Shelly's Signature

Mild Zucchini Salsa with Recipe and Home Canning Tips

Mild Zucchini Salsa with Recipe and Home Canning Tips

Last month we harvested a few large zucchinis from our garden. I’ve already canned several jars of zucchini relish and zucchini pickles. You can find both of those recipes on the blog. This time around I knew I wanted to make a large batch of 

Home Canning Chicken Soup with Recipe

Home Canning Chicken Soup with Recipe

Every year I like to home can 18-21 quarts of homemade chicken soup to use throughout the winter. I will typically can it during the months of July and August when fresh vegetables become available from our backyard garden. Canning your own soups and stews