
I like to make a large batch of pork and sauerkraut in my slow cooker (crockpot) a few times every year. Once it's done...my husband and I will have some for dinner that day. What's leftover...I can in my pressure cooker for a later meal. Since there's meat in this...I do recommend that you use a … [Read more...] about Pork and Sauerkraut Recipe for Home Canning
Home Canning Recipes
Pasta Sauce with Ground Turkey Recipe with Home Canning Instructions
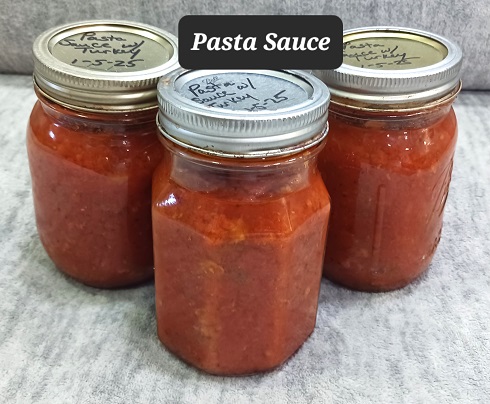
Last month I decided to get the 2 bags of frozen whole tomatoes out of my freezer and cook them down to make pasta sauce. In case you didn't know...YES, you can freeze tomatoes from your backyard garden! I cut the stem out, rinse them with water to remove the majority of seeds and lay them on a … [Read more...] about Pasta Sauce with Ground Turkey Recipe with Home Canning Instructions
Tropical Cowboy Candy Recipe with Home Canning Tips
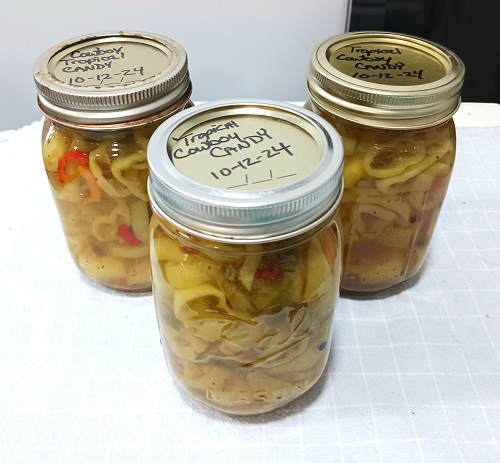
Tropical Cowboy Candy is a homemade condiment for people who love hot peppers with just a little bit of sweetness. It's great tossed on top of your favorite burger, onto a grilled hot dog, tossed into a fajita or burrito, as a topper on nachos, etc. The guys in my family love hot peppers and use … [Read more...] about Tropical Cowboy Candy Recipe with Home Canning Tips
Ham and Bean Soup Recipe with Home Canning Tips
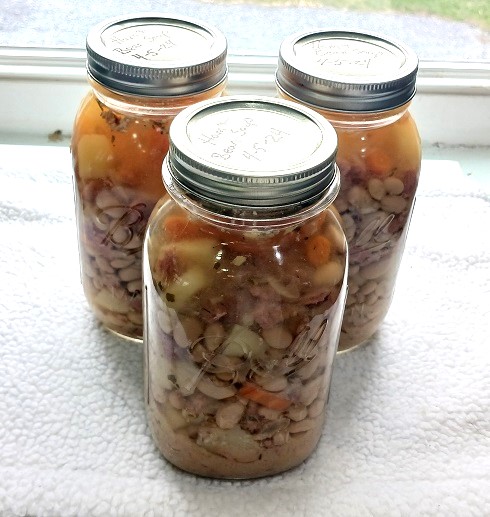
Ham and Bean Soup is a classic belly-filling soup that can be made on the stove-top or in your slow cooker crockpot. I like to make a huge kettle of it on the stovetop and can it for later use. For this home canning recipe you'll need a steam pressure canner along with your basic home canning … [Read more...] about Ham and Bean Soup Recipe with Home Canning Tips
Home Canning Chocolate Pudding with Recipe

Homemade chocolate pudding is one of my family's go-to snacks. Not only do they snack on it...often times it's the dessert to a quickly-served meal. We don't purchase or use boxed mixes or buy those pudding snack cups. We make all of our puddings from scratch...that way we control the ingredients … [Read more...] about Home Canning Chocolate Pudding with Recipe
Zucchini Pineapple Banana Bread Recipe Baked in Glass Mason Jars

Banana bread is one of my favorite sweet breads to make at home. It's always a family favorite. With that said, I found a way to sneak in some healthier ingredients like freshly shredded zucchini and crushed pineapple to the batter to make it even better! The results are fantastic! You'll get a very … [Read more...] about Zucchini Pineapple Banana Bread Recipe Baked in Glass Mason Jars
Mason Jar Baked Pineapple Upside-Down Cakes Recipe

These Pineapple Upside-Down Cakes are super easy-to-make! You use a pre-purchased cake mix along with a few basic ingredients to make them. They're baked in glass mason jars in your oven. Perfect for individual portions and sweet dessert treats. One basic cake mix will make 4 pint jars. You'll need … [Read more...] about Mason Jar Baked Pineapple Upside-Down Cakes Recipe
Cabbage Soup Recipe with Home Canning Instructions

Cabbage Soup is one of my favorite soups to make at this time of the year. I can use up several items from our backyard garden when I make it. Don't have a garden? Don't worry...all ingredients are readily available at the local grocery store or farmer's market. The recipe makes a really nice sized … [Read more...] about Cabbage Soup Recipe with Home Canning Instructions