Tag: Gardening Products and Tips

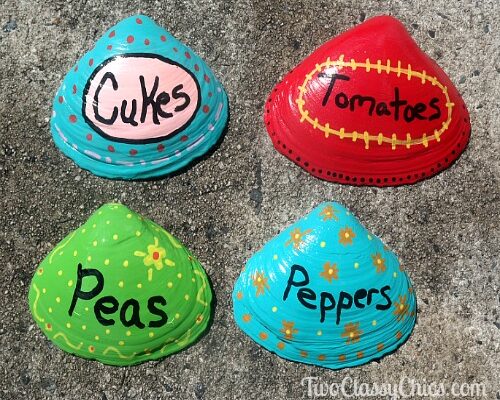
Kid’s Crafts: Easy-to-Make Seashell Garden Markers

Kid’s Crafts: Easy-to-Make Seashell Garden Markers

My grandchildren love to work on arts and craft projects. My grandson is more of the artistic one while my granddaughter is more of the crafty one. The two of them could sit for hours working on various projects together. We tend to keep them 

Hand-Painted Seashell Vegetable Garden Markers

Hand-Painted Seashell Vegetable Garden Markers

Every year we plant a backyard garden. We enjoy growing our own tomatoes, bell peppers, zucchini, peas, onions, broccoli, watermelon, cucumbers, lettuce and several other vegetables. We’re by no means EXPERTS when it comes to gardening and are always trying to improve our skills. This 

Repainting and Updating Old Metal Wind Spinners

Repainting and Updating Old Metal Wind Spinners

Repainting and Updating Old Metal Wind SpinnersWe have three metal wind spinners on our property. I have one in a flower bed in our front yard and you’ll find the other two in a backyard gardening area. At one time they were colorful and looked beautiful in those areas. Over time the color became very faded due to the weather. I had a choice to make…update them or toss. I chose to update them which was a lot easier than I thought!

The first thing you want to do is clean them. I sprayed a non-toxic all-purpose cleaner on them and gently wiped off the dirt and grime. Hubby used the garden hose to spray them down. We then laid them out to thoroughly dry.

You’ll want to inspect them. If they have any rusty areas use sand paper to get rid of it. If any screws or bolts need to be tightened or replaced…do that too. All mechanical repairs should be completed before you repaint them. If they need to be lubricated you can hit them with a little bit of WD-40.

I choose to use Nicole’s Craft Studio Acrylic Craft Paint in the Metallic Gold and Metallic Bronze colors. You can use any brand but make sure they will give you a metallic finish. To get the coverage that I wanted I did have to use two coats of paint and allowed for one hour of drying time between each coat. You can use a bristle or foam-style paint brush depending on the design of your wind spinner. I’m not picky so I slapped it on with a regular paint brush.

Repainting and Updating Old Metal Wind Spinners

You’ll want to protect the finish with one to two coats of a clear acrylic spray sealer. I recommend doing this on a good weather day because you want it to dry quickly. I went out and spinned my spinners every 3-5 minutes as I didn’t want the sealer to clog up the spinning function. Know what I mean? I still wanted them to spin around easily with the lightest of breezes.

It took me two days to have all three of my wind spinners updated and repainted for the new summer season. The process was easier than what I thought it would be. I’m glad I was able to save them and can continue to enjoy them!

* This post contains affiliate links. If you make a purchase, we may or may not receive a small commission which helps to support this site. Thank you!

Shelly's Signature

Getting Started on the 2020 Gardening Season

Getting Started on the 2020 Gardening Season

Last month we got started on the 2020 gardening season. Hubby used the tiller to dig up our old garden bed and added new fertilizer into the soil. That entire process took him 3 days. Yes, it’s hard, back-breaking work! He then spent the next 

Miracle-Gro Indoor Plant Food Spikes

Miracle-Gro Indoor Plant Food Spikes

I love gardening and that includes growing a lot of indoor houseplants. Every spring and fall I like to spend time transplanting my houseplants into larger pots, replanting the baby plants into new pots and feeding my plants. How many of you enjoy indoor gardening? 

How to Blanch and Freeze Peas

How to Blanch and Freeze Peas

How to Blanch and Freeze PeasWe’ve been planting our own garden and harvesting the fruits of our labor for the past 15+ years. We enjoy planting our own tomatoes, bell peppers, cucumbers, peas, corn, cauliflower, watermelon, cantaloupe, onions, red beets, potatoes, green beans, and a few other things.

* This post may contain affiliate links. Please see full disclosure located below.

When it comes to harvesting our fruits and vegetables I like to preserve them one of two ways…either by home canning or by freezing. It all depends on the item and how much of it do I have on hand. Freezing is convenient for smaller amounts and let’s face it…some foods taste better coming from frozen. Just my 2 cents on that. Today I’m going to share with you how I like to blanch and freeze peas.

How to Blanch and Freeze Peas

Always start out with fresh product and you’ll want to freeze them shortly after being picked. You don’t want to pick them and then wait days to prepare them. Do it within a few hours for the best results.

Sort through the pea pods and discard any that have blemishes or mold. Just toss them away or use them for composting. Place them in a colander and rinse under cold running water. Flip them around with your hands and rinse again. You want to get all of the dirt and debris off of them. They need to be clean!!!

Using a cutting board and a paring knife…snip off the end of each pea pod. Remove any strings that you see. If you’re working with a type of a pea that has an edible pod (like snow peas) you can process them with the pod on them or de-shell them. For non-edible varieties you’ll want to de-shell them (remove the peas from the pods). Place in a bowl.

How to Blanch and Freeze Peas

In a large pot bring water to a full rolling boil. Place the peas or peas in their pods into the boiling water. Set a timer and boil for 2 full minutes. Remove from heat and pour them into a colander that is sitting in a bowl of cold ice water. You need to do this to immediately stop the cooking process. I let my colander sit in the ice cold water for about 2 minutes and then finish by rinsing them under cold running water. If you see any “missed” debris, pick it out and toss it away.

I fold up 3-4 paper towels and place them onto a plate. I pour the peas onto that plate. Take another 2-3 folded up paper towels and place it on top. Gently use the paper towels to blot up excess water. You want to try to blot up water so that they don’t form a lot of ice crystals once frozen.

I prefer to freeze in freezer storage bags (quart-size) and will measure out 2 cups of de-shelled peas or 3 cups of peas in-the-shell. It’s just the two of us and 2 cups of peas is plenty for us per meal when using them as a side dish. You may want to measure out bigger portions depending on your family’s needs.

When freezing them in a freezer bag you want to purge out as much air that you can. Seal the bag, label and freeze. You want to store your bags FLAT in the freezer, not upright! By storing them flat you’ll help to limit freezer burn, ice crystals, and it helps to save on storage space.

* This post contains affiliate links. If you make a purchase, we may or may not receive a small commission which helps to support this site. Thank you!

Shelly's Signature

Solar Powered Glass Pink Flamingo Garden Lights

Solar Powered Glass Pink Flamingo Garden Lights

One of the first things visitors see when they come to your home is your front yard (or backyard), depending on where they park. I’m the type of person who enjoys gardening and setting up pretty little areas around our yard. First impressions and curb 

Gardening – The Beautiful Bearded Iris

Gardening – The Beautiful Bearded Iris

Every year I look forward to spring and the start of the gardening season. First to bloom are my mini daffodils, daffodils, hyacinths, tulips, bleeding hearts and then my bearded iris will start blooming. From mid March through the end of May that’s what you’ll