Tag: Gardening Products and Tips

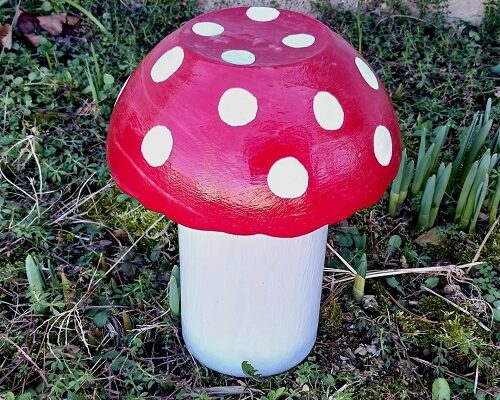
Glass Vase and Bowl Mushroom Garden Yard Art

Glass Vase and Bowl Mushroom Garden Yard Art

Looking to add some color and design to your flower garden this year? If so, I’ve got the perfect FRUGAL garden yard art project for you! Today’s craft project was made with upcycling a glass vase and a glass bowl. Don’t have any? Head to 

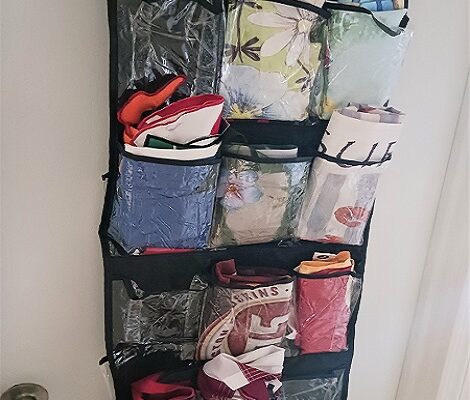
Decorative Garden Flags Hanging Storage Organizer

Decorative Garden Flags Hanging Storage Organizer

Decorative garden flags are a fun and colorful way to decorate your outdoor spaces. They add a pop of color and show off the home owner’s personality and interests. You can find thousands of different styles and colors available out in the retail marketplace. Every 

Ladybug Garden Yard Art Made with Metal Coffee Can

Ladybug Garden Yard Art Made with Metal Coffee Can

Ladybug Garden Yard Art Made with Metal Coffee CanI’m getting ready for spring and working on several new DIY craft projects for my outdoor living and garden areas. I enjoy adding a few new items every year to add style and a pop of color. One thing that I really like is junk yard art…where you upcycle several items and turn them into a new piece of garden yard art. That’s exactly the type of craft project that I’m featuring today. You can check out my previous post on how to make an adorable Bumble Bee using the same techniques. Both work well together in your garden.

Please Note – Don’t use hot glue or a glue gun for this project! It doesn’t work well for outdoor use. I recommend that you use Gorilla Glue or E6000 Craft Adhesive for outdoor craft projects like this one.

* This post may contain affiliate links.

Ladybug Garden Yard Art

1 Metal Coffee Can
1 Plastic Water Bottle (clear)
Acrylic Craft Paints – Black, White and Red
Modge Podge with Glossy Finish
Paint Brush, Foam Brush, Water Dish, Paper Towels
2 Metal Screws
Gorilla Glue
Plastic or Metal Stake
Drill
Scissors

Wash and thoroughly dry the coffee can, bottle caps, and water bottle.

Ladybug Garden Yard Art Made with Metal Coffee Can

To get the acrylic craft paint to stick really well to the metal I coated it with one thin layer of Modge Podge using a foam brush. Let it thoroughly dry. Once dry you’ll want to paint the entire can red and let dry. Once dry you’ll go back and add the black polka dot spots. I opted to paint the bottom of the can red, but you can certainly paint it black.

The can that I used came with a black plastic lid, so I didn’t have to paint it. If your’s is a different color…cover the plastic with Modge Podge, let dry and then paint the entire lid black (2 coats of paint) and let throughly dry. You’ll use white and black acrylic paint to make the eyes and red acrylic craft paint for the nose and mouth. Let dry.

My husband was kind enough to drill 2 holes into the metal can for me and then inserted the 2 metal screws. They should be placed slightly at an angle, not straight up and down. We picked up a $1.25 outdoor solar light from Dollar Tree and used the stake that came with it as the stake for the Ladybug. It’s made out of plastic. He used a drill bit the diameter of the stake and made a hole in the bottom (the belly) of the metal coffee can. Inserted the stake and has it held in place with a bolt. We then used a generous amount of Gorilla Glue to hold the stake and bolt in place and left it dry overnight (that’s all inside the can).

Use scissors to cut the top and bottom off of a plastic water bottle. You’ll have a ring which you’ll cut open down the seam to make the wings. Flatten them out a little bit. Use a generous amount of Gorilla Glue (dries clear) to attach them on top of the Ladybug. I used 4 clip-on wooden clothespins to hold it into place until the glue was dry & set.

To finish up you want to protect your new piece of artwork. I opted to coat the entire thing with 2 coats of Modge Podge in a glossy finish. I made sure that I coated the can, screws, bottle caps, the plastic lid and even the plastic stake. This will help protect it from the weather elements when displayed outside in your garden. Let dry overnight.

Note: As soon as our ground thaws I will take it outside and place it into one of my flower beds and get better photographs of it. In the meantime…you can get started gathering together the supplies to make it.

* This post contains affiliate links. If you make a purchase, we may or may not receive a small commission which helps to support this site. Thank you!

Shelly's Signature

Helpful Tips for Finding Good and Affordable Garden Statuary

Helpful Tips for Finding Good and Affordable Garden Statuary

If you’re looking for a way to enhance the beauty of your garden and create an outdoor space that’s both inviting and serene, consider investing in good quality garden statuary. Statuary adds interest to gardens by providing a focal point while also blending into natural 

Miracle-Gro Water Soluble Plant Food for Vegetables and Herbs

Miracle-Gro Water Soluble Plant Food for Vegetables and Herbs

For the past 10 years my wife and I have been planting 2 medium-sized vegetable gardens in our backyard. We’re not expert gardeners, but learning as we go. Each season we learn something new and we really enjoy it. It’s a lot of hard work, 

Bumble Bee Garden Yard Art Made with Metal Coffee Can

Bumble Bee Garden Yard Art Made with Metal Coffee Can

Bumble Bee Garden Yard ArtI’m getting ready for spring and working on several new DIY craft projects for my outdoor living and garden areas. I enjoy adding a few new items every year to add style and a pop of color. One thing that I really like is junk yard art…where you upcycle several items and turn them into a new piece of garden yard art. That’s exactly the type of craft project that I’m featuring today. Check out the cute ladybug version of this project that we made. Adorable!

* This post may contain affiliate links.

Bumble Bee Garden Yard Art

1 Metal Coffee Can
2 Metal Bottle Caps
1 Plastic Water Bottle (clear)
Acrylic Craft Paints – Yellow, Black, White and Red
Modge Podge with Glossy Finish
Paint Brush, Foam Brush, Water Dish, Paper Towels
2 Metal Screws
Gorilla Glue
Plastic or Metal Stake
Drill
Scissors

Wash and thoroughly dry the coffee can, bottle caps, and water bottle.

To get the acrylic craft paint to stick really well to the metal I coated it with one thin layer of Modge Podge using a foam brush. Let it thoroughly dry. Once dry you’ll want to paint the yellow and black bumble bee stripes as shown in the photograph. You can make them as thick or as thin as you personally like. I opted to paint the bottom of the can yellow, but you can certainly paint it black.

The can that I used came with a black plastic lid, so I didn’t have to paint it. If your’s is a different color…cover the plastic with Modge Podge, let dry and then paint the entire lid black (2 coats of paint) and let throughly dry. Paint both of the metal bottle caps with 2 coats of black acrylic paint. Once dry, do the white area on the eyes and then the black pupil as shown in the photograph. Let dry. Once dry use Gorilla Glue to attach the bottle caps onto the lid. Use red paint to make the nose and mouth. Let dry.

My husband was kind enough to drill 2 holes into the metal can for me and then inserted the 2 metal screws. They should be placed slightly at an angle, not straight up and down. We picked up a $1.25 outdoor solar light from Dollar Tree and used the stake that came with it as the stake for the Bumble Bee. It’s made out of plastic. He used a drill bit the diameter of the stake and made a hole in the bottom (the belly) of the metal coffee can. Inserted the stake and has it held in place with a bolt. We then used a generous amount of Gorilla Glue to hold the stake and bolt in place and left it dry overnight (that’s all inside the can).

Bumble Bee Garden Yard Art Made with Metal Coffee Can

Use scissors to cut the top and bottom off of a plastic water bottle. You’ll have a ring which you’ll cut open down the seam to make the wings. Flatten them out a little bit. Use a generous amount of Gorilla Glue (dries clear) to attach them on top of the Bumble Bee. I used 4 clip-on wooden clothespins to hold it into place until the glue was dry & set.

To finish up you want to protect your new piece of artwork. I opted to coat the entire thing with 2 coats of Modge Podge in a glossy finish. I made sure that I coated the can, screws, bottle caps, the plastic lid and even the plastic stake. This will help protect it from the weather elements when displayed outside in your garden. Let dry overnight.

Note: As soon as our ground thaws I will take it outside and place it into one of my flower beds and get better photographs of it. In the meantime…you can get started gathering together the supplies to make it.

* This post contains affiliate links. If you make a purchase, we may or may not receive a small commission which helps to support this site. Thank you!
Shelly's Signature

How to Properly Freeze Eggplant

How to Properly Freeze Eggplant

A few months ago my one neighbor gave me 7 eggplants from her backyard garden. I enjoy eating eggplants but knew that I couldn’t possibly eat 7 of them over the course of a week. That’s when I got the bright idea to freeze them 

Plantable Pencils that Turn into Flowers, Herbs, Vegetables, and Trees

Plantable Pencils that Turn into Flowers, Herbs, Vegetables, and Trees

Imagine giving a gift that can live for 100 years or more. The idea of ??the plantable Sprout pencil is to plant it when it becomes too short to write with, thus giving new life to an end-of-life product that you would otherwise throw into