Tag: easter

Frugal Shopping – Buying Candy and Decor After the Easter Holiday

Frugal Shopping – Buying Candy and Decor After the Easter Holiday

When I shop for “after the holiday” bargains and deals I like to hit the retail stores 1-2 weeks AFTER the holiday has passed. A lot of shoppers think they need to go out the very next day to get the bargains. FALSE! While some 

Happy Easter 2023

Happy Easter 2023

We wanted to wish all of our TCC blog readers a Happy Easter! When spending time with your family, friends or even if you’re staying home…please reflect on the real reason for the holiday. We hope everyone enjoys their Easter holiday with loved ones.  We 

Scrap Wood Painted Easter Bunny Shelf Sitter

Scrap Wood Painted Easter Bunny Shelf Sitter

This hand painted Easter Bunny shelf sitter is easy-to-make! We made them with a group of 13 year old Girl Scouts using inexpensive art and craft supplies. My husband cut all of the wood blocks ahead of time from his scrap wood pile. They can be any width or height that you like. The idea is to use whatever scrap wood that you have on hand. They need to be in a rectangular shape after cutting. The majority of the ones used were 1″ thick by 4 1/2″ wide by 7 1/2″ high. Those measurements can vary.

* This post contains affiliate links.

The photograph shows one that was made by a 13 year old with the assistance of an adult. You can make them simple (as shown) or get fancy & elaborate if you’re an adult making the project. If working with children…keep it simple!

Scrap Wood Painted Easter Bunny Shelf Sitter

Scrap Wood Painted Easter Bunny Shelf Sitter

Rectangular Piece Scrap Wood (see above)
Acrylic Craft Paint – White, Pink, Black
Foam Brush
Paint Brush, Water Dish, Paper Towels
Roll of Burlap Ribbon (for ears)
Scraps of Pink Ribbon (for inner ears)
1 Large Cotton Ball (tail on the back)
Hot Glue Gun and Glue Sticks (adult supervision)
2 Different Scraps of Pink Ribbon (bow)
Clear Acrylic Spray Sealer (optional)
Scissors
Florist Wire

The entire wood block needs to be painted with 2 coats of white acrylic craft paint using a foam brush. If you’re working with kids and want to save time…spray paint all of the blocks white the week before. Let dry and they can decorate them.

Eyes are 2 black oval shapes, the nose is a pink heart shape, and then use black paint to add the whiskers and mouth. Once the black paint has dried add the white inner eye. Let dry. All of the painting is now done.

For the ears we used a roll of burlap ribbon. Unwind the ribbon and cut out 2 tear drop shapes. The width and height of the ears will depend on the size of the wood block. Cut 2 pieces of light pink ribbon for the inner ears. Use a tiny amount of glue to tack the pink ribbon down the center of each ear. To make them stand up straight and bendable…we used florist wire. Cut a piece slightly smaller in length than the ear and glue it on the back. Once glue has set, bend a tiny bit of the bottom of each ear and then glue each one to the top of the bunny head. Let dry. You can pose them and angle them anyway that you like.

My granddaughter used 2 different ribbons to make the bows around the bunny’s neck using a satin ribbon and a pink sheer ribbon. She glued them into place. Flip it over and add the large cotton ball on the back to serve as the bunny’s tail. A pom-pom will work too!

If you want to protect the painted finish you’ll want to take the wood blocks outside after all of the paint has dried (but before you add the ears and bows) and spray it with 1-2 light coats of a clear acrylic spray sealer. We like using the Modge Podge Spray Sealer but any brand will do. This step is totally optional.

* This post contains affiliate links. If you make a purchase, we may or may not receive a small commission which helps to support this site. Thank you!

Shelly's Signature

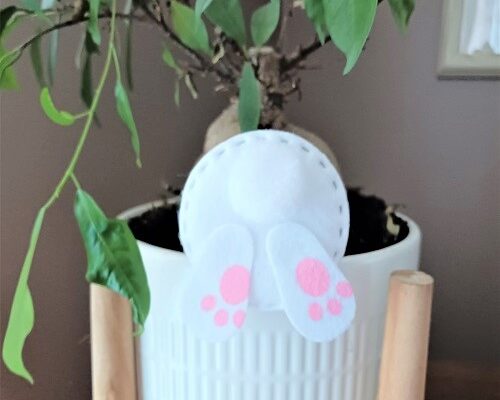
Easter Bunny Butt Houseplant Pot Hugger – Dollar Tree Crafts

Easter Bunny Butt Houseplant Pot Hugger – Dollar Tree Crafts

This Easter Bunny Houseplant Pot Hugger is super easy-to-make! You can make dozens of them in just one day!!! This pot hugger gives the appearance that the Easter Bunny is digging through the dirt looking for carrots with his butt up in the air. So 

How to Make Faux Carrots for Easter Decorating

How to Make Faux Carrots for Easter Decorating

I enjoy decorating for the Easter holiday but I don’t go overboard. I like to change out a few of our linens and add a few small decorator pieces throughout the home. As a crafter, I’m always looking for new little Easter craft projects to 

Easter Bunny Butt Carrot Patch Wood Crate Craft Project

Easter Bunny Butt Carrot Patch Wood Crate Craft Project

This Easter Bunny Butt Carrot Patch Wood Crate will take you 2 afternoons or a weekend to make. It was made using mostly supplies purchased from the Dollar Tree store. It’s adorable! If you want to save time you can purchase a wood crate from Amazon…we made our’s from unfinished craft sticks. You will use a combination of hot glue and wood glue. Here’s a list of everything that you’ll need.

Easter Bunny Butt Carrot Patch Wood Crate Craft Project

* This post contains affiliate links.

Dollar Tree –  1 pack of faux carrots, 1 pack of felt bunny butts, 1 pack of unfinished wood craft sticks, acrylic craft paint, paint brushes, wood glue and glue sticks.

Things to have on hand – 1-2 sheets green construction paper, a paper shredder, one popsicle wood stick, small alphabet letter rubber stamps, black ink pad and scissors.

We built the wood crate using unfinished craft sticks (larger than popsicle sticks). We were able to easily cut them using scissors. You can make the crate any size that you like. Snip off the rounded end of each stick. We have 3 full length sticks making up each long side of the crate and 3 sticks that were cut down to 2/3 of their original size for the short ends. The bottom will depend on how many sticks you use for the sides. This is to just give you an idea of what you’ll need. Save all of the pieces that you cut off. Use those pieces to reinforce the inside of the crate at the corners. Everything needs to be glued together first with hot glue to hold things in place and then reinforced with wood glue to get a permanent bond. Let it dry.

The crate was painted with 3 different colors of acrylic paint: white, black and light gray. You want to “mottle” all 3 colors together while painting…so apply each one while the paint is wet to give it that textured weathered look. Let dry.

I put a large sheet of green construction paper through our paper shredder to come up with the “grass”. You can purchase shredded paper at the Dollar Tree in their gift supplies aisle. Fill up your crate 80% full with the shredded paper. Use hot glue to glue the bunny butt onto the center front of the crate and pop in 3-4 of the carrots.

Carrot Patch Sign – This was made using a wood popsicle stick and a scrap piece of a craft stick cut down to size. Glue them together to make a sign post. Painted it white (2 coats of paint). Then went around the edges with gray paint to give it a weathered outline. Once it was dry…I used small alpha letter rubberstamps and black ink to stamp on the words Carrot Patch. Let it dry. Then use wood glue to adhere it to the back inside of the crate.

* This post contains affiliate links. If you make a purchase, we may or may not receive a small commission which helps to support this site. Thank you!

Shelly's Signature

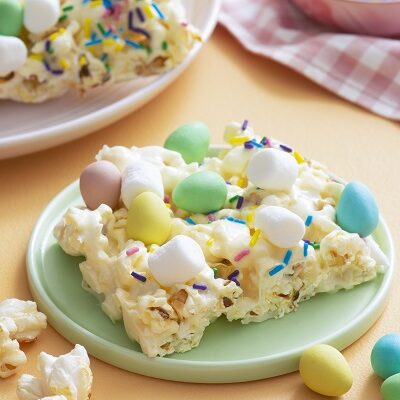
Popcorn Easter Bunny Snack Bars Recipe

Popcorn Easter Bunny Snack Bars Recipe

These Popcorn Easter Bunny Snack Bars would be the perfect homemade treat to add to those Easter baskets this year. They’re easy to make and each batch of the recipe will yield approximately 16 bars. The recipe is courtesy of our friends at Popcorn.org. Tips 

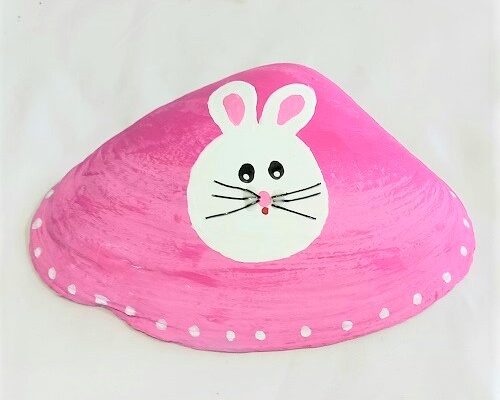
Coastal Beach Hand Painted Easter Bunny Clam Seashells

Coastal Beach Hand Painted Easter Bunny Clam Seashells

These hand-painted Easter Bunny clam seashells are super easy to make. You don’t have to be artistically talented to make them! The perfect craft project for older kids and adults that doesn’t cost a lot of money. You can do a simple design like the