
How many of you enjoy inexpensive DIY craft projects? I know that I do! I really enjoy going out and shopping for cheap craft supplies and then sitting down to create something new for my home. * The writer personally purchased all of the items from the Dollar Tree store. This post is NOT sponsored … [Read more...] about DIY Dollar Tree Patriotic Door Wreath for July 4th
DIY Projects
DIY Wood Shadow Boxes from Old Desk Drawers

Today I have a fairly easy DIY craft project for you and you can have them completed in just one afternoon. What's really nice about this project is that you'll be upcycling (recycling) old wooden desk drawers or small kitchen cabinet drawers. Once you've converted them...you can turn them into … [Read more...] about DIY Wood Shadow Boxes from Old Desk Drawers
DIY Coastal Style Terracotta Flower Pots

I have a lot of indoor houseplants and I have to admit, I'm pretty good at growing them. Back in late Spring I decided to grow some starters and last week they were finally rooted and ready to be planted. I decorate my home in a coastal and beach style and needed some new flower pots. Since I can … [Read more...] about DIY Coastal Style Terracotta Flower Pots
Craft Project DIY Seashell Trinket Dish and Soap Dish

I love the coastal life and I love everything about it. For me, I love sitting on the beach watching the waves roll in, the sun hitting my face and there is nothing like breathing in the fresh sea air. If I could spend all of my time on the beach, I certainly would! One of the things I enjoy … [Read more...] about Craft Project DIY Seashell Trinket Dish and Soap Dish
How to Get Rid of Fruit Flies with DIY Fruit Flies Trap

For the past few weeks I've been having an issue with fruit flies. Every year when I'm busy harvesting fruits and veggies from our garden...the fruit flies appear. This year, those buggers are worst than ever and driving me nuts! Seriously, I can't stand fruit flies and hate them with a … [Read more...] about How to Get Rid of Fruit Flies with DIY Fruit Flies Trap
Front Porch Lighting with Waterproof LED Strip Lights

Last year we gave our front porch a total makeover! My husband tore down the old porch columns and built custom ones to replace them. We resurfaced the cement flooring, added a white picket porch railing, painted and then added some new furniture items. The only thing we needed to do was add some … [Read more...] about Front Porch Lighting with Waterproof LED Strip Lights
DIY Metal Plant Stand Makeover!
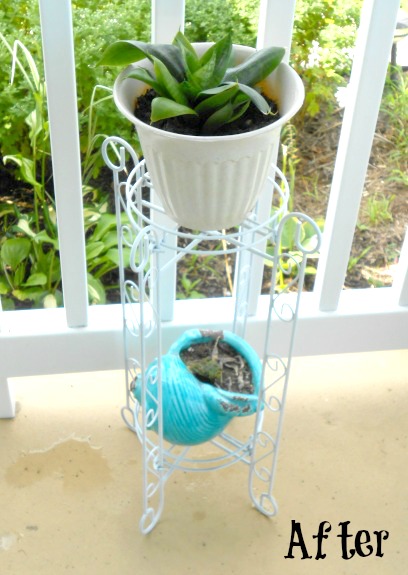
If you've been reading this blog for the past few years or even the past few months, you'll already know that I consider myself to be frugal and crafty. I love to decorate my home in a beach & coastal style, but let's face it, these days home decor can be really expensive! My one neighbor moved … [Read more...] about DIY Metal Plant Stand Makeover!
Easy DIY Home Renovation Ideas

Home renovation doesn’t have to be scary, expensive, and time-consuming. You can knock out a few home renovation projects over the weekend! Read on for some simple ideas that will update your space. 1. If your kitchen needs an upgrade but you don’t want to invest in brand new cabinetry, refinish … [Read more...] about Easy DIY Home Renovation Ideas