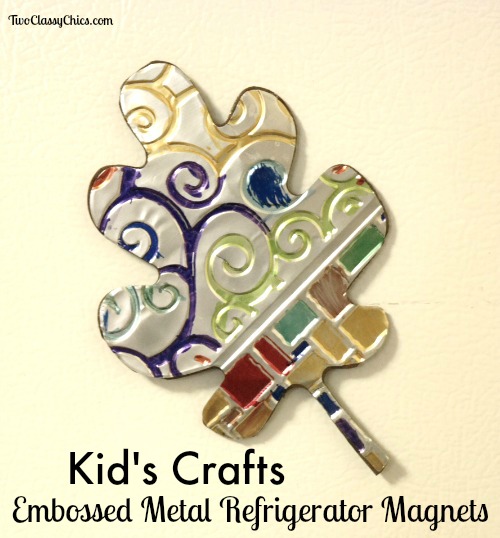
This week's installment of "Crafting with Kids" is a project that is geared towards the older kids, teens and adults. I would say that children ages 6 and up could make these with adult supervision. My 6 1/2 year old grand daughter and I made several of these embossed metal refrigerator magnets … [Read more...] about Kid’s Crafts: Embossed Metal Refrigerator Magnets
crafts
Cotton + Steel Adult Coloring Book

If you've been following this blog for the past 6 months or so...you'll already know that many of the writers here on the blog love the adult coloring book trend. While I didn't jump on the trend myself right away...I did jump on it recently and have found it totally addictive as a crafter for … [Read more...] about Cotton + Steel Adult Coloring Book
Craft Project – 3 Snowmen in a Wash Tub
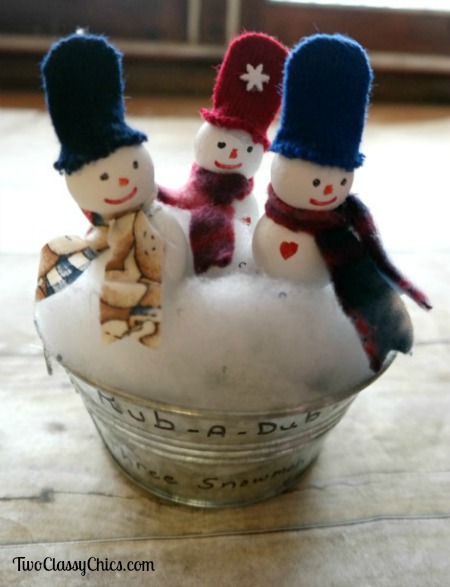
The holidays are over but that doesn't mean that you have to put away all of your winter theme decorations or that you have to stop making them. Nope, not at all. During the winter season I decorate with snowmen all season long! I'll put them out the end of November and I'll let them out until the … [Read more...] about Craft Project – 3 Snowmen in a Wash Tub
Craft Project – Clothespin Snowflake Christmas Tree Ornaments

For the past few months I've been featuring various craft projects on the blog that you can do with the kids. This one is one you can do with older kids, but you will need to supervise them while they are making them. In addition, you'll need to do this one outside where you have some fresh air … [Read more...] about Craft Project – Clothespin Snowflake Christmas Tree Ornaments
Holiday Crafting – Personalized Satin Ribbon Ornament Hangers

A few months ago I received the Epson LW-300 Label Printer and the Epson LabelWorks Iron-on Kit to review and you can check out my original review HERE to read about all of the cool features this portable ribbon and label printer has. To refresh your memory...this label printer features: * … [Read more...] about Holiday Crafting – Personalized Satin Ribbon Ornament Hangers
Creative Photography Editing, Publishing and Sharing #BestLifeEver

Note: The reviewer has been compensated in the form of a Best Buy Gift Card and/or received the product/service at a reduced price or for free. Photography...it's something I just LOVE but not real good at. I've been taking photographs all of my life and over the years...I've been really … [Read more...] about Creative Photography Editing, Publishing and Sharing #BestLifeEver
Decorate Your Garden with DIY Stepping Stone Kits
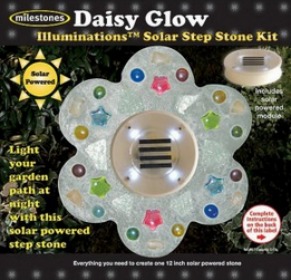
For the past 2 years my husband and I have been putting a lot of time and money into the landscaping around our home. We have a lot of plans for our property and after 2 years...I would estimate that we have accomplished 60% of them. Now that the major landscaping tasks have been completed, it's … [Read more...] about Decorate Your Garden with DIY Stepping Stone Kits
DIY Coastal Beach Style Photo Frames

I love decorating my home in the beach cottage and coastal styles. While I like some nautical items...I am really drawn more to the simple coastal & beach style. Last month I ran into a bargain sale and picked up 4 of these Frugal Finds. These wooden photo frames had some slight damage to … [Read more...] about DIY Coastal Beach Style Photo Frames