Tag: crafts

Coastal Crafts: Seashell Covered Wood Seahorse Wall Art

Coastal Crafts: Seashell Covered Wood Seahorse Wall Art

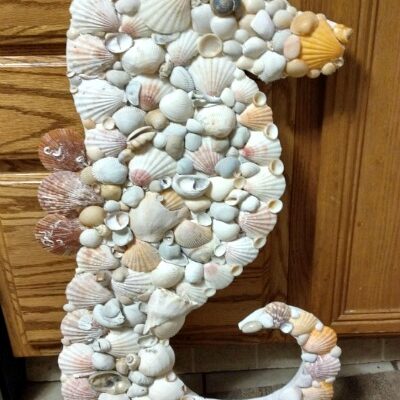
I’ve been collecting seashells for 35+ years. When I say collecting, I’m talking about seashells that I’ve personally picked up off of a beach somewhere during our travels. I have 6 boxes of labeled shells that are for my collection and then I have 8-10 

DIY Craft Project Tic-Tac-Toe Board Game

DIY Craft Project Tic-Tac-Toe Board Game

How many of you enjoy the old classic games that we used to play as kids? I know that I do! Well, I wanted to share my love for some of those old classic games with my grandchildren and decided to make my own Tic-Tac-Toe 

DIY Crafts: Cute Snowman Wooden Blocks

DIY Crafts: Cute Snowman Wooden Blocks

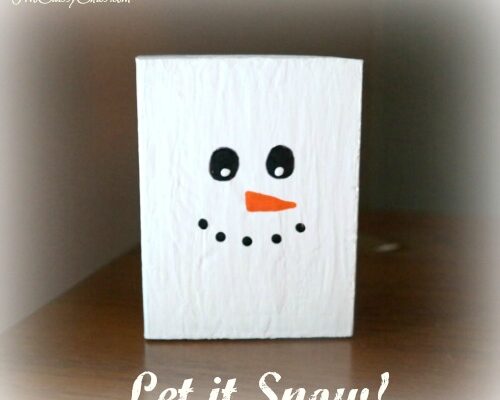
DIY Crafts - Cute Snowman Wooden BlocksFor the past few months my husband has been remodeling two rooms in our home. As you can imagine, there are a ton of little pieces of scrap wood leftover from his remodeling projects. Instead of tossing them away, I’ve been coming up with quick and easy craft projects that utilize scrap pieces of wood!

The DIY Snowman Wooden Blocks craft project that I’m featuring today is super-easy to make! I’ve been making them in various sizes ranging from 5″ tall by 1″ thick by 3″ wide. I’ve made a few that are smaller than that and a few that are larger than that, depending on the scraps of wood that I’m using. All of them are made from pine wood.

To start off, you’ll want to collect some scrap wood in a variety of sizes. You’ll want to use rectangular shapes and you’ll want to make sure the edges are cut straight, so that they stand up on their own. You’ll want to use some sandpaper and sand the edges and sides until they’re smooth.

DIY Crafts - Cute Snowman Wooden Blocks

DIY Crafts – Cute Snowman Wooden Blocks

Wood Blocks (see notes above)
Acrylic Paints – White, Black and Orange
Paint Brush, Water Dish, Paint Palette
Newspaper and Paper Towels
Clear Acrylic Spray Sealer – Glossy Finish

Cover your work surface with newspaper and prepare your wooden blocks as described above.

Paint two coats of white acrylic paint on all sides of the block, allowing each coat to dry for about 30 minutes, before adding the second coat. Allow to fully dry before proceeding.

Using black acrylic paint, add two black oval-shaped eyes and then dot on small black circles to make the mouth. We just dipped the end of our paint brush into the black paint and dotted them on. Use orange acrylic paint to add the triangular carrot-shaped nose. Let dry for 30 minutes. Dot on small white circles in the bottom half of his black eyes to add depth. Left dry for one full hour.

Lay newspaper down outside and lay your blocks on top. Lightly coat each side of the wooden blocks with the clear acrylic spray sealer. If you’re only going to display them indoors, one coat will be enough. If you’re going to display them outdoors, you’ll want to add two-three coats of the clear sealer. Let dry for 8 hours before displaying.

* This post contains affiliate links. If you make a purchase, we may or may not receive a small commission which helps to support this site. Thank you!


Shelly's Signature

Adult Coloring – Save Money with InkCraft 100 Gel Pens Refill Kit

Adult Coloring – Save Money with InkCraft 100 Gel Pens Refill Kit

Over the past 3 years I’ve shared over 30+ adult coloring book reviews here on the blog, along with several reviews of my favorite gel ink pens. Some of these reviews were sponsored by various companies and some were on items that I’ve personally purchased. 

DIY Project Wishing Well Garden Planter – Coastal Style

DIY Project Wishing Well Garden Planter – Coastal Style

Last month my mom gave me an old wooden wishing well flower planter that she picked up at a local yard sale for $1.00. She was going to sit it out on her deck, but then decided to give it to me. She decorates in 

Star Wars Build-A-Scene Papercraft Kit

Star Wars Build-A-Scene Papercraft Kit

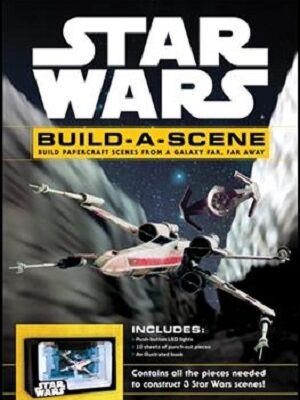
Star Wars Build-A-Scene KitMy husband has been a HUGE fan of the Star Wars genre of movies since the mid 1980’s. He has seen all of the movies at least 50 times and every time there is a new release, he’s at the theater at midnight to see it.

Besides being a Star Wars movie fan, he collects all kinds of Star Wars items. He has amassed over 350+ items in his collection and it grows every week. When you walk into our family’s game room, you see Star Wars every where!

* Complimentary kit received for review. Affiliate links are in the post. See our disclosure at the bottom for more information.

Recently he received a complimentary Star Wars Build-A-Scene Papercraft Kit with Book to review for all of you. This kit is for ages 14 and up.

Star Wars Build-A-Scene Papercraft Kit

Star Wars: Build a Scene – Build Papercraft Scenes from a Galaxy Far, Far Away by Benjamin Harper and Claudio Dias Kit w/ 48 page booklet.
Publisher: Becker & Mayer Books
ISBN: 9780760353158
Facebook: Quarto Knows

Star Wars: Build a Scene Papercraft Kit includes everything you need to make iconic papercraft scenes from the Star Wars universe. The kit provides ten sheets of punch-out pieces and step-by-step instructions for creating three detailed 5″ x 8″ x 4″ paper dioramas, including one with LED lights.

Star Wars Build-A-Scene Papercraft Kit

Re-create the drama of Obi-Wan Kenobi and Darth Vader’s duel on Mustafar from Revenge of the Sith; the nail-biting trench battle on the Death Star from A New Hope; and the Kylo Ren and Rey lightsaber fight in the snowy forest of the Starkiller Base from The Force Awakens.

The accompanying book includes illustrated assembly instructions for the models, along with three essays on each classic scene and how they were designed and filmed. Each model takes roughly 2–4 hours to build.

Star Wars Build-A-Scene Papercraft Kit

Hubby decided to build the “The Trench Run” scene first. All of the paper pieces are included in the kit and the building instructions are in the book. All he needed was glue and he was off and running. The instructions on how to punch out and glue together all of the pieces is pretty easy to understand…there are photos and diagrams to help you along. This particular scene took him about 4 hours to complete and then he left it dry overnight. As you can see in our photos, it turned out really nicely.

So, does hubby love this kit? You bet he does! He said it brings back memories from his childhood when he used to sit down and build model cars, bikes and spaceships for hours on end. This is for the BIG BOYS to enjoy and he loves it!

I think it’s important that we get the men in our lives kits like this to work on, especially older men. It keeps their minds busy, helps to keep their eye-to-hand coordination strong and all kinds of other things. My husband isn’t into puzzle books, so this is a nice alternative to keep him busy! The holidays are coming and winter will come along with it. These kits are perfect for the season!

* This post contains affiliate links. If you make a purchase, we may or may not receive a small commission which helps to support this site. Thank you!
Shelly's Signature

Disclaimer: Shelly received complimentary products to feature in this blog post. Shelly did not receive any monetary compensation. Shelly’s thoughts, opinions and words are 100% her own unbiased opinion. Your thoughts may differ.

Disney Zootopia Crochet Book and Kit

Disney Zootopia Crochet Book and Kit

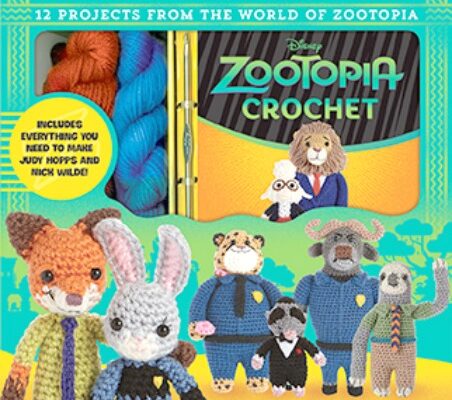
I’ve was born to craft. Seriously, I been an avid crafter since the age of 8. I’ve always enjoyed the various arts and craft projects I would make at school, in Girl Scout’s and in my church youth group. That love for arts and crafts 

Cute and Easy Baby Gender Reveal Party Ideas!

Cute and Easy Baby Gender Reveal Party Ideas!

Every time I turn around there is a new baby shower to host or a new one to attend. All of my friends (including myself) have been having babies the past few years and one hot trend among us all is…Baby Gender Reveal Parties! If