
The kids are back in school and the Christmas holiday is quickly approaching. Do you need a little handmade gift for that school teacher on your gift-giving list? If so, we have a very easy art and craft project for you today. If you paint the designs onto larger sized seashells they can be used as … [Read more...] about School Themed Painted Clam Shells Seashell Designs Teacher’s Gifts
craft projects
Bumble Bees, Birds and Flowers Painted Seashell Designs

These bumble bees, birds and flowers hand-painted seashells would make GREAT garden yard art, front porch art or place them in your backyard around the swimming pool. They make great table decor during backyard barbecues too! The designs are easy-to-replicate and you can whip up several of them in … [Read more...] about Bumble Bees, Birds and Flowers Painted Seashell Designs
Coastal Beach Starfish Cabinet Knobs
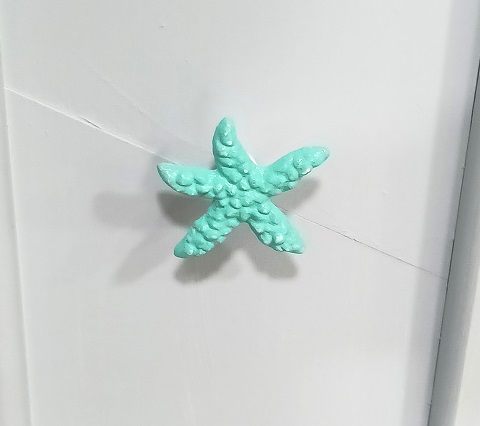
Two months ago we started the remodeling project in our laundry room. It's a small room that houses our washer, dryer, 3 small shelves and there's a small closet. Inside that closet I like to keep my laundry and cleaning supplies. This entire laundry room is the size of a small guest bathroom, it's … [Read more...] about Coastal Beach Starfish Cabinet Knobs
5 Easy Tropical Beach Designs Hand Painted Seashells
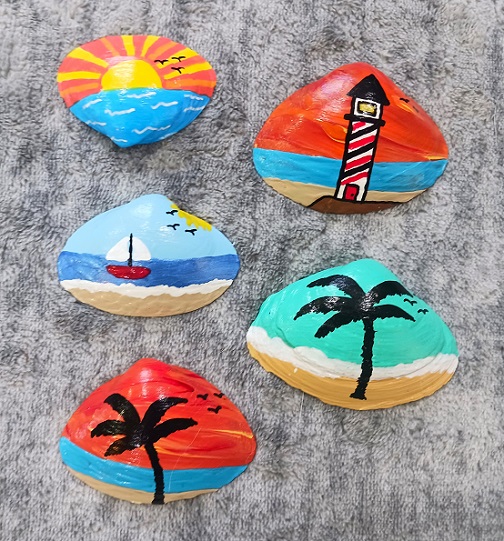
Hosting a fun summer party or just looking to add some new home decor accents? Live at the beach or have some seashells laying around the house? If so, I think you'll enjoy our new arts and crafts project for this week. These 5 tropical beach designs were hand painted onto small and medium size clam … [Read more...] about 5 Easy Tropical Beach Designs Hand Painted Seashells
Hand Painted Pac-Man Seashell Birthday Party Favors
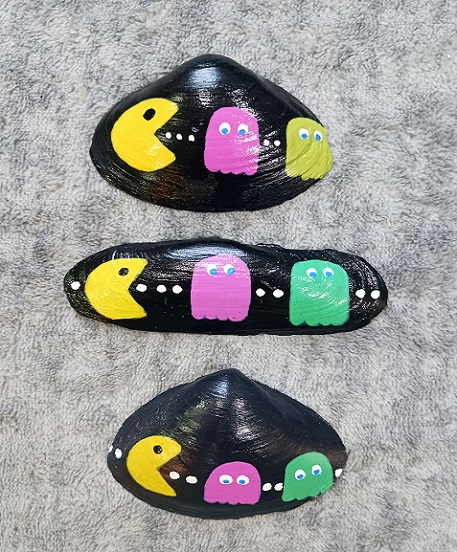
My grandson loves playing the classic Atari game called Pac-Man. Out of thousands of video games available...his favorite is Pac-Man. As a grandparent who grew up playing it....I approve! Prince has a birthday coming up and the theme will be Pac-Man. Hence...why I painted over a dozen of these … [Read more...] about Hand Painted Pac-Man Seashell Birthday Party Favors
Decoupage and Painted Lighthouse on Large Scallop Shells
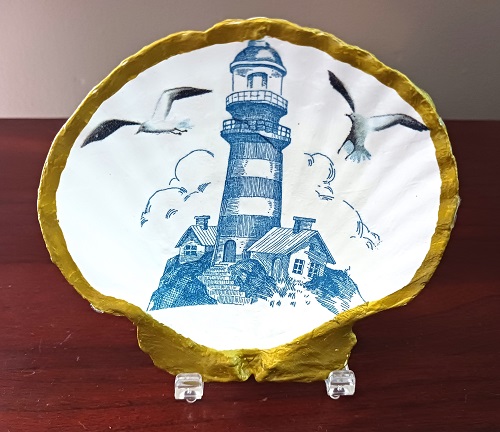
Looking for an easy beach and coastal themed craft project to make this weekend? If so, check out this pretty lighthouse that was decoupaged onto a large scallop shell seashell. You can make several of them in just one weekend with only a few different art and craft supplies needed. A great … [Read more...] about Decoupage and Painted Lighthouse on Large Scallop Shells
The Best Acrylic Paint Markers for Arts and Craft Projects

I've been crafting all of my life. I remember the first little arts & craft project that I made as a Brownie Girl Scout 51 years ago. We made paper snowflakes and covered them with glitter. Over the decades I've made thousands of different projects. I've shared hundreds of them on the TCC blog. … [Read more...] about The Best Acrylic Paint Markers for Arts and Craft Projects
Doodle Zen Tangle Art Hand Painted Clam Shell Seashell Designs
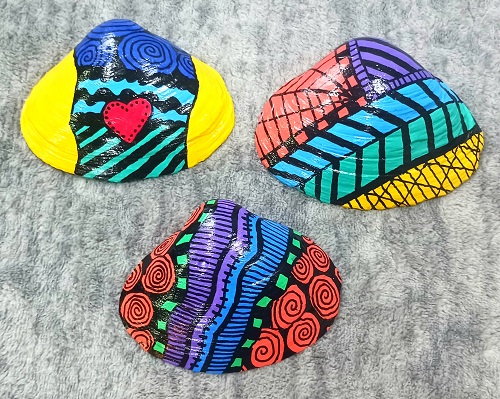
Do you enjoy doodling? What about Zen Tangle Art? If you answered yes to either of those questions I think you'll like these 3 easy hand-painted designs. Each one was painted onto a genuine clam shell seashell but you could certainly paint them onto smooth river rocks. No pattern or template is … [Read more...] about Doodle Zen Tangle Art Hand Painted Clam Shell Seashell Designs