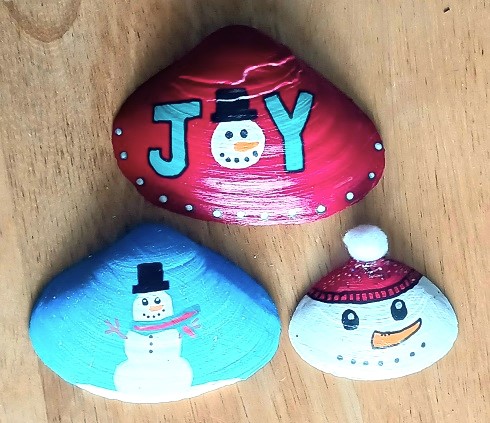
During the holiday and Christmas season I decorate our home in a coastal cottage beach-style. Every year I look forward to putting up our Christmas tree and hanging 300+ coastal style ornaments on it. Our front and back doors have beach themed wreaths and all kinds of other holiday decor is in the … [Read more...] about Painted Snowman Holiday Design Clam Shells Seashells
craft projects
Painting and Decorating Broken Clam Shells Seashell Designs
Finding only broken clam shells on the beach? Have a lot of medium-sized and large-sized broken clam shells in your collection? If so, you can still use them! Turn them into pretty works of art to decorate your home, outside gardens or for kidness shells and rock drops! All these designs are … [Read more...] about Painting and Decorating Broken Clam Shells Seashell Designs
Chicken and Rooster Designs Painted Clam Shells Seashells

Are you a fan of chickens and roosters? If so, you'll love these easy-to-paint designs! You won't need a template or pattern to make them. It's a great beginner's project. You can paint the designs on seashells or smooth river rocks. All four of these painted clam shells were made in just one … [Read more...] about Chicken and Rooster Designs Painted Clam Shells Seashells
3 Beautiful Zentangle Doodling Painted Clam Shells Seashells
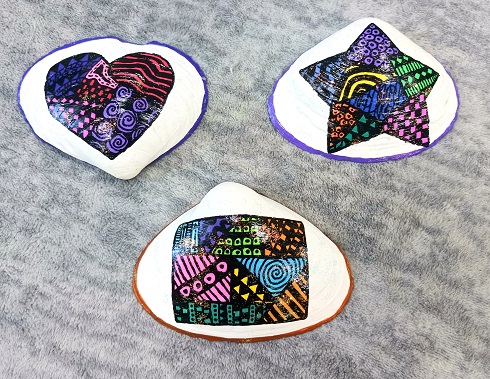
Love to draw and doodle? How about painting? If so, you should try your hand at Zentangle Art. I really enjoy it and every design that I sit down to make is unique! Anyone can do Zentangle! It's all about letting your creativity flow. It's about the designs that you personally like. Often times I … [Read more...] about 3 Beautiful Zentangle Doodling Painted Clam Shells Seashells
Beach Vacation Painted Clam Shells Seashell Designs
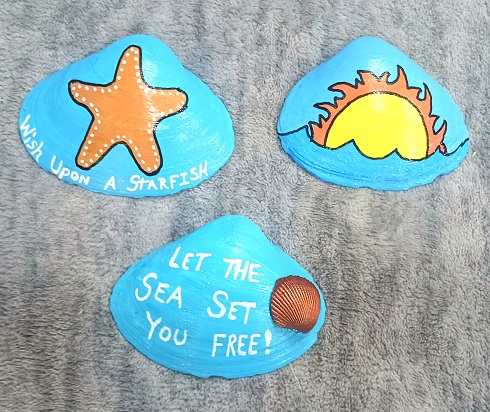
Heading to the beach for vacation? Were you on vacation and brought home some clam shells? Live there? Lucky you! Here are 3 easy to make painted beach vacation designs that you can whip up this weekend! All designs were painted on medium sized clam shells collected from the beach. Enjoy painting … [Read more...] about Beach Vacation Painted Clam Shells Seashell Designs
Painted Patriotic Seashells for Veteran’s Day
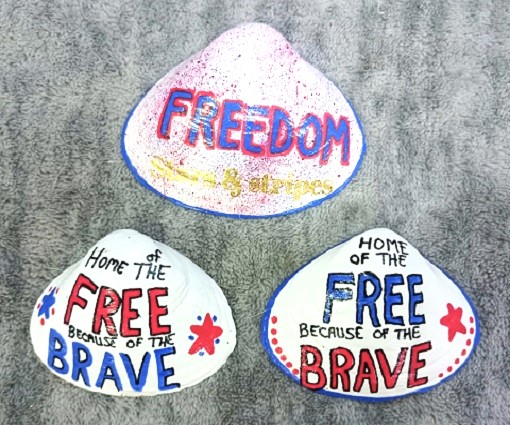
Veteran's Day is just around the corner so I decided to paint a dozen patriotic themed clam shells to leave around my community to show my appreciation to our veterans. I like to "drop" these designs at community Veteran's Day events and at memorials in our hometown. You can leave them at Veteran's … [Read more...] about Painted Patriotic Seashells for Veteran’s Day
Hand Painted Halloween Themed Seashells Party Decor

Hosting a Halloween party this year? Looking for some cute little Halloween themed home decor accents that you can easily make yourself? If so, you'll love this project! You can paint the designs on clam shells, oyster shells, smooth river rocks or other items. You don't need any patterns or … [Read more...] about Hand Painted Halloween Themed Seashells Party Decor
Ghost, Pumpkin and Candy Corn Painted Halloween Seashells Party Decor

Last month I got to work on hand painting a dozen clam shellls and seashells for an upcoming Halloween party. These cuties will be used as table decor and party favors. All of them are super-easy to make and ONLY require a few basic art supplies. The designs can be painted onto seashells, smooth … [Read more...] about Ghost, Pumpkin and Candy Corn Painted Halloween Seashells Party Decor