These adorable hand painted and decoupage coastal beach Christmas ornaments are easy to make! You can use oyster shells or mussel seashells to make them. You can whip up several of them in just one weekend. You'll need to collect seashells from the beach or purchase them from Amazon. Two of the … [Read more...] about Hand Painted and Decoupage Coastal Beach Oyster Shell Christmas Ornaments
craft projects
EASY Hand Painted Christmas Themed Seashell Decor

Over the past 12 years I've published hundreds of seashell and beach crafts for our readers to enjoy. With Christmas just around the corner I wanted to post these 4 easy to make designs that were hand painted onto small clam shells aka seashells. You don't need to be a professional artist or crafter … [Read more...] about EASY Hand Painted Christmas Themed Seashell Decor
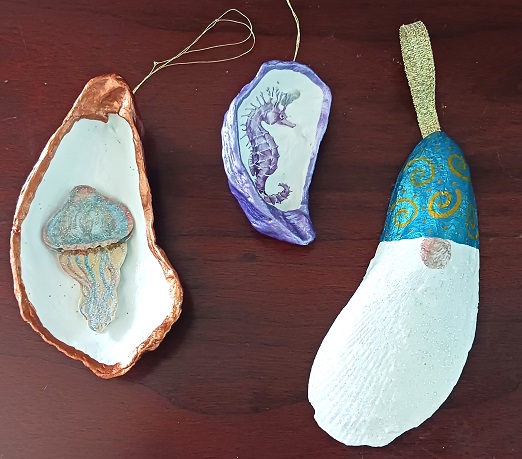
Painted Oyster Shell Santa and Gnome Christmas Ornaments

Decorate your Christmas tree in coastal and beach ornaments? Do you have some oyster shells leftover from vacation? If so, you're going to enjoy this easy-to-make craft project! All you need are oyster shells, craft paint, glitter, paint brushes or paint markers, clear sealer and hanging cords. … [Read more...] about Painted Oyster Shell Santa and Gnome Christmas Ornaments
Hand Painted Sand Dollar and Starfish Christmas Tree Ornaments
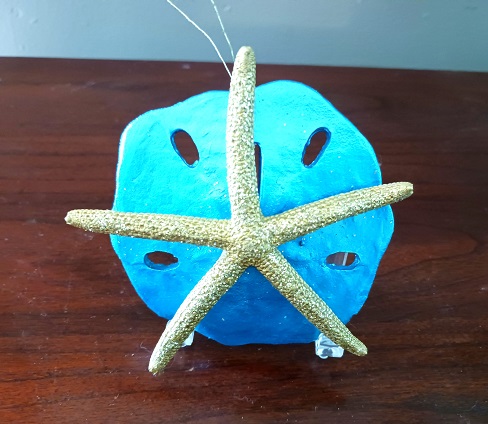
Every year I put up a 7 foot tall Christmas tree that is 100% decorated with coastal and beach Christmas ornaments. My tree topper is an Angel (beach theme) and my tree collar is one that my husband made for me. Guests who visit our home during the holiday season pay me a ton of compliments on our … [Read more...] about Hand Painted Sand Dollar and Starfish Christmas Tree Ornaments
Decoupage and Painted Pet Themed Christmas Holiday Decor
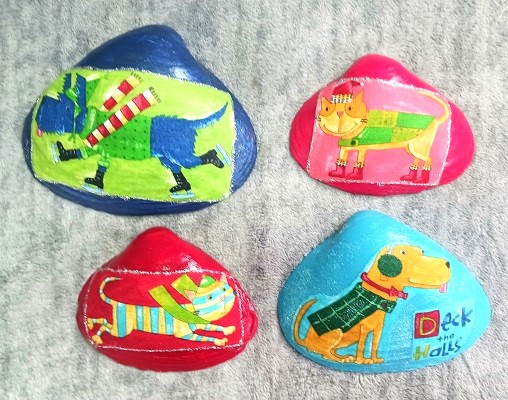
Last month I made a dozen of these pet themed Christmas and holiday decor seashells. If you don't have seashells available to you, you can certainly make the project using medium sized smooth river rocks or ceramic tiles. For this arts and craft project you'll need clam shells, acrylic craft paints, … [Read more...] about Decoupage and Painted Pet Themed Christmas Holiday Decor
ZenTangle Designs Painted Christmas Themed Seashells

New to Zentangle art? If so, these painted Christmas themed seashells would be a great project for beginners...like me! For this art and crafts project I used 4" and 5" clam shells seashells that I collected from the beach. You'll then need a few basic painting supplies to make them. You can make … [Read more...] about ZenTangle Designs Painted Christmas Themed Seashells
Christmas Diamond Art Refrigerator Magnets Craft Kits
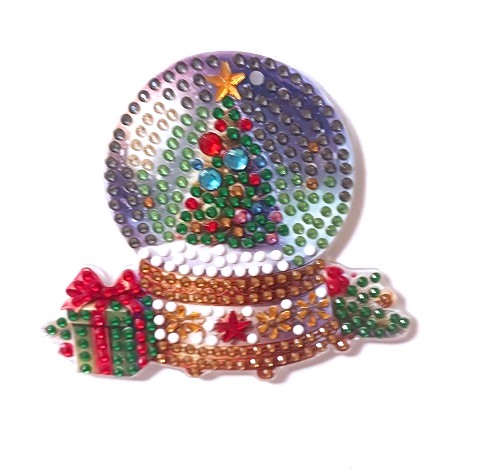
Looking for a craft project to make this holiday season to give out as handmade Christmas Gifts? Diamond Painting has been a BIG craft trend for the past 5-10 years and getting even more popular! It's a craft medium that anyone can do and it's an affordable hobby for many! You can do small and … [Read more...] about Christmas Diamond Art Refrigerator Magnets Craft Kits
Gnome Design Mussel Seashell Christmas and Holiday Ornaments

Gnomes have really gained in popularity over the past few years. Every time I walk into a retail store I see Gnome home decor and garden accents. I have to admit...they're cute!!! This arts and crafts project is easy to make...you can make up a dozen in just one weekend using Mussel Shells collected … [Read more...] about Gnome Design Mussel Seashell Christmas and Holiday Ornaments