Tag: craft projects

Dollar Tree Stacked Foam Pumpkins Craft Project

Dollar Tree Stacked Foam Pumpkins Craft Project

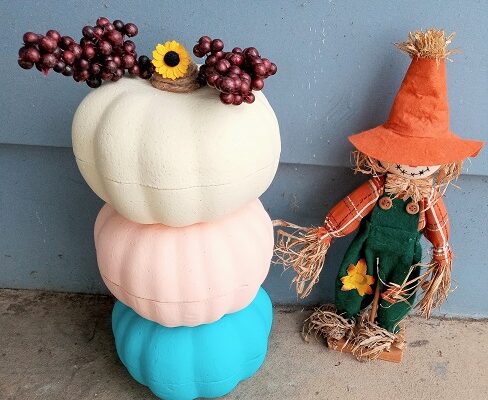
Looking for an easy and affordable craft project for the Autumn and/or Halloween season? If so, head on over to your local Dollar Tree to pick up the supplies to make this adorable Stacked Foam Pumpkins fall decoration. Complete how-to’s on how to make it 

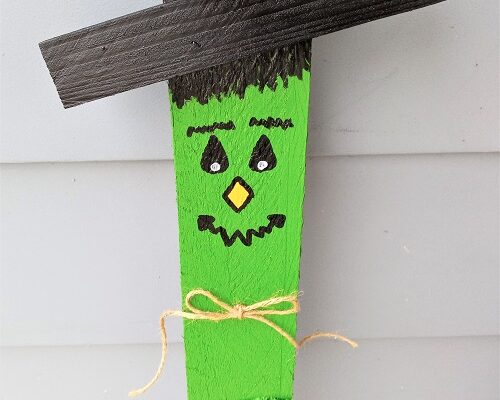
Halloween Frankenstein Porch Leaner Made from Upcycled Pallet Wood

Halloween Frankenstein Porch Leaner Made from Upcycled Pallet Wood

Pallet Wood is cheap wood that you can upcycle into new projects to use in and outside of your home. We like to tear apart the pallets and use them in craft projects like the one that I’m featuring today on the blog. This Frankenstein 

Autumn Maple Leaf Decoupage Scallop Seashells

Autumn Maple Leaf Decoupage Scallop Seashells

Autumn is here and I’m excited to work on some new fall themed craft projects. I’m hosting a little get together next weekend and made these adorable decoupage scallop seashells with maple leafs on them. They were super easy-to-make and I made a dozen of them in one afternoon.

You can purchase scallop shells from Amazon, Dollar Tree, General Craft Supply Stores and you can certainly collect them from the beach. Make sure you wash them in warm, soapy water. Rinse with clean water and air dry. They need to be completely dry!!! I picked up a pack of Autumn themed paper napkins from my local Dolllar General Store which I used for the design.

* Post contains affiliate links.

Autumn Maple Leaf Decoupage Scallop Seashells

Autumn Maple Leaf Decoupage Scallop Seashells

Scallop Seashells
Prefered Paper Napkins (see above)
Scissors
Ivory Acrylic Craft Paint
Paint Brush, Water Dish, Paper Towels
Gold Metallic Acrylic Paint Pen
Mod Podge in a Glossy Finish
Foam Brush

Base coat each scallop seashell with 2 coats of ivory acrylic craft paint. I liked using the ivory color to reflect Autumn and it went better with the color of the maple leaves. You could use white depending on the leaf design/colors that you’re using. Let dry.

While the shells were drying I cut out the maple leaf design from the paper napkins. The napkins had an allover pattern of various leaves. I just wanted the pretty maple leaves. You don’t have to trim exactly on the outline because the background color of the paper napkins was ivory. It disappeared completely on the shell once I coated in Mod Podge…so I trimmed about an 1/8 to 1/4″ around each leaf.

Dip a foam brush in the Mod Podge Sealer and coat the painted side of the shell. Lay the cut-out paper napkin leave on top. Use the foam brush to smooth it out to remove wrinkles and air bubbles. Brush the entire top of the shell with the Mod Podge covering it completely. Let dry.

Use a Gold Metallic Paint Pen to add the gold metallic edging to each shell. I think it gives it a nice finished look. Let dry. Get the Mod Podge out again and give the entire shell a finall allover coat. Let dry overnight or for atleast 8 hours to allow the sealer to cure.

These adorable seashells can be used as decorations inside or outside of the home. I’m using them as place settings at my Autumn Fall tea party that I’m hosting. My guests can then take their pretty seashell home with them. Cute and easy!!!!

* This post contains affiliate links. If you make a purchase, we may or may not receive a small commission which helps to support this site. Thank you!

Shelly's Signature

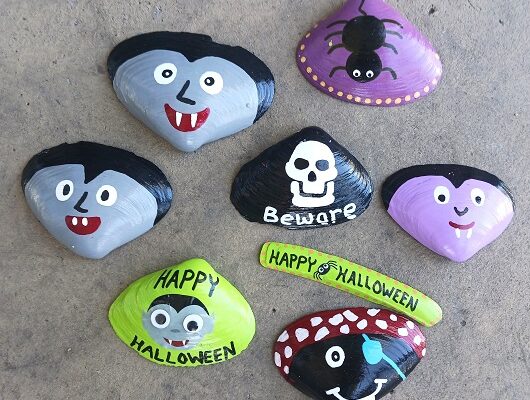
15 Painted Halloween and Autumn Seashell Designs

15 Painted Halloween and Autumn Seashell Designs

Time to decorate for the Autumn season and Halloween. We made 15 different designs that were painted onto large clam shells and oyster shells. These same designs can be painted onto smooth river rocks too. All of them are great for beginners, no artistic experience 

Kids Crafts Painted Halloween Designs Seashells

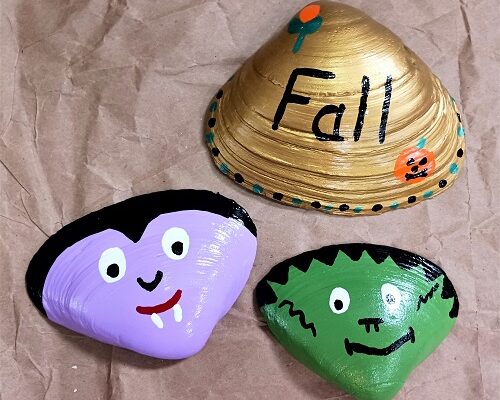
Kids Crafts Painted Halloween Designs Seashells

Got some seashells sitting around from summer vacation? Live near a beach? If so, here’s a fun craft project to keep the kids busy this fall. These hand painted Halloween design seashells are super easy to make! We made them using 4″ and 5″ wide 

Autumn Decorating: Decopauge Foam Pumpkins for Fall

Autumn Decorating: Decopauge Foam Pumpkins for Fall

Autumn Decorating: Decopauge Foam Pumpkins for FallThese Decopauge Foam Pumpkins are super-easy to make! You can make several of them in just one weekend. Plus, they’re affordable! Each one will cost you less than $4.00 to make. A nice Autumn and Fall craft projects for older children, teens, adults and seniors to do.

** This post contains affiliate links.

Dollar Tree Shopping List: I picked up the white foam pumpkin from DT for $1.25 each, a pack of paper napkins for $1.25 per pack, foam brush and a small bottle of Modge Podge Decopauge Sealer with a glossy finish.

On Hand Supplies: Scissors, Vanilla Acrylic Craft Paint, Tacky Glue and a scrap piece of Jute rope.

The foam pumpkin was originally solid white…like styrofoam. I used a foam brush and applied one coat of vanilla acrylic craft paint over the entire pumpkin. I selected vanilla as the color to work with the color scheme within the paper napkin.

While it’s drying you want to separate the 2-layers of the paper napkin that you’re using. I selected a design that features wheat stalks, ivy and pumpkins…purchased from DT. Toss the plain layer away. You only need the printed layer of the paper napkin.

Use scissors and trim around the desired design. You can use the entire design or bits and pieces of it. Whatever you prefer and according to the design that you’re working with. You want to work in small sections and not with LARGE designs.

Autumn Decorating: Decopauge Foam Pumpkins for Fall

Dip the foam brush into Modge Podge and brush on a thin layer across 1/4 of the pumpkin. Place the paper napkin cut-out on top. Smooth it down into place to remove wrinkles and air bubbles. Continue layering on pieces of the paper napkin and Modge Podge until you cover the pumpkin as desired. The motif that I used repeats a total of 3 times on it. Once all of the paper is on…go back over the entire thing by brushing another layer of Modge Podge on top. You need to cover everything. Let dry.

Cut a piece of Jute rope to fit around the stem. Squirt quick-drying tacky glue onto the stem (generous amount) and wind the jute rope around it. I used a snack clip to hold it in place until the glue was done drying (about 90 minutes or so). That’s it, you’re done!

Now…if you want to get fancy with it…you can glue faux leaves and curly wire sprigs around the stem of the pumpkin too. I decided I liked the simple look.

* This post contains affiliate links. If you make a purchase, we may or may not receive a small commission which helps to support this site. Thank you!

Shelly's Signature

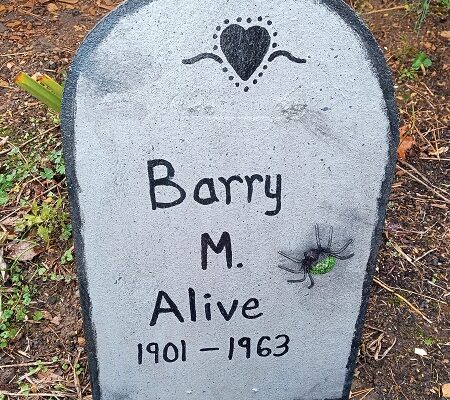
Halloween Wood Graveyard Headstone Craft Project

Halloween Wood Graveyard Headstone Craft Project

Check out this EASY Halloween Wood Graveyard Headstone craft project that I made by upcycling an old table-top wooden ironing board! Don’t have one sitting around? Don’t worry, you can simply cut it from a piece of plywood or other scrap wood you have lying 

Halloween Porch Leaners Made from Upcycled Pallet Wood

Halloween Porch Leaners Made from Upcycled Pallet Wood

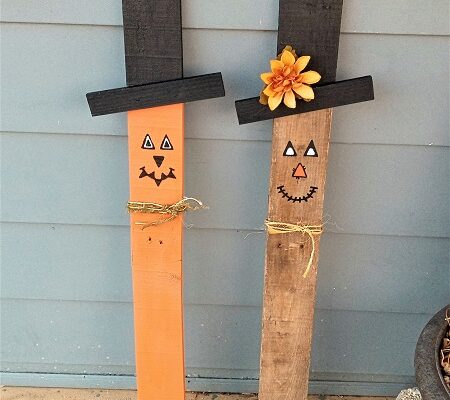
Pallet Wood is cheap wood that you can upcycle into new projects to use in and outside of your home. We like to tear apart the pallets and use them in craft projects like the one that I’m featuring today on the blog. These two