Tag: Count Down to Christmas

Quick and Easy Ribbon Angel Ornaments

Quick and Easy Ribbon Angel Ornaments

These ribbon angel ornaments work up quickly and are super easy to make. You can whip up several of them in just one afternoon. It’s a great way to use up leftover small Christmas ball ornaments and your smaller amounts of wire-edged ribbon leftover from 

Recycled K-Cup Snowman Top Hat Christmas Ornaments

Recycled K-Cup Snowman Top Hat Christmas Ornaments

These adorable snowman top hat Christmas ornaments cost less than $1.00 to make! You will need to upcycle a few things from your kitchen and raid your leftover craft supplies scrap box to make them. You can make several of them over the course of 

Easy-to-Make Old Fashion Pom-Pom Gnomes

Easy-to-Make Old Fashion Pom-Pom Gnomes

Gnomes have made a big comeback the past 2 years and AGAIN are all of the rage in home and garden decor. Every time I walk into a department store or discount store I see all kinds of home decor in a Gnome theme! Heck, even the blogs, YouTube, Pinterest, and Instagram is flooded with Gnome craft projects too!

Easy-to-Make Old Fashion Pom-Pom Gnomes

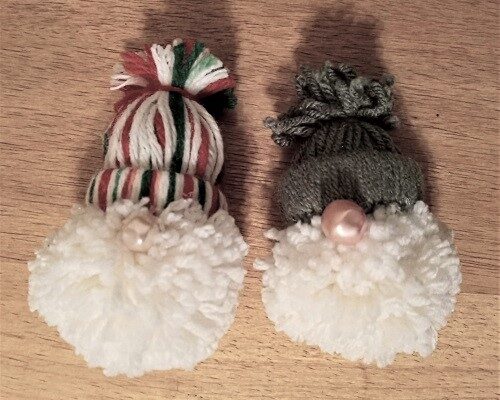
Over the winter I was making old fashion Pom-Pom Gnomes and wanted to share that project with all of the TCC blog readers. I’m on a mission to make 24 of them for a Christmas garland that I’m working on for the holiday season 2023. My photo will show you 2 of the 9 that I have completed so far.

To make the hat you’ll want to get the easy-peasy directions on how to make Mini Yarn Hat Ornaments HERE. You will need to make one for each of the gnomes that you’re making. Each one will require a small ball of scrap yarn in your choice of color, a piece of cardboard from a toilet paper or paper towel roll, 2-3 cotton balls, and scissors. If you like a narrow hat (like the red, white and green) use 2 cotton balls. If you like a more “filled” hat (like the green one) I stuffed 3 cotton balls into that one.

Let’s discuss pom-poms. You can cut up cardboard and do them the old-fashion way which does yield inconsistent results and sizes. I opted to use an inexpensive pom-pom maker that I purchased from Amazon. You can make 4 different sized pom-poms with the loom kit…super simple to use and YOU GET CONSISTENT SIZES! You can read my review on the Pom-Pom Kit that I purchased and using HERE. I picked up 4 skeins of white acrylic yarn at my local Dollar Tree store for $1.25 and using that to make the beards. As you can see…that loom makes beautiful pom-poms for your projects!

From Hobby Lobby I purchased a package of flesh-toned faux pearls that I’m gluing on for the noses using hot glue and my glue gun. You only need a tiny dab of glue to adhere them to the yarn. Use your scissors to trim up the fringe at the top of each hat and his beard if needed.

These Pom-Pom Gnomes are super cute and can be used a variety of different ways. Insert a string or ribbon through the hat to turn them into country Christmas tree ornaments, hang them from peg hooks, use as package tie-ons, or do what I’m doing…string them together to make a fun holiday garland.

* This post contains affiliate links. If you make a purchase, we may or may not receive a small commission which helps to support this site. Thank you!

Shelly's Signature

How to Make a Coastal Tree from Tumbling Tower Wood Blocks

How to Make a Coastal Tree from Tumbling Tower Wood Blocks

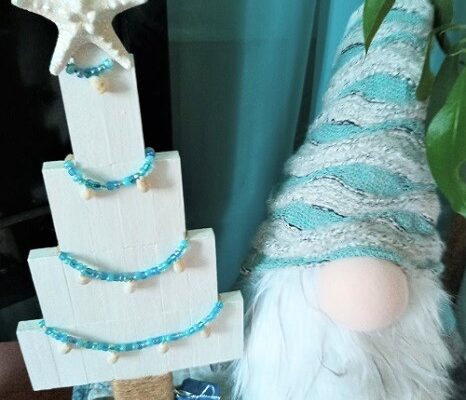
Tumbling Tower Blocks are wooden game blocks sold at your local Dollar Tree store. They’re smaller in size than a traditional Jenga block. If you can’t find them there…check out 5 and Below. They sell their version of the wood blocks game but their in 

How to Make Gnome Ornaments from Oyster Shells

How to Make Gnome Ornaments from Oyster Shells

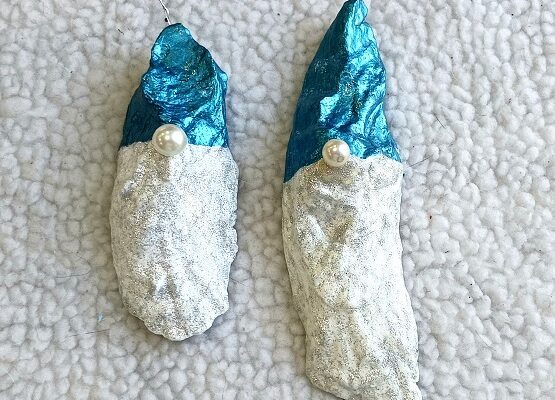
Gnomes…they’ve been a HOT decorating craze for the past few years. I’ve seen people decorating every room in their home with gnomes…including their Christmas trees. They’re cute and show off a part of your whimsy side. I can walk in just about any department store 

Snowman Refrigerator Magnets Made with Tumbling Tower Blocks

Snowman Refrigerator Magnets Made with Tumbling Tower Blocks

Tumbling Tower wood blocks are from a game that is sold by Dollar Tree. You can find them in the kid’s toys aisle. Our local DT store sells out of them often…so at those times I have to purchase them from Amazon. If you want to use larger-sized blocks you can pick up a set at 5 and Below…their version of the Jenga blocks game for $5.00 a box. However, they’re much larger in size than the ones you get from Dollar Tree (and cost more too).

* This post contains affiliate links

Snowman Refrigerator Magnets Made with Tumbling Tower Blocks

These Snowman Refrigerator Magnets are super easy to make. We made them with children ages 7 to 13 years of age. You’ll need a total of 3 Tumbling Tower Blocks per magnet. An adult will need to cut 1/3 of one block off using a saw. My husband did that part for us ahead of time. Other than that…basic craft supplies!

Dollar Tree – We purchased the box of Tumbling Tower Blocks, white, orange, and black acrylic craft paint, a pack of paint brushes, the snowflake stickers and a bottle of Modge Podge (glossy finish) all from the DT. The Gorilla Glue and refrigerator craft magnets were purchased from Amazon.

Snowman Refrigerator Magnets

3 Wood Tumbling Tower Game Blocks
White, Black, and Orange Acrylic Craft Paint
Paint Brush, Water Dish, Paper Towels
Gorilla Glue
1 Pack of Snowflake Stickers
Modge Podge in Glossy Finish
Commerical-Grade Refrigerator Magents
Round Wood Toothpicks

An adult will need to cut 1/3 off of one block per snowman that you make. The block that is 2/3 of the original size and 1/3 of the original size will be used to make the top hat.  Use Gorilla Glue (or a wood glue, not a hot glue) to glue the wooden blocks together as shown in the photo. It will take 1-2 hours for the glue to dry.

Paint the bottom 2 blocks with white acrylic paint (front, back and sides). We used 2 coats of paint. Use the black paint to paint his top hat (front, back and sides). Let all paint dry until it’s no longer tacky. It will take 60-75 minutes.

Dip the end of the paint brush into black paint and dot-on 2 eyes. Use the brush end to make an orange triangular shaped nose. Dip the end of a wooden toothpick into black paint and dot on his mouth. Let dry for an hour. Dip the end of the paint brush into white paint and dot on his inner eyes. Let dry for 60-75 minutes.

We sealed the paint by brushing on a coat of Modge Podge in a glossy finish. Make sure you cover all sides with the Modge Podge. It will take an hour or so to dry. Peel off one of the snowflake stickers and apply to his top hat. Flip him over and use Gorilla Glue to adhere 2-3 mini magnets on the back. This will take 2-3 hours to dry.

These cute Snowman Refrigerator Magnets can be used to decorate the front of the fridge, a work or school locker, a file cabinet, etc. for the entire winter season. They don’t scream Christmas at all!

* This post contains affiliate links. If you make a purchase, we may or may not receive a small commission which helps to support this site. Thank you!

Shelly's Signature

Upcycled Empty Pill Bottle Snowman Ornament

Upcycled Empty Pill Bottle Snowman Ornament

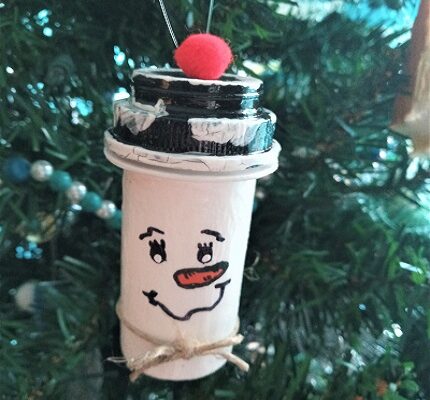
Looking for a way to upcycle all of those empty pill bottles and prescription medication bottles that you get at the pharmacy? If so, we’ve got a cute and easy craft project for you today that utilizes them to make a fun Snowman Christmas Tree 

How to Make a Christmas Ornament Ball Door Wreath

How to Make a Christmas Ornament Ball Door Wreath

Two weeks ago I went into Dollar Tree to pick up supplies to make a holiday door wreath for my daughter. This year she’s decorating in a beautiful pink blush color, champagne, and gold color scheme. I love shopping at the Dollar Tree for affordable