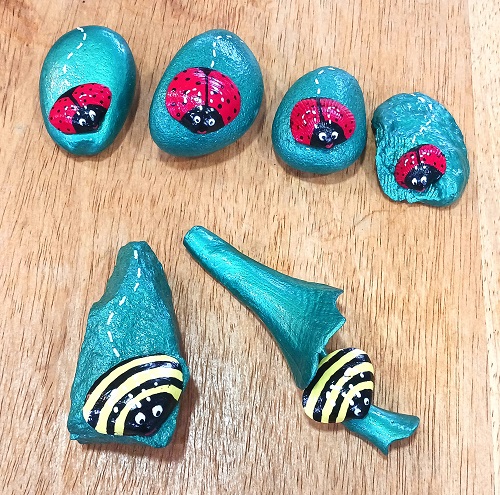
Here's a fun and easy art and crafts project that combines painted rocks with small seashells. These designs are perfect for kindness rocks, kindness seashells or use them as little decorating accents around your home. I placed two of them in my houseplants as a little colorful decoration and gave … [Read more...] about Lady Bug and Bumble Bee Painted Kindness Rocks and Seashells
arts and crafts
Easy Painted Seashell Designs – Great for Beginners

Over the past 10+ years I've shared 150+ arts and craft projects that utilize seashells. I decorate my home in a coastal and beach style...so I'm always incorporating seashells into our home decor. Plus, I participate in a kindness painted seashells group where we paint shells and leave them for … [Read more...] about Easy Painted Seashell Designs – Great for Beginners
Easy Pink Flamingo Hand-Painted Clam Shells Seashells

Pink flamingos scream summertime and oceanside living. I love incorporating them into my garden and yard art decor. Last month I painted these easy pink flamingo clam shells to display on my back deck near our swimming pool area. They added a nice pop of color and are perfect for the hot summer … [Read more...] about Easy Pink Flamingo Hand-Painted Clam Shells Seashells
How to Cut Energy Bills Without Sacrificing Comfort

High energy bills can feel like an unavoidable part of modern life. Whether you’re cranking the AC in summer or keeping your home toasty in winter, comfort often comes at a price. But what if it didn’t have to? You don’t need to give up your creature comforts to save money. By making smart choices … [Read more...] about How to Cut Energy Bills Without Sacrificing Comfort
Painted Red, White and Blue Patriotic Seashell Designs
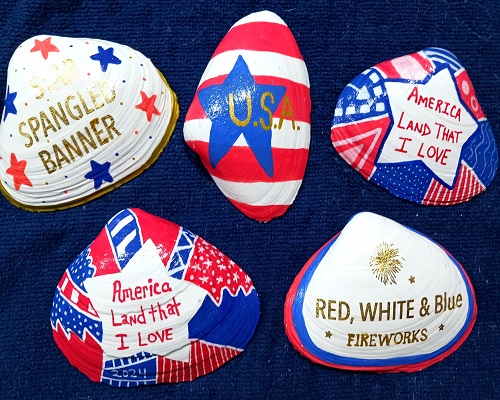
These hand painted red, white and blue Patriotic designed seashells make the perfect little home decor accents during all of those holidays throughout the summer. Think Memorial Day, July 4th, Veteran's Day and President's Day. They're great for anyone who loves showing off their pride in the U.S.A. … [Read more...] about Painted Red, White and Blue Patriotic Seashell Designs
Hand Painted Whelk Seashells for Summer Decor
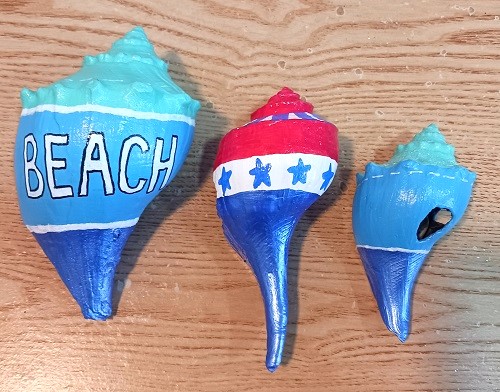
Whelk shells are often referred to as conch shells when it reality...they're whelks. The knobby whelk and channel whelk seashells that I collected were EMPTY shells that I collected from a New Jersey beach. When collecting seashells you NEVER want to take a shell that is occupied by another animal. … [Read more...] about Hand Painted Whelk Seashells for Summer Decor
Hand Painted Summer Themed Clam Shell Seashell Designs
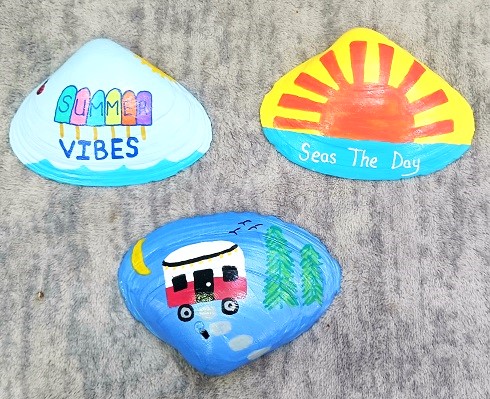
It's time to get busy decorating for the summer season! Last week I started working on some new summer themed designs painted onto large clam shells seashells. These will be displayed on my front porch, back deck and around our pool area to set the mood for summer! They're also great table … [Read more...] about Hand Painted Summer Themed Clam Shell Seashell Designs
Easy Hand-Painted Daisy Floral Design Clam Shells Seashells
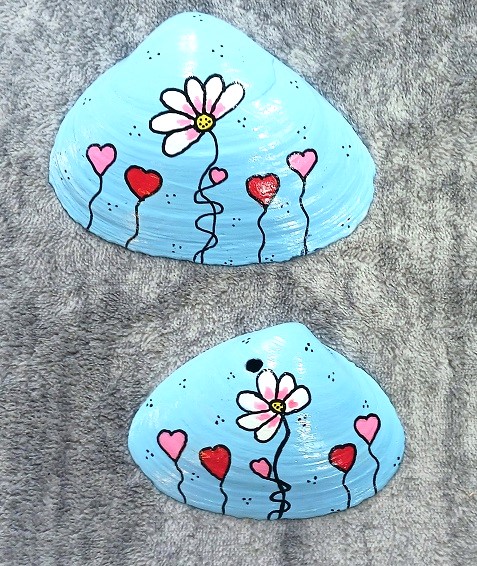
These hand-painted daisy floral design clam shells seashells are very easy to make! You don't need a template or pattern to make them. You can easily do this design on clam shells, other seashells, smooth river rocks and painted onto other surfaces. You'll only need a few basic art supplies to make … [Read more...] about Easy Hand-Painted Daisy Floral Design Clam Shells Seashells