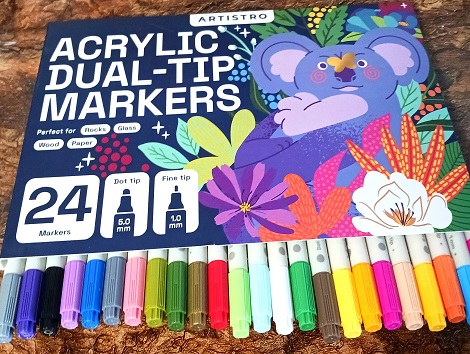
One of my favorite hobbies is to paint seashells and kindness rocks. I enjoy sitting down for a few hours and just letting my creativity flow. You don't have to be an artist to enjoy this hobby. Matter of fact, it's a great beginner's hobby and very affordable to get into. Smooth rocks and seashells … [Read more...] about ARTISTRO 24 Acrylic Paint Markers for Rock and Seashell Painting
arts and crafts
Turn Your Space Into a Masterpiece: 5 Stunning Ways to Decorate with Art
What is the one thing you might do to your home to make it truly speak for you? The answer is simple: art, art, art! Art transforms walls into pieces of self-expression, filling every nook with personality, color, and emotion. If you have no idea where to begin, don't worry because this guide is … [Read more...] about Turn Your Space Into a Masterpiece: 5 Stunning Ways to Decorate with Art
Hand-Painted Beach Red Crab Clam Shell Seashell Designs
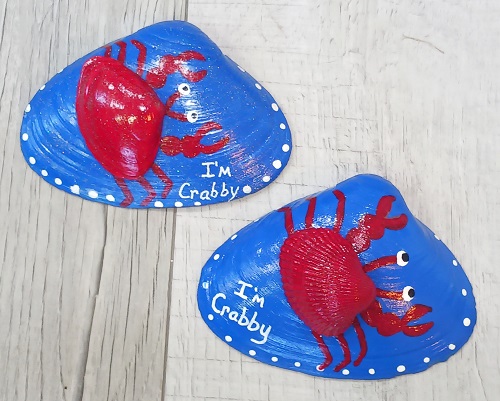
These hand-painted red crab clam shells would make a great decoration during a backyard barbecue, pool party or if you live near the beach...paint them up and add them to your garden for a pop of color. Each one was made using a 4" to 5" wide clam shell and then a smaller clam shell for the red … [Read more...] about Hand-Painted Beach Red Crab Clam Shell Seashell Designs
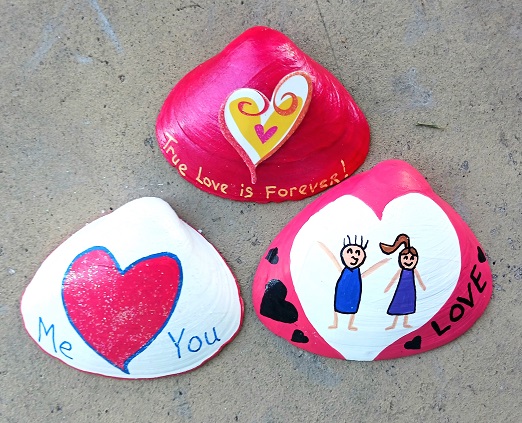
LOVE Valentine’s Day Hand-Painted Seashells
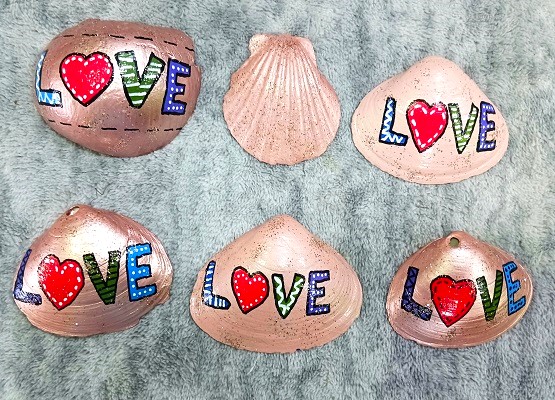
Two weeks ago I sat down and hand-painted some Valentine's Day themed seashells for my granddaughter's upcoming Valentine's Day party. She wanted to use them as part of the table decor and party favors. In addition, she requested that I make them in non-traditional Valentine's Day colors. You of … [Read more...] about LOVE Valentine’s Day Hand-Painted Seashells
Valentine’s Day Sweetheart Bird Painted Clam Shell Seashell Designs
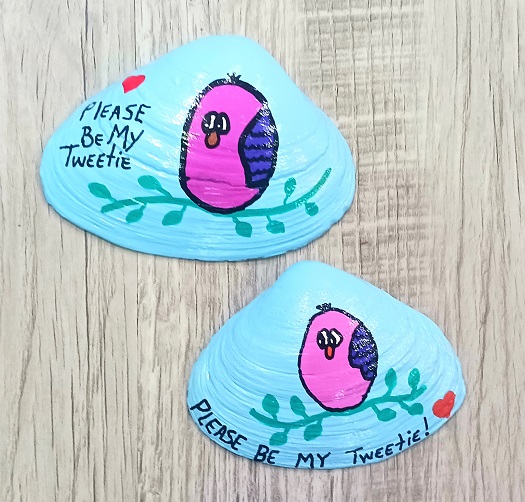
These hand painted love bird seashells would be perfect for you to give to your sweetheart for Valentine's Day. They're easy-to-make and require no template or pattern. They can be made by older children and adults. Perfect project for Seniors too! Don't have access to seashells? Don't worry, you … [Read more...] about Valentine’s Day Sweetheart Bird Painted Clam Shell Seashell Designs
Diamond Art Painting Greeting Card Kits
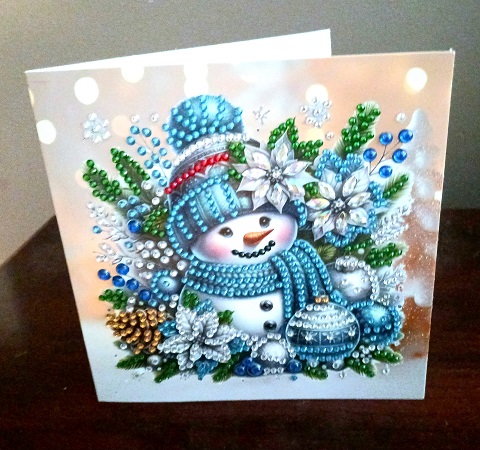
A few years ago I jumped onto the Diamond Art Painting crafting craze as soon as those kits hit the retail marketplace. When they first came out you found gorgeous designs that you needed to frame to hang onto your wall. They were available in a wide variety of sizes and designs from Country Farm to … [Read more...] about Diamond Art Painting Greeting Card Kits
Hand Painted Valentine’s Day Seashell Greeting Cards
Valentine's day is 2 weeks away. This year I'm making homemade greeting cards for my grandchildren, friends and loved ones. These hand-painted Valentine's Day themed seashells are something they can keep forever and use them as part of their decor. The design is painted on one side with a … [Read more...] about Hand Painted Valentine’s Day Seashell Greeting Cards
Sea and Ocean Animals Rub-on Transfers Decals for Crafts
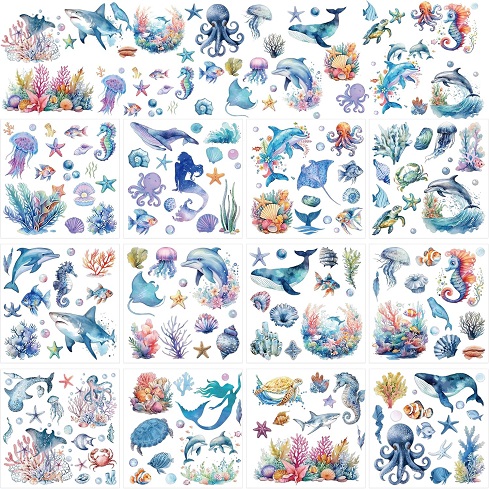
I love the beach life and everything that goes along with it. There's something about sitting on the beach and listening to the waves that calms my soul....my entire soul!!! With that said, I decorate our home in a Coastal Beach Style and often make home decorating accessories to fit within my … [Read more...] about Sea and Ocean Animals Rub-on Transfers Decals for Crafts