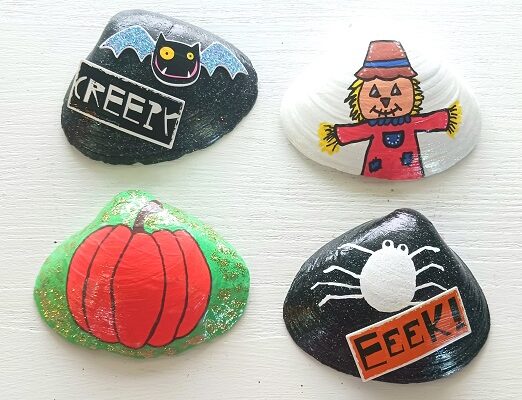
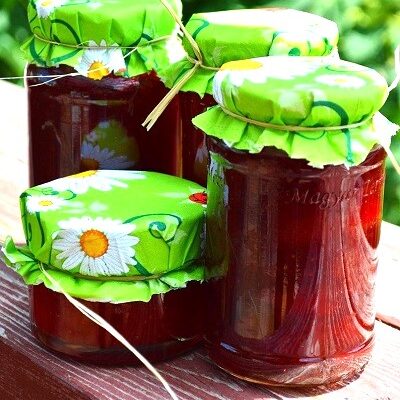
Author: Shelly

Home Canning Nectarines with Recipe and Tips

Home Canning Nectarines with Recipe and Tips

Nectarines are one of my favorite fruits! They’re sweet and juicy but not overly so. One way you can preserve fresh nectarines is by home canning them using a water bath canner. The process is really easy. Once they’ve been properly processed, they’re shelf stable 

Why Mental Health Should Be at the Heart of Your Self-Care Routine

Why Mental Health Should Be at the Heart of Your Self-Care Routine

Did you know that nearly 1 in 5 adults experience mental health issues each year? In the bustling streets of NYC, where life moves relentlessly, taking care of your cognitive health is more important than ever. Mental well-being isn’t just a luxury; it’s a fundamental 

Chex Cereal Snack Mix with M & M Candies and Mini Marshmallows

Chex Cereal Snack Mix with M & M Candies and Mini Marshmallows

Last weekend we had the grandchildren over for a sleepover and movie night. For snacking, I whipped up a batch of Muddy Buddies Cereal Snack Mix. I make it the traditional way but tossed in a few extra goodies to really ramp up the flavor. Once you have it prepared you want to store it in an airtight container. It doesn’t need to be refrigerated. It will keep for up to a week although we typically have it all gone within 2-3 days.

The recipe calls for 3 different type’s of Chex cereal. Don’t worry about that…use whatever flavor(s) you have on hand, as long as it totals up to 9 cups. For this batch I used just Corn and Rice Chex cereal. When we travel or take a road trip I like to whip up a batch of this. Once it has been mixed up I pack it into zipper-close sandwich bags. The kids (and adults) can grab individual bags of it for snacking.

Chex Cereal Snack Mix with M & M Candies and Mini Marshmallows

* Post contains affiliate links.

Muddy Buddies Cereal Snack Mix with M & M Candies and Mini Marshmallows Recipe

3 cups of Rice Chex Cereal
3 cups of Corn Chex Cereal
3 cups of Chocolate Chex cereal
3/4 cup semisweet chocolate chips
1/4 cup cocoa powder
1/4 cup butter
1/2 cup creamy peanut butter
1 teaspoon vanilla extract
1/4 cup dehydrated minature marshmallows
1/4 cup M & M chocolate candies
1 1/2 cups powdered 10X sugar

In a large mixing bowl combine together all of the Chex cereals until combined; set aside.

In a large microwaveable bowl melt together the chocolate chips, peanut butter and butter until smooth. Do this on the high setting at 30 second intervals until smooth and creamy. Remove from microwave and stir in the pure vanilla extract until combined.

Pour the chocolate mixture into the mixing bowl that contains the cereal. Use a large spoon and stir until everything is combined and the chocolate mixture is coating all of the goodies in the mixing bowl. Toss in the 1/4 cup of miniature dehydrated marshmallows and the 1/4 cup of M & M chocolate candies. Stir until everything is combined.

Pour the confectioner’s sugar into the bowl and stir again until all ingredients are well combined and everything is coated in the confectioner’s sugar.

Cover bowl. You can store in the refrigerator or at room temperature like we do.

* This post contains affiliate links. If you make a purchase, we may or may not receive a small commission which helps to support this site. Thank you!
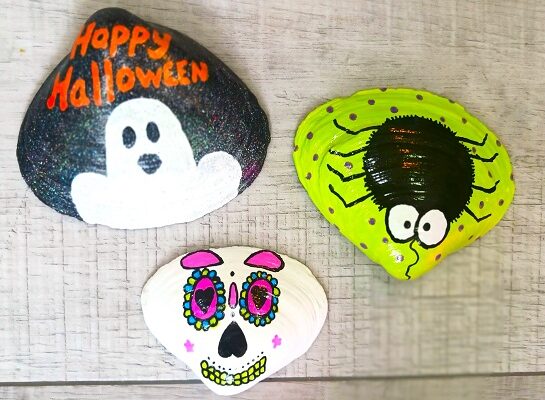
Painted Autumn and Halloween Clam Shells Seashell Designs

Painted Autumn and Halloween Clam Shells Seashell Designs

Last week I started putting out a few of my Autumn and Halloween home decor items along with a few things out in our front yard. We will be adding more items next weekend to get ready for the season. One thing I decided to 

Homemade Strawberry Jam Canning Recipe

Homemade Strawberry Jam Canning Recipe

Strawberry jam is one of the most popular flavors of fruit jam around the world. It’s sweet but not overly so. It’s delicious used as a spread on toast, bagels, peanut butter & jelly sandwiches, English muffins, etc. It’s equally as good when used in 

Black Spiders Painted Seashells Halloween Party Decor

Black Spiders Painted Seashells Halloween Party Decor

Black Spiders Painted Seashells Halloween Party DecorEvery year our adult daughter hosts a costume Halloween party at their home. It’s a tradition and everyone looks forward to it every year. The party is for families, adults and the kids. She provides the majority of the food and beverages, although a few of the guests will contribute food too. In addition to hosting the party, she likes to decorate the house too! Yup, you gotta set the party mood!

** Post contains affiliate links.

Last week she asked me to paint a few clam shells seashells in a black spider them for the upcoming Halloween costume party. She wants to use them as table decorations and party decor. For this arts and crafts project you’ll need to collect large 4″ to 5″ wide clam shells from the beach. Wash them with Dawn Liquid Dish Soap in warm water. I like to let them soak for about 30 minutes and then rinse with clean water. Why Dawn? It does the best job at removing sand, debris and fishy odors. Let them air dry overnight.

Orange Shells – Base coat the clam shells with 2 coats of orange acrylic craft paint allowing for 30-45 minutes of drying time between coats. I purchased a pack of 6 black plastic spiders from the Dollar Tree which are used to decorate these shells. Use Gorilla Glue to adhere the plastic black spiders on top of the seashells. Let dry for one hour. I used a BETEM black acrylic paint marker (the fine tip side) to write the words Let’s Hang Out or Itsy Bitsy Spider on each one. I then used it to add the black border you see running around the outer edge. Let dry for 2 hours.

White Shells – Base coat the clam shells with 2 coats of white acrylic craft paint allowing for 30-45 minutes of drying time between coats. I used a pack of BETEM Acrylic Paint Markers to decorate these shells. These paint markers are fantastic! There’s no priming, no clogged tips, no drippy messes and no foul paint odors. Plus, the paint dries fast! You can purchase them from Amazon for a really affordable price! Use the paint markers to add the “simple designed” black spider, then add the wordage and then finish up by adding the polka dots. I wanted a cutesy design that the kids would enjoy. Let dry for 2 hours.

Finishing Up – You need to protect the painted surface by brushing on 1-2 light coats of Mod Podge Clear Acrylic Sealer. I used one with a glossy finish. It will go on white but dries crystal clear. This will protect the painted surface. Depending on the weather and humidity…it can take 1-3 hours for them to completely dry.

* This post contains affiliate links. If you make a purchase, we may or may not receive a small commission which helps to support this site. Thank you!

Shelly's Signature

Zucchini Pineapple Bread Recipe Baked in Glass Mason Jars

Zucchini Pineapple Bread Recipe Baked in Glass Mason Jars

This year my one and only zucchini plant in our backyard garden gave us several nice-sized zucchinis. Last week I baked a batch of homemade Zucchini Pineapple Bread in glass mason jars. I love baking in the jars which gives you nice single-serve or 2-people 

Hand Painted Rooster and Chickens Clam Shells Seashell Designs

Hand Painted Rooster and Chickens Clam Shells Seashell Designs

Got a chicken lover in your life? My brother loves chickens and has his own coop on his property. I believe he has 5 hens and 1 rooster at last count. He’s been raising chickens for a few years and they’re treated like pets. Extremely