Author: Shelly

Painted Snoopy Clam Shell Seashell Designs – Easy Craft Projects

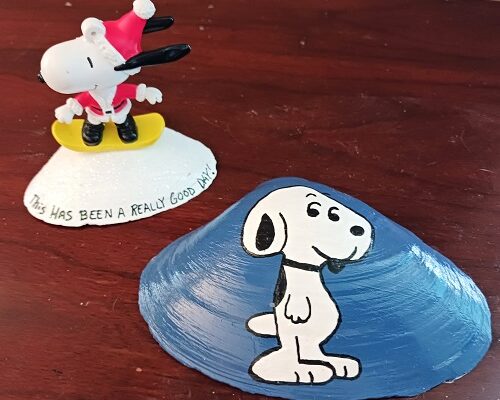
Painted Snoopy Clam Shell Seashell Designs – Easy Craft Projects

Are you a big fan of Snoopy the beloved character from Peanuts? If so, check out these easy-to-make painted seashell designs! They would make great little gifts for that Snoopy lover on your holiday gift-giving list! All 3 can be made in just one weekend 

Hand Painted Blue Jay Birds Clam Shell Seashells Garden Yard Art Designs

Hand Painted Blue Jay Birds Clam Shell Seashells Garden Yard Art Designs

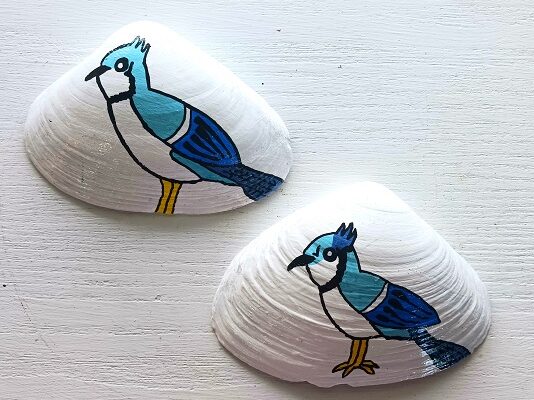
One of my favorite backyard birds is the common Blue Jay which can be seen almost daily in my backyard. I love their vibrant blue colors and when I see the one…I usually see a pair aka the mate nearby. Last week I decided to 

Hand Painted Halloween Pumpkins, Skulls, Ghosts and Spiders Seashells

Hand Painted Halloween Pumpkins, Skulls, Ghosts and Spiders Seashells

Halloween is just around the corner and it’s time to add some new decorations to your holiday decor. These hand painted clam shells are easy-to-make and can be made in just one weekend. You only need  handful of art and craft supplies to make them. Don’t have access to clam shells? You can do these same designs on smooth river rocks too!

If you enjoy painting on seashells or crafting with seashells…you’ll find over 150+ seashell craft projects right here on the Two Classy Chics blog! We will be sharing more seashell craft projects in the future too!

Hand Painted Halloween Pumpkins, Skulls, Ghosts and Spiders Seashells

** Post contains affiliate links.

Wash all seashells in warm, soapy water using Dawn Liquid Dish Soap. Rinse with clean water and air dry overnight. I recommend Dawn because it does a great job at removing sand, debris and fishy odors.

You’ll need various bottles of acrylic craft paint, paint brushes, a set of acrylic paint markers, Mod Podge Clear Sealer, a foam brush and glitter.

Time to base coat all of the shells with acrylic paint. You’ll need to 1-2 base coats to get really nice coverage with 30-35 minutes of drying time between coats.

Pumpkin gets an orange base coat, the sugar skull gets white and the spider and ghost get black. Let fully dry.

Decorating them is easy! I used a set of BETEM Acrylic Paint Markers to do all of the design work. I used a pencil to lightly sketch on the design that I wanted. Then got busy decorating them. BETEM Acrylic Paint Markers are fantastic to work with. No priming, no drippy messes, no clogged tips and no foul paint odors. They have dual-ended tips (one medium and one fine).

Use the paint markers to add the facial features onto the pumpkins along with the stem. Then used them to do the rest of the clam shells using the photograph for referrence. You can do simple designs like I did or get fancy if you have artistic talent which I do not! Let all of the paint dry.

Seal all of your painted seashells by brushing on 1-2 coats of Clear Mod Podge Sealer with a Glossy Finish. Matte works well too, but I prefer the gloss! It adds a nice shine. Let them dry overnight.

Tip: If you want to add fine craft glitter onto any of your designs you want to sprinkle it on while the Mod Podge is very wet. I sprinkled glitter onto the body of the spitter.

* This post contains affiliate links. If you make a purchase, we may or may not receive a small commission which helps to support this site. Thank you!
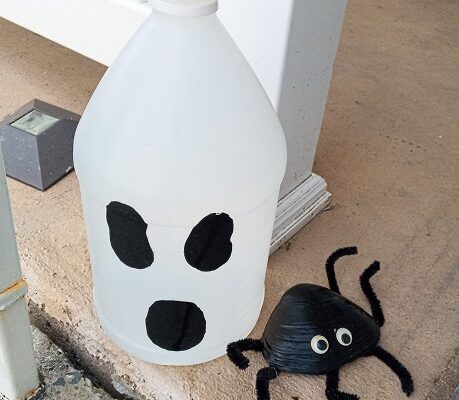
Halloween Ghost Made from Upcycled Plastic Bottle – Kid’s Craft Project

Halloween Ghost Made from Upcycled Plastic Bottle – Kid’s Craft Project

Looking for a super easy Halloween craft project that doesn’t cost you any money? Well, it won’t cost you a thing if you have a large plastic bottle lying around! My 14 year old granddaughter came up with this idea after seeing an empty white 

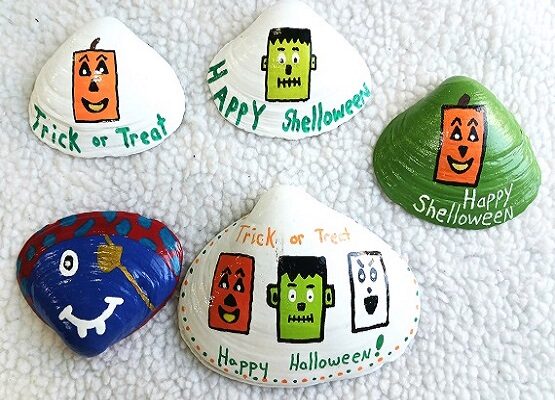
Easy Halloween Designs Painted Clam Seashells

Easy Halloween Designs Painted Clam Seashells

Here’s a fun Halloween craft project to do with older kids, adults and/or seniors. All of these designs are easy-to-make and require no artistic skills. No pattern or template is needed. We kept the designs simple using basic shapes and with the majority of the 

Hand Painted Jack-o-Lantern Pumpkins Clam Shells Seashells

Hand Painted Jack-o-Lantern Pumpkins Clam Shells Seashells

When it comes to fall decorating I like to whip up a few new autumn inspired craft projects every year. When it comes to crafting, I like quick and easy projects that don’t cost a lot of money. These hand painted Jack-o-Lantern Pumpkins are adorable! The designs were painted onto clam shells collected from the beach. If you don’t have access to clam shells, you can paint the designs onto smooth river rocks.

If you enjoy painting on seashells or crafting with seashells…you’ll find over 150+ seashell craft projects right here on the Two Classy Chics blog! We will be sharing more seashell craft projects in the future too!

Hand Painted Jack-o-Lantern Pumpkins Clam Shells Seashells

** Post contains affiliate links.

You always want to wash your seashells in warm, soapy water using Dawn Liquid Dish Soap. It’s the best for removing sand, debris and fishy odors. Rinse with clean water and air dry overnight. They need to be completely dry before painting on them. For this project we used 3″ to 5″ wide shells.

Base coat all of the seashells with 2 coats of orange acrylic craft paint. Allow for 30-45 minutes of drying time between the 2 coats. It’s dry when it’s no longer tacky. If you want to speed up the drying time…place them in front of a desk fan set at medium speed for about 15-20 minutes. I love using a wireless desk fan to speed up that drying time!

All of the facial features and design work was made by using paint markers. I use and highly recommend BETEM Acrylic Paint Markers. They have dual-ended tips (medium and fine), require no priming, no drippy messes, no clogged tips, no foul paint odors and they dry quickly. I also find that the paint doesn’t smear once I put sealer on top. HIGHLY and I mean HIGHLY recommend them! Plus, they’re affordable. You can buy them from Amazon.

Use the BETEM Paint Markers to add all of the facial features, the green pumpkin stem, etc. I like to use the medium-tip for coloring in and the the fine-tip for doing the outlining and detailed work. Let the paint dry for a little bit. Even though it’s dry in 10-15 minutes, I like to let them sit for 1-2 hours to allow all of the paint to cure.

Protect your beautifully painted seashells by brushing on 1-2 light coats of Clear Mod Podge Sealer. I like using the glossy finish, but matte finish will work too. This will help protect the paint from chipping, cracking or discoloring. Plus, you’ll be able to display them inside or outside of your home.

* This post contains affiliate links. If you make a purchase, we may or may not receive a small commission which helps to support this site. Thank you!

Shelly's Signature

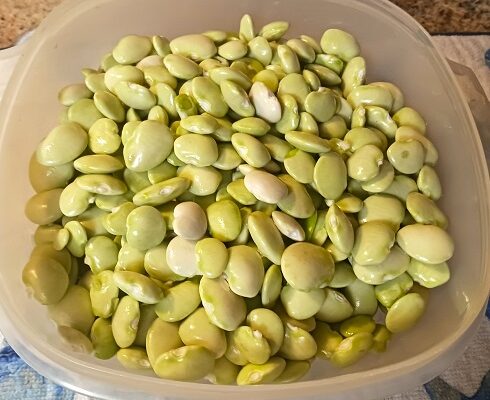
How to Blanch Lima Beans for Freezing

How to Blanch Lima Beans for Freezing

Got fresh lima beans on-hand that you want to freeze for later use? If so, you need to blanch them before freezing them. Blanching helps to preserve their flavor, retain their nutrients, color and can kill off any bacteria or germs. Blanching is a simple 

Mason Jar Baked Pineapple Upside-Down Cakes Recipe

Mason Jar Baked Pineapple Upside-Down Cakes Recipe

These Pineapple Upside-Down Cakes are super easy-to-make! You use a pre-purchased cake mix along with a few basic ingredients to make them. They’re baked in glass mason jars in your oven. Perfect for individual portions and sweet dessert treats. One basic cake mix will make