
5 years ago I started hand painting clam shell memorial markers every time a loved one passed away. I like to place them at the gravesite when I visit them. Just a nice way to let everyone know that they were loved...remembered and not forgotten. You can also leave these painted memorial seashells … [Read more...] about Hand-Painted Loved One Memorial Clam Shell Seahell Designs
Hand-Painted Beach Red Crab Clam Shell Seashell Designs
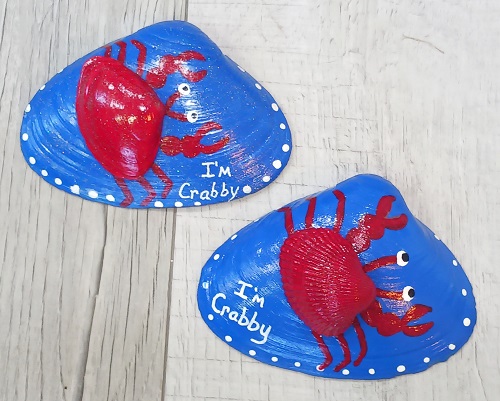
These hand-painted red crab clam shells would make a great decoration during a backyard barbecue, pool party or if you live near the beach...paint them up and add them to your garden for a pop of color. Each one was made using a 4" to 5" wide clam shell and then a smaller clam shell for the red … [Read more...] about Hand-Painted Beach Red Crab Clam Shell Seashell Designs
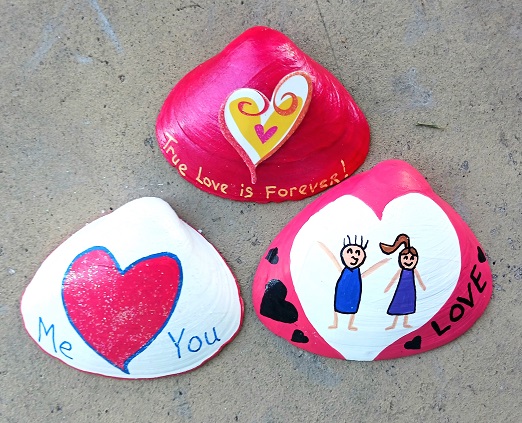
LOVE Valentine’s Day Hand-Painted Seashells
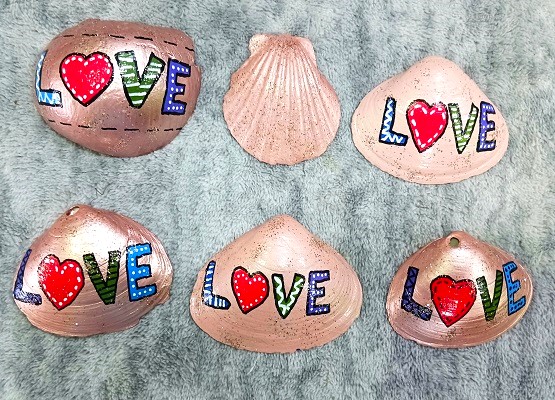
Two weeks ago I sat down and hand-painted some Valentine's Day themed seashells for my granddaughter's upcoming Valentine's Day party. She wanted to use them as part of the table decor and party favors. In addition, she requested that I make them in non-traditional Valentine's Day colors. You of … [Read more...] about LOVE Valentine’s Day Hand-Painted Seashells
Ball and Chain Beaded Keychain Rings for Crafting

I enjoy making all kinds of different crafts...from pieces that I display in our front yard to items that become home decor. Jewelry, Christmas Ornaments, Yard & Garden Art, Coastal Beach Crafts, Keychains & Purse Charms, Quilting & Sewing are just a few of the arts and crafts that I … [Read more...] about Ball and Chain Beaded Keychain Rings for Crafting
Ham, Green Beans and Potato Soup Recipe
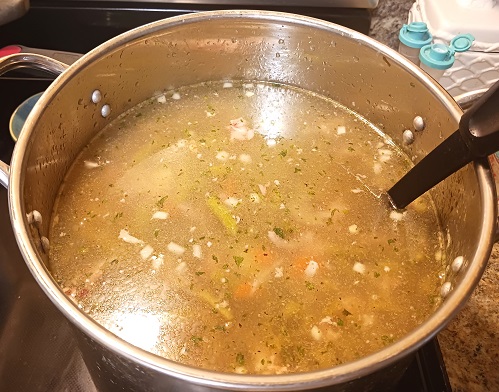
This ham, green beans and potato soup recipe makes a lot! I like to use this recipe when I'm making soup to freeze for later use. That's right, this soup freezes well and will keep for up to 1 year in your freezer. It's also a great recipe for when you're cooking for a crowd or a large-sized … [Read more...] about Ham, Green Beans and Potato Soup Recipe
Where to Buy Replacement Wire Racks for Water Bath Canners
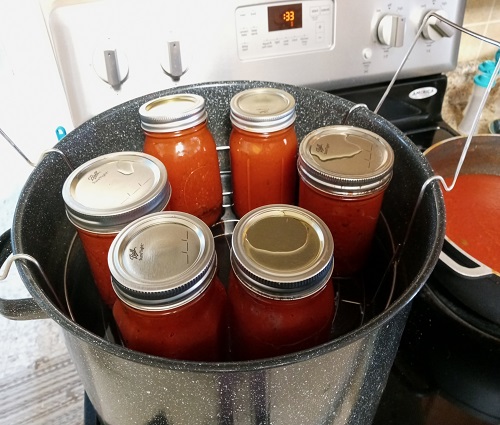
I've been a home canner for the past 30 years. I've canned vegetables, fruits, soups, stews, sauces, condiments, meats, fish, juices, desserts and all sorts of things over the years. My water bath canner and steam pressure canners get a workout every canning season. With that said, there are times … [Read more...] about Where to Buy Replacement Wire Racks for Water Bath Canners
Valentine’s Day Sweetheart Bird Painted Clam Shell Seashell Designs
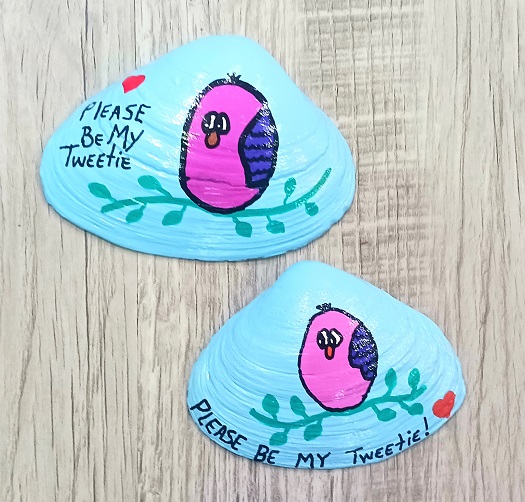
These hand painted love bird seashells would be perfect for you to give to your sweetheart for Valentine's Day. They're easy-to-make and require no template or pattern. They can be made by older children and adults. Perfect project for Seniors too! Don't have access to seashells? Don't worry, you … [Read more...] about Valentine’s Day Sweetheart Bird Painted Clam Shell Seashell Designs
Hand Painted Valentine’s Day Seashell Greeting Cards
Valentine's day is 2 weeks away. This year I'm making homemade greeting cards for my grandchildren, friends and loved ones. These hand-painted Valentine's Day themed seashells are something they can keep forever and use them as part of their decor. The design is painted on one side with a … [Read more...] about Hand Painted Valentine’s Day Seashell Greeting Cards