Author: Shelly

Healthy + Happy Essentials Hydrating Facial Cleanser

Healthy + Happy Essentials Hydrating Facial Cleanser

Healthy + Happy Essentials is a dermatologist-developed and plant-powered skincare line by Dr. Helen M. Torok. All of Healthy + Happy Essentials face and body products include the company’s proprietary Skin Nourishing Blend™, which is enriched with Ceramides, Hemp Seed Oil, Shea Butter & Jojoba 

Kitchen Cleaning Tips Using Lodge Cast Iron Pan Scrapers

Kitchen Cleaning Tips Using Lodge Cast Iron Pan Scrapers

Cleaning the kitchen isn’t one of my favorite things to do. Matter of fact, I’ve never met a person who will admit that they enjoy spending hours cleaning doing it. With that said, I do enjoy cooking, baking and canning, so a dirty kitchen is 

Painted and Decoupage Seashells for Spring Decorating

Painted and Decoupage Seashells for Spring Decorating

Painted and Decoupage Seashells for Spring DecoratingSpring is in the air! After a long winter…I’m ready for Spring and all of the spring flowers that come along with it. Every year during the month of March my Daffodils start blooming. A few weeks later my Hyacinths, Tulips, and Bearded Iris’ follow suit. I just love this time of the year!

To get ready for the spring season we sat down and painted large clam shells that we collected from the beach. Some of the designs are fully hand-painted while others have a decoupage design. The 2 seashells with the pink flowers are the decoupage ones. We cut the flowers out of previously used gift wrap!

** Post Contains Affiliate Links

Before you get started…wash and dry your shells. They need to be completely dry before painting on them.

Basecoat the seashells in the desired color using acrylic craft paint. We did two shells in black, one we left natural and one was base coated with a blue color. Some may need 2-3 coats of paint with 30 minutes of drying time between coats to get the desired coverage.

The two painted designs were just free-handed onto the shells. Simple shapes were used such as circles, tear drops, almond shapes, half-circles, etc. If you’re not an artist…just think along the lines of adding simple shapes together to form the flowers.

Decoupage shells – We had some previously used gift wrap that needed recycled. We carefully cut the flowers out of the gift wrap. You need to make sure the design will fit on top of the shell. Use a foam brush along with clear Modge Podge in a Glossy Finish to adhere it to the shell. First basecoat the shell with a generous layer. Lay the paper design on top, smoothing out any wrinkles. Then brush another generous layer of Modge Podge on top. Let them dry for 1-3 hours.

You can add additional embellishments to the shells by using Gorilla Glue. I don’t recommend using a hot glue gun because those embellishments tend to fall off. Embellishment ideas: buttons, beads, rhinestones, bows, charms, ribbon trims, faux pearls, etc. Let everything dry overnight.

* This post contains affiliate links. If you make a purchase, we may or may not receive a small commission which helps to support this site. Thank you!

Shelly's Signature

Painted and Decoupage St. Patrick’s Day Seashells Table Decorations

Painted and Decoupage St. Patrick’s Day Seashells Table Decorations

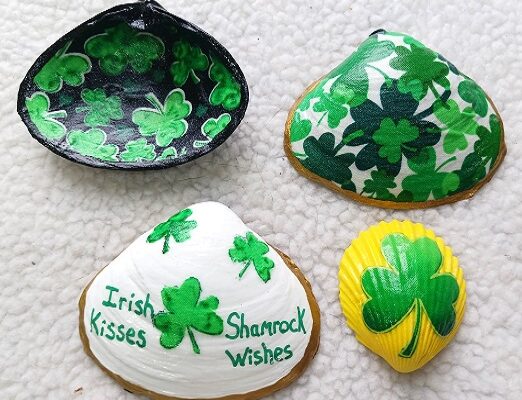
Decorating for St. Patrick’s Day can be a lot of fun. I don’t go overboard decorating but I do like to put out a few things every year…include a few new ones. This year I made these St. Patrick’s Day themed seashells for table decor. 

Painted and Decoupage Seashell Ideas for Kids and Adults

Painted and Decoupage Seashell Ideas for Kids and Adults

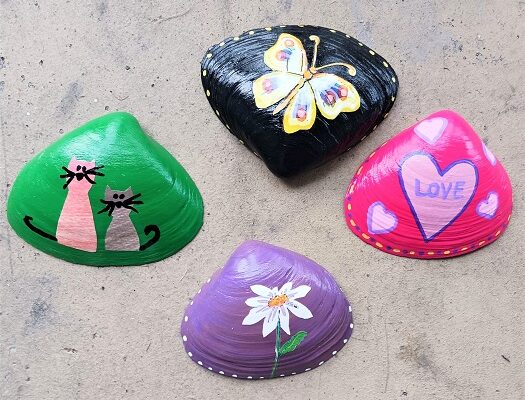
We love crafting with seashells. You can walk just about any beach on the east coast, west coast and along the Gulf and find them. Shell collecting is a hobby that I enjoy with over 300+ seashells in my collection. The ones that don’t make 

Easy Paint Pour Painted Seashell Designs

Easy Paint Pour Painted Seashell Designs

Easy Paint Pour Painted Seashell DesignsHave you tried paint pouring yet when it comes to painting seashells and river rocks? If not, give it a try! It’s an easy way for you and the kids to paint them! You don’t need any artistic skills and you don’t need a lot of art supplies to make them. It’s one of the easiest ways to decorate them.

Here are the supplies that you’ll need:

Seashells or Smooth River Rocks
Several Bottles of Acrylic Craft Paint
Clear Acrylic Spray Sealer – Glossy Finish
Plastic Drop Cloth (something to protect your surface as this can get messy)
Old Plastic Placemat

Note – For paint pouring I like to use plastic medicine cups. You know…those little plastic cups that come with liquid cough medicine, infant fever reducer, etc. They’re the perfect size for mixing the acrylic craft paints.

Make sure all shells and rocks are clean and dry. Decide on a color scheme. I like using only 3-4 colors that work well together. See my photograph for some ideas on colors that play nicely together.

Easy Paint Pour Painted Seashell Designs

Squirt a few drops of each color into the plastic medicine cup. For example on the patriotic one I used Navy Blue, Medium Blue, White and Red acrylic craft paint colors. I squirted 3 drops of navy blue, 2 medium blue, 2 red and 2 white into the cup. Gently move the cup side to side to kind of swirl the paint colors together. You don’t want to stir them together as that will make an entirely new color!!!

We like to paint pour over the kitchen sink so that as the paint runs off the shells we can easily wash it down the drain. Gently pour the paint out of the cup and onto the seashell. As you’re doing that…move the seashell around to let the paint run over all surfaces of the shell. You want to cover it all. As you move the shell around the paint runs and makes beautiful swirl-type of designs.

Once it has been covered in paint place it on an old plastic placemat to dry. Don’t have one? A sheet of aluminum foil works great as a non-stick surface too! It will take a few hours for them to air dry. After drying…you’ll want to have an adult take them outside to spray each one with 1-2 coats of a Clear Acrylic Spray Sealer. We used one with a glossy finish. This protects the painted surface. Let dry for several hours.

* This post contains affiliate links. If you make a purchase, we may or may not receive a small commission which helps to support this site. Thank you!

Shelly's Signature

Painted Pennsylvania Hiking Seashell Designs

Painted Pennsylvania Hiking Seashell Designs

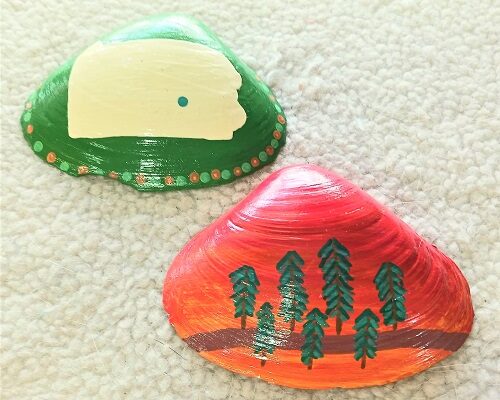
We live in Pennsylvania and one of the most popular outdoor hobbies is hiking! We have beautiful state parks and local parks with hiking trails, waterfalls, etc. Millions of people come to Pennsylvania from all around the world to hike the Appalachian Trail which runs 

Learn Mandala Dot Painting with This Easy to Use Kit

Learn Mandala Dot Painting with This Easy to Use Kit

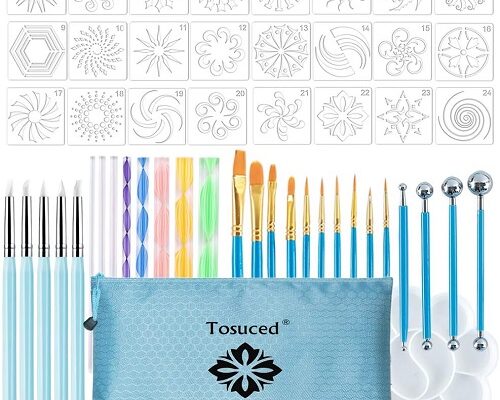
Have you always wanted to learn how to do Mandala Dot Painting? If so, check out this easy-to-use kit that contains 53 pieces! You get everything you need to get started except for the paint and the surface that you want to paint on! Mandala