Dill pickles are one of my family’s favorite pickles! They’re a classic that can be served alongside burgers, hot dogs, hot and cold sandwiches, chopped up and tossed into a salad, and more! Sure…you can buy them in a grocery store but there’s nothing BETTER than eating homemade dill pickles!
** Post contains affiliate links.
We like to home can 12-18 jars of dill pickles every year. Luckily for us…cucumbers grow extremely well in our backyard garden. When selecting cucumbers to make dill pickles I like to use slender cucumbers. There are varieties that you can plant in your garden that are specific for making pickles. Always use fresh cucumbers that don’t have mold or damage. You don’t want them soft and gushy either (aka overly-ripe). You will need a water bath canner for this recipe.
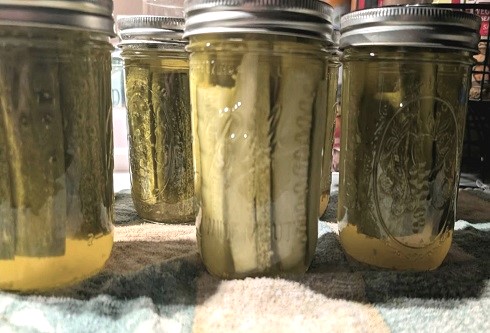
When making Dill Pickles I follow the recipe in the Ball Book of Home Canning. It’s a great guide to preserving food. You’ll find 100+ home canning recipes on the Two Classy Chics blog!
Dill Pickles Home Canning Recipe
8 lbs. of 4-6″ long cucumbers
3/4 cup granulated sugar
1/2 cup Ball Salt for Pickling & Preserving
1 quart white vinegar, 5% acidity
1 quart water
3 Tbsp. Ball Mixed Pickling Spice
Green or Dry Dill (1 head per jar)
Ball Pickle Crisp (optional)
Prep – Wash cucumbers under cold running water; drain. Remove stem and blossom end of cucumbers. Cut them in half lengthwise. Tie spices in a spice bag.
Cook – Combine granulated sugar, white vinegar and water in a large saucepan. Add the spice bag. Bring mixture to a boil, stirring until the sugar dissolves. Reduce heat to a simmer, then simmer the mixture for 15 minutes.
Fill – Pack cucmbers into a hot jar leaving a 1/2″ headspace. Put one head of dill in the jar. Add 1/8 tsp. Ball Pickle Crisp to one pint jar ot 1/4 tsp. to one quart jar, if desired. Ladle hot pickling liquid over cucumbers, leaving a 1/2″ headspace at the top of the jar. Remove air bubbles. Wipe the rim of the jar with a clean cloth. Center the lid on the top and screw on the band until it’s finger-tip tight. Don’t overly-tighten it! Place jar on the rack elevated over simmering water in the boiling water bath canner. Repeat this process until all jars are filled.
Process – Lower the rack into the simmer water. The water needs to cover the top of the jars by at least 1″. Adjust heat to medium – high. Cover the canner and bring the water to a rolling boil. Once it’s boiling you need to start your timer. Process pint or quart jars for 15 minutes. Turn off heat and remove the cover. Let the jars cool for 5 minutes. Remove jars from the canner.
I like to lay a clean cotton towel down on my kitchen counter-top. Carefully move the hot jars onto the towel. Let them sit there for 12 hours or until they have fully cooled. Do NOT touch them to tighten bands or to move them until they’re fully cool. After 12 hours check all of the seals to make sure they have sealed properly. Refrigerate any jars that didn’t seal. Store the sealed jars in a cool and dry place. You want to label them with contents and the date made.