 Custom t-shirt printing has become an exciting way to express creativity, whether for personal use, events, or even starting a business. The process of turning an idea into a wearable design is both rewarding and fulfilling. However, for many, it can seem overwhelming. Fear not! This step-by-step guide will walk you through the entire custom t-shirt printing process—from brainstorming your design to wearing your personalized creation.
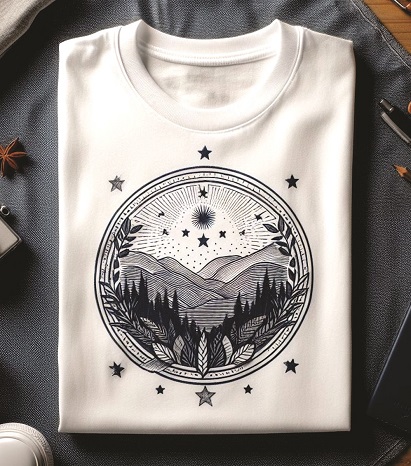
Step 1: Defining Your Concept
The first and most crucial step in custom t-shirt printing is defining your concept. Without a solid idea, your design will lack direction, and your final product may not reflect your vision. Start by thinking about your personal style, current trends, or the message you want your shirt to convey.
If you’re struggling to come up with ideas, brainstorm by jotting down themes or words that resonate with you. Maybe it’s a favorite quote, a graphic you’ve always loved, or even a fun design that aligns with your hobbies or lifestyle. Inspiration can come from anything—from a simple graphic or pattern to a deep, meaningful message.
Once you have a few ideas, think about how they’ll fit on a t-shirt. A bold statement might look great across the chest, while a smaller graphic or logo could work better on the corner of the shirt. This stage is all about making sure your concept is both creative and practical.
Step 2: Creating Your Design
Now that you have your concept, it’s time to bring it to life. Creating your design is where the fun begins! Whether you’re a graphic designer or a complete beginner, there are tools available for every skill level.
For those new to design, software like Canva or Adobe Spark can provide templates and easy-to-use tools for creating custom graphics. If you’re looking for more control over the design process, software like Adobe Illustrator or Procreate will give you the flexibility to create professional-grade artwork.
When designing, be mindful of the resolution and size of your file. A common mistake is creating a design that looks great on a screen but gets pixelated when printed. Aim for a resolution of 300 DPI (dots per inch) and ensure your file is large enough to be printed on the shirt without losing quality. Avoid overly complex designs that may not translate well to fabric—simplicity often results in a cleaner and more wearable look.
Step 3: Selecting the Right T-Shirt Fabric
Choosing the right fabric is vital because it directly impacts the feel and durability of your printed t-shirt. The most common fabric for custom t-shirts is cotton, thanks to its softness and breathability. However, you may want to consider other fabric options based on the look and feel you’re aiming for.
For example, polyester is ideal for moisture-wicking and performance wear, while cotton-polyester blends combine the best of both worlds—comfort and durability. Eco-conscious shoppers may prefer organic cotton, which is grown without pesticides or synthetic fertilizers, making it an environmentally friendly option.
When selecting fabric, think about your audience. If you’re creating custom t-shirts for an event or business, it’s important to ensure the fabric suits the purpose—whether it’s for a casual outing or a fitness event.
Step 4: Choosing the Right Printing Method
With your design and fabric selected, it’s time to decide how to print your custom t-shirt. There are several methods, each with its benefits depending on your design and production volume.
Screen printing is one of the oldest and most common methods, ideal for large runs with relatively simple designs. This method uses stencils to transfer ink onto the fabric, making it highly cost-effective for bulk orders. However, it’s not the best option for intricate designs or small runs.
Direct-to-Garment (DTG) printing is another popular option, particularly for designs with many colors or detailed artwork. It works similarly to an inkjet printer but is designed for textiles. DTG allows for vibrant, full-color designs with great detail, making it an excellent choice for complex or photo-realistic prints.
One printing method that’s gaining traction for its versatility and quality is Direct-to-Film (DTF) printing. The Prestige XL2 DTF printer has made waves in the printing industry by offering high-quality prints with vibrant colors and excellent durability. DTF works by printing the design onto a special film, which is then transferred to the fabric using heat and pressure. This method works on a variety of fabrics and can produce stunning prints without the need for complex setup, making it perfect for small runs or personalized items.
If you’re printing on polyester or synthetic fabrics, sublimation printing is a great option. This method uses heat to turn the dye into gas, allowing the design to become part of the fabric itself, which means it won’t fade over time.
Step 5: Preparing Your Design for Printing
Before your design can be printed, you need to ensure it’s ready for the printer. The preparation stage involves optimizing your design files for printing. Make sure the design is in the correct file format (usually PNG, PDF, or AI) and that it’s in the right color mode. For t-shirt printing, the color mode should be CMYK (cyan, magenta, yellow, and black), which is used for printing.
It’s also crucial to consider the size and placement of your design on the t-shirt. Make sure the design fits well on the fabric and doesn’t get cut off or distorted during the printing process. If you’re working with a professional printer, they will often provide specific guidelines for file size, resolution, and placement.
Step 6: Printing and Quality Control
Once your design is prepared and ready to go, it’s time for the actual printing. This step involves transferring your design onto the fabric using the chosen printing method. Whether you’re using screen printing, DTG, or DTF, the process involves careful attention to detail to ensure the colors, alignment, and print quality are spot-on.
After printing, quality control is crucial. Inspect each shirt for any errors, such as color mismatches or misalignments. Ensure that the print is clear and vibrant and that the ink has been properly cured to avoid fading or cracking over time.
If you’re printing in bulk, it’s wise to do a sample run before proceeding with a larger order. This allows you to make adjustments if necessary, ensuring that the final product meets your expectations.
Step 7: Post-Printing Care and Packaging
Once your custom t-shirts are printed, it’s time to care for them properly. To ensure the longevity of the design, follow proper care instructions, such as washing the shirts inside out, using cold water, and avoiding high heat when drying. This helps prevent fading and cracking of the print.
Packaging your t-shirts properly is essential, especially if you’re selling them or sending them as gifts. Fold each shirt neatly and consider using eco-friendly packaging materials to enhance your brand’s image.
Conclusion
The custom t-shirt printing process may seem complex, but with careful planning and attention to detail, you can turn any idea into a beautiful, wearable design. Whether you’re looking to create a one-of-a-kind piece for yourself or start a t-shirt business, following these steps will ensure that you produce high-quality, lasting custom t-shirts. From concept to cotton, the journey is filled with creativity and excitement—so go ahead, bring your design to life!