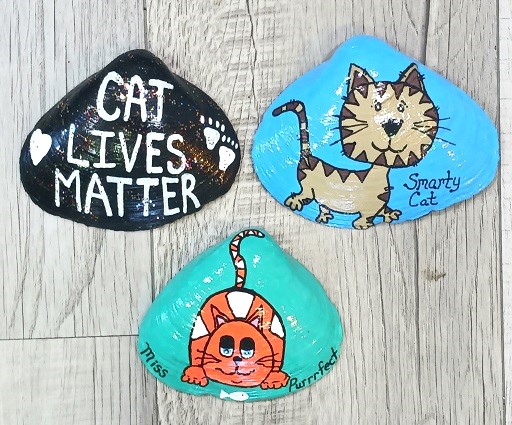
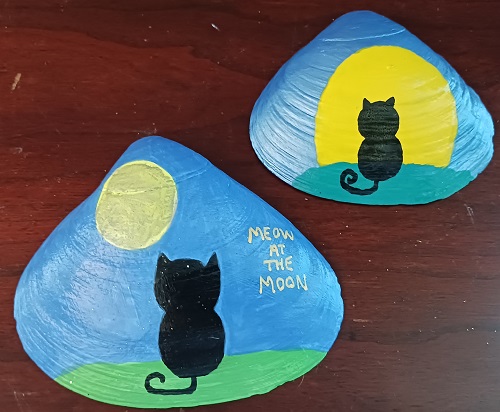
5 Hand Painted Kitty Cat Designs on Clam Shells Seashells
 Love cats? Got a kitty fur baby in your family? Check out this collection of 5 hand painted kitty cat designs! All of them have been painted onto medium and large clam shells that were collected from the beach. All of them are great for beginners who are just getting into seashell art. No patterns or templates are needed. Just a pencil and some paint supplies.
** Post contains affiliate links.
Wash all shells in warm soapy water using Dawn Liquid Dish Soap. It does the best job at removing sand, debris and fishy odors. Rinse with clean water. Lay them out on a towel to dry overnight.
Base coat all of the clam shells in your desired color using acrylic craft paint and a paint brush. I used 1-2 coats with 30-45 minutes of drying time between coats. Let them thoroughly dry until the paint is no longer tacky.
Use a pencil to sketch on your desired design. All of the ones in the photographs were free-handed onto the shell’s surface using basic shapes like circles, ovals, tubes, triangles, etc. Keep it simple!!! They don’t have to look absolutely perfect. Matter of fact, small flaws keep them looking handmade.
Designs were colored in using BETEM Acrylic Paint Markers. They have dual-ended tips (a medium and fine tip). These paint markers require no priming, no leaky messes, no clogged tips, no foul paint odors and they dry quickly. They come in beautiful vivid colors and can be purchased from Amazon for an affordable price. Let the paint dry.
I like to outline all of the designs and write words onto the seashells using a fine tip Tooli-Art Black Paint Marker. I buy them in a pack that contains several black and white paint markers. I use those 2 colors the most when writing wordage and doing outline work. You can purchase them from Amazon. They take a little longer to dry than the BETEM paint markers mention above. Regardless, they’re great!
Once all of the paint has dried you need to seal it. I like sealing them with 2 light coats of Mod Podge Clear Sealer with a Glossy Finish. I brush it on…wait an hour for the first coat to dry and then apply a second light coat. It goes on white but dries crystal clear. It protects the painted finish. You can display the seashells inside or outside of the home once the design has been sealed.
If you enjoy painting on seashells or crafting with seashells…you’ll find over 150+ seashell craft projects right here on the Two Classy Chics blog! We will be sharing more seashell craft projects in the future too!
* This post contains affiliate links. If you make a purchase, we may or may not receive a small commission which helps to support this site. Thank you!

