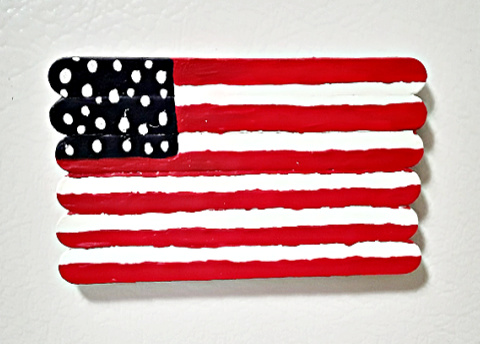
Kid’s Crafts: Painted Popsicle Sticks American Flag Refrigerator Magnet
 We love popsicles and save all of the wooden popsicle sticks to use in our craft projects! Matter of fact, we have hundreds of them tucked away in a storage box. This kid’s craft project requires some adult supervision and help. My two grandchildren had fun making these for the upcoming July 4th holiday. They did take two afternoons to complete to allow for the paint and glue to dry.
* This post contains affiliate links.
Before we get started here’s a few tips: Use old plastic placemats or sheets of aluminum foil to protect your work surface. You need a nonstick surface which works best. Wash and thoroughly dry all wooden popsicle sticks before you begin this project.
Painted Popsicle Sticks American Flag Refrigerator Magnet
8 Wooden Popsicle Sticks
Hot Glue Gun and Glue Sticks
Acrylic Craft Paint – Red, Navy Blue and White
Paint Brush, Water Dish, Paper Towels
Clear Acrylic Spray Sealer – Glossy Finish
Magnets
We broke 2 popsicle sticks in half for a total of 4 halves which were used as the base for the flag. You will use hot glue to attach the 6 remaining popsicles on top. The base holds everything together and you can see those “halves” behind the flag. Let dry for 10-15 minutes or until you have a solid bond.
Give the kids acrylic paints to make this project. Start with the red and white stripes first. Paint them across the entire flag. Once dry, use the navy blue paint to make your square in the upper left corner, covering the stripes in that area. The navy blue color is dark enough to cover that up. Let dry.
Since we were working with kids they had a hard time painting in stars so we opted to do white dots instead. If you’re working with older children they can do the stars and let the younger ones do the dots. Just dip the end of a paint brush into the white paint and “dot on” the spots. Let dry.
To seal the paint you’ll need to take the finish ones outside and spray them with clear acrylic spray sealer. We used a glossy finish. Let dry. Bring them back inside and use a hot glue gun to attach magnets onto the back. Let dry for 30 minutes before tacking them up onto the front of your refrigerator.
* This post contains affiliate links. If you make a purchase, we may or may not receive a small commission which helps to support this site. Thank you!
