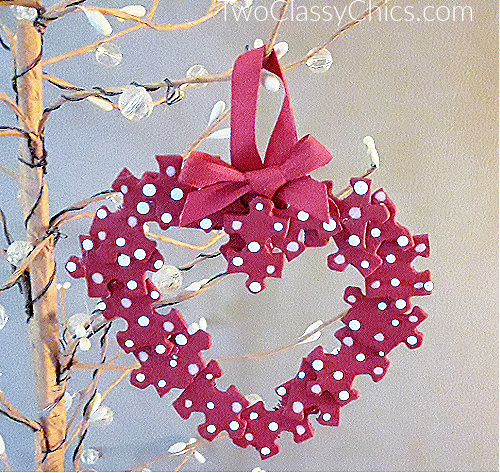
Heart Shape Puzzle Pieces Valentine’s Day Ornament
 These heart shaped puzzle pieces Valentine’s Day ornaments are a great to recycle cardboard puzzle pieces into new works of art. You’ll need an old cardboard puzzle along with basic craft supplies to make them. Once completed you can give them away for Valentine’s Day or use them at Christmas to hang on your holiday tree.
* This post contains affiliate links. Craft project was made with an 11 year old child with adult supervision.
Tips: We used a hot glue gun with an older child. If you’re working with young children you will want to use a clear, quick-drying craft glue. You can paint your hearts red, white or light pink and then swap-out the polka dot colors to coordinate with it. We opted for red hearts. Don’t own any puzzles? Ask family & friends for one of theirs that is missing pieces.
Heart Shape Puzzle Pieces Valentine’s Day Ornament
Cardboard Puzzle Pieces
Red Pipe Cleaner
Red Acrylic Paint
Paint Brush, Water Dish, Paper Towels
Hot Glue Gun and Glue Sticks
Paint Pens – White, Light Pink
2 Pieces Red Satin Ribbon
Scissors
Sheet of Aluminum Foil
Form the red Pipe Cleaner into a heart shape and twisting the two ends together. Lay puzzle pieces down on sheet of Aluminum Foil. This provides a great non-stick surface to use while painting them.
We found it best to paint the plain cardboard side of the puzzle pieces using the printed side as the backside. We painted 17 pieces to fit on our heart shape with 2 coats of acrylic paint. Make sure you paint the edges too. Let dry until paint is no longer tacky. About 90 minutes.
Use hot glue or a quick-drying clear craft glue to glue pieces onto the heart-shaped pipe cleaner. We used white and light pink paint pens to add the polka dots. You can use the end of your paint brush dipped into paint to make the polka dots too.
We used a piece of red satin ribbon (about 4″ in length) to make hanging loop which we glued onto the back. Cut a 7″ piece of red satin ribbon to make your bow. Glue to the top as shown in the photo. Let dry.
* This post contains affiliate links. If you make a purchase, we may or may not receive a small commission which helps to support this site. Thank you!
