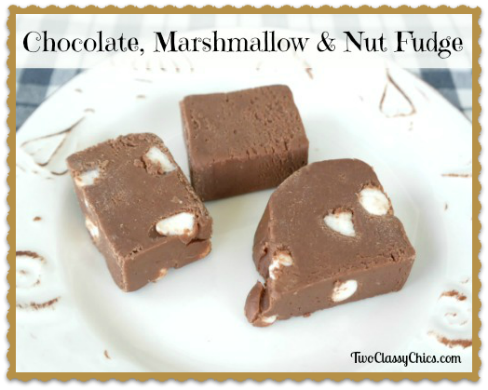
Easy Chocolate Marshmallow Nut Fudge Recipe
How many of you enjoy a good piece of homemade chocolate fudge? I know I do! I’ve been making homemade fudge for about 30 years now and absolutely love it! I probably make one batch of it every month. Sometimes I send it into my husband’s work for the staff to enjoy, to my granddaughter’s Girl Scouts meetings, for school and church bake sales, etc. Of course, I make it for myself too!
This recipe is really easy to make. It’s almost goof-proof if you ask me! Some people call this Rocky Road Fudge, but as you can see…I call it what it is. You can use just about any type of nut that you like…I prefer using chopped unsalted peanuts.
Easy Chocolate Marshmallow Nut Fudge
14 oz. can Sweetened Condensed Milk
12 oz. bag Semi-Sweet Chocolate Chips
1 tsp. Vanilla Extract
1/4 cup Unsalted Peanuts, finely chopped
3/4 cup Miniature Marshmallows
Non-Stick Baking Spray or Butter
Spray an 8″ by 8″ square baking dish lightly with the non-stick baking spray or lightly grease with butter. Set aside.
In a medium-sized saucepan combine together the Sweetened Condensed Milk with the bag of Semi-Sweet Chocolate Chips over medium heat, stirring almost constantly. You want to complete melt them until the mixture is smooth. Stir in the vanilla extract.
Remove the saucepan from heat. Use a large spoon to gently stir in the chopped Unsalted Peanuts and the Miniature Marshmallows. You want to do this quickly and ONLY stir the mixture enough to coat the mini marshmallows. You don’t want to over-stir and melt them!
Pour the fudge mixture into your prepared baking dish. Let it sit at room temperature for 10 minutes. Cover the dish and refrigerate for 1 hour to help them firm up quicker.
Once firm, remove from the refrigerator and cut into squares. Store fudge squares in an airtight container for storage.
Note: Fudge freezes extremely well! I will often cut them into squares and wrap them in parchment paper or plastic wrap. Then I place my prepared squares into a freezer container to freeze. I’ve kept them perfectly fine (frozen) for up to 3 months. To thaw, just place them in your refrigerator for a few hours and you’ll be good to go!
* This post contains affiliate links. If you make a purchase, we may or may not receive a small commission which helps to support this site. Thank you!

