 Our kids are back in school and even though school has started, some kids may still need some extra school supplies. Today’s craft project is a DIY Pencil Case that is made out of Duct Tape. Who knew that duct tape could be used for so many different things!
The project is courtesy of Fabian Morgan who is the author of the Duct Tape Series Books: Tape It & Make It, Tape It & Make More, Tape It & Wear It and her newly released book, Duct Tape Bags.
Craft Project: Duct Tape Pencil Case
Materials: white, blue, yellow, light blue, gold, orange, green, red, and fuchsia duct tape; 2 round neodyne magnets, key chain ring
Tools: self-healing cutting mat, corked back metal ruler, craft knife, parchment paper, 1/8″ hole puncher
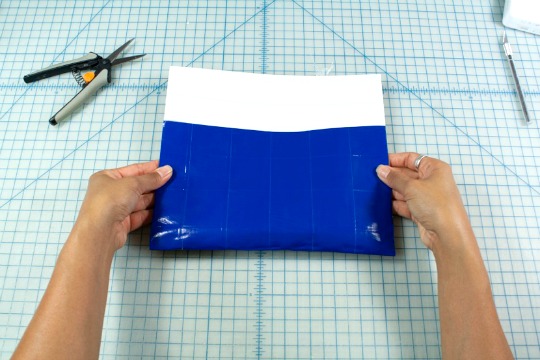
1. Place a parchment paper measuring 10″ wide x 15″ high on top of your worktable. Starting from the bottom, place 9 strips of white duct tape across the parchment paper. Be sure the strips overlap along the long edges by at least 1/8″. Flip over and place the duct tape/parchment paper on your worktable in the landscape position. Peel off parchment paper. Starting at the bottom of the half-made fabric, place 6 strips of blue duct tape across it. Be sure the strips overlap along the long edges by at least 1/8″. Trim down the fabric to 10″ x 15″. See the instructional video.
2. Place the fabric on your worktable in the portrait position, white side facing up.
3. Cut two strips of 6″ white duct tape. Measure and mark 6″ from the bottom left and right corners of the fabric. Starting at the two marks, vertically place each strip along the left and right edges. Be sure the strips are halfway on the fabric.
4. Fold back the vertical tape strips and pull up the bottom portion of the fabric. Push down along the outer edges to form the main pocket.
5. Trim the corners of the flap in a curved line.
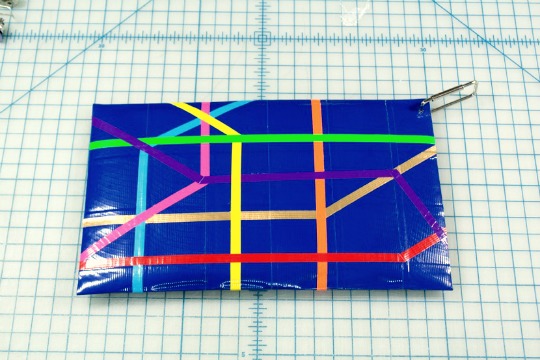
6. Cut 12″ strips of various colored tape. Trim the width of each trip to 1/4″. Use these strips to decorate the front of the pencil case. Trim edges of strips that extend past the edges of the pencil case.
7. Flip bag over so the opening is face up. Place a magnet on the inside of the flap, centered and approximately 1/2″ from the top edge. Cover with a piece of white duct tape.
8. Place a magnet inside the pocket, centered and approximately 1/2″ from the bottom edge. Push it against the top fabric of the pocket and cover from the inside with a piece of white duct tape.
9. Using the hole puncher, make a hole on the upper left corner of the pencil case near the top of the pocket.
10. Loop the key ring through the hole.
11. Close the flap and flip the bag over.
Richela Fabian Morgan began her duct tape odyssey 8 years ago with a simple bi-fold wallet, before writing the best-selling crafting books Tape It & Make It, Tape It & Make More, and Tape It & Wear It. She is an indie crafter specializing in paper, adhesives, and found materials. Her newest duct tape crafting book, Duct Tape Bags, is available nationwide.
* This post contains affiliate links. If you make a purchase, we may or may not receive a small commission which helps to support this site. Thank you!
This is so unique! Who knew you could do so much with duct tape. I love the design, too!
Ah, yes duct tape: It’s like The Force: it has a dark side and a light side and it holds the Universe together. Fun craft.
I have not read Richela Fabian Morgan’s books, but if this is an example of her projects I can understand why she is so popular. This is a very cute yet usable item to make.