It’s hard to believe but Summer is quickly winding down and Fall will be here before we know it. As the kids go back to school, I start thinking about the holidays. I don’t know about all of you, but I like getting a jump on my holiday craft projects before the season even begins!
Last week the Princess and I made some adorable coat pins from a plastic that is meltable called “Friendly Plastic”. You can find it in any general craft supply store and from several sources online. When it comes to melting it, I suggest letting an adult do it. We used our toaster oven to melt them but you can use a household oven. Follow the melting directions on the Friendly Plastic package.
Friendly Plastic comes in little sheets and is pretty inexpensive if you ask me. We picked up several solid color sheets and a few with fun prints. Here’s how we made our coat pins.
Kid’s Craft Project: Friendly Plastic Coat Pins
Multiple Sheets of Friendly Plastic
Metal Pin Back
All-Purpose Craft Glue
Scissors
Sheet of Aluminum Foil
Toaster Oven or Household Oven
Oven Mits
Baking Tray or Baking Dish
Line your baking dish or tray with a sheet of aluminum foil. Set aside.
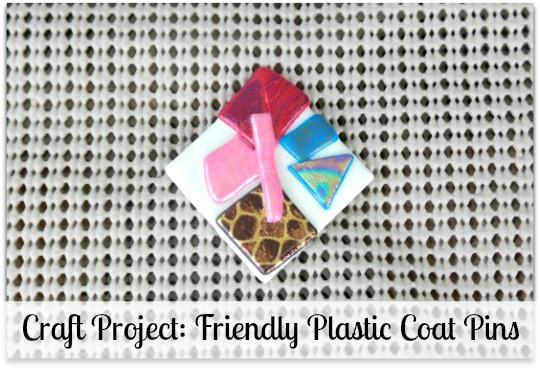
Cut a 2 1/2″ square from a piece of Friendly Plastic. We used white for the one shown in the example above and this will serve as the base for your coat pin. Cut 6 various small shapes from the other Friendly Plastic pieces that you have. The Princess chose random colors, shapes and sizes. Just make sure that all of those pieces will fit onto the 2 1/2″ backing square that you original cut.
Lay your plastic bases onto the sheet of aluminum foil, leaving a little bit of space between all of your bases. Take the small Friendly Plastic pieces and layer them on top in any design that the kids would like. I let the Princess be creative with her colors, shapes and sizes, and the pattern when she lays them on top of the base piece.
We used our toaster oven to melt them which took longer than using a conventional oven, but I didn’t want to heat up my entire kitchen doing this project. The melting instructions can be found on the package…we did ours on low heat. We kept checking them every minute or so until we saw that the top pieces had melted onto the bottom base. We removed the baking tray and left them cool on the tray and then lifted them off with a spatula to continue cooling.
Once they’re completely cooled, use the all-purpose craft glue to glue a straight-bar pin-back onto the back side of the coat pin. Let them dry overnight and they’re done!
The Princess is going to be placing her’s into little jewelry gift boxes and giving them as a Holiday Gift to her aunts, school teacher, mom and to a few of her friends.
Note: If you can’t find the Friendly Plastic little sheets at your local craft supply store, you can purchase the Polly Plastics Moldable Plastic and Color Pellet Kit. It’s moldable plastic pellets that work’s similar to the Friendly Plastic. They sell it for a great price on Amazon and you can read about it over there. Matter of fact, my local craft store didn’t have a huge selection left of the little sheets, I guess it’s not too popular anymore, so I’ll need to get one of those kits (mentioned above) for future projects that I have planned. Just an FYI on that.
* This post contains affiliate links. If you make a purchase, we may or may not receive a small commission which helps to support this site. Thank you!

I’ve not worked with the Friendly Plastic but sure want to give it a try. I rarely use my old toaster oven anymore but forgot it can be great for craft projects like this. I’m on the lookout now to see some other crafty ideas using this plastic.
This is a great project for kids or adults too. I have never used Friendly Plastic and am intrigued by all the different uses I can think for making things with it.
What an awesome Coat Pin. I never knew that they had friendly plastic available that you could mold into shape! Your imagination could run wild with these cute coat pins. Thank you so much for sharing this adorable kraft! Again you showed me a thing or two! 🙂
This is so interesting! What a neat craft to make!