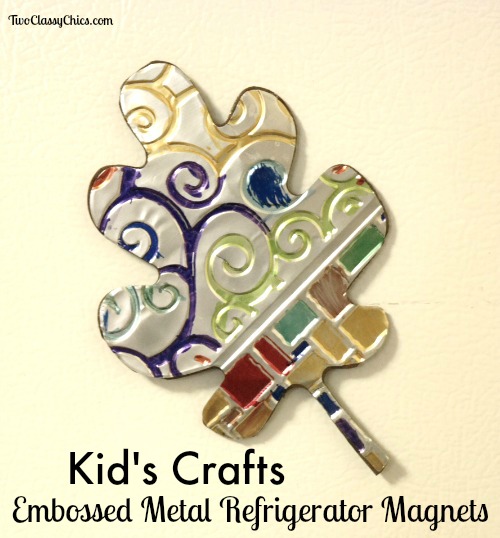
Kid’s Crafts: Embossed Metal Refrigerator Magnets
 This week’s installment of “Crafting with Kids” is a project that is geared towards the older kids, teens and adults. I would say that children ages 6 and up could make these with adult supervision.
My 6 1/2 year old grand daughter and I made several of these embossed metal refrigerator magnets and I admit, I did have to help her with the cutting and embossing parts. She did the coloring part and gluing which she was happy to do! In addition, you’ll have to own a die cutting and embossing machine which a lot of crafters own these days.
Embossed Metal Refrigerator Magnets
Die Cutting Machine
Embossing Folders
Die Cutters in Various Shapes
Aluminum Sheets (for your particular machine)
1/2″ Round Magnets
All Purpose Craft Glue
Craft Foam Sheets
Sharpie Markers in a Variety of Colors
Scissors
I used my die cutting machine and embossing folders that I already had on-hand. I had purchased some aluminum crafting sheets off of Ebay for my particular machine. There are several different brands of die cutting & embossing machines out there like the Cricut, Cuttlebug and others. I used primarily my Cuttlebug.
For some reason…she wanted to make a variety of Fall leaves as our shapes but you can use whatever cutting dies & embossing folders that you have on hand. We first used the machine to cut out our various shapes. We then ran those shapes through the machine with our chosen embossing folders which give the metal cut-out it’s embossed design. We used the Cuttlebug to cut out those same shapes from craft foam (in this case dark brown craft foam) and will be using those to back our refrigerator magnets.
Once you have everything cut out and embossed…let the child glue the foam shape to the back of the metal cut out using all-purpose craft glue. Next…give them the Sharpie Markers and let them color in the designs on the front. This was the Princess’ favorite part of this craft project!
Once they have been colored in…flip them over and glue the round metal magnet onto the back. Let them dry overnight before placing them onto your refrigerator!
We are going to make some more for the Spring and Summer season over the next few weeks. Like I said…use whatever cutting dies and embossing folders that you have on hand.
* This post contains affiliate links. If you make a purchase, we may or may not receive a small commission which helps to support this site. Thank you!
