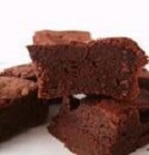
Classic Chocolate Brownies Recipe
How many of you enjoy chocolate brownies? We love brownies and I bake a batch of brownies once every couple of weeks. We love all kinds of brownies from the classic chocolate, to blondies and even cheesecake brownies.
Today I thought I would share my recipe for the Classic Chocolate Brownies with all of you. These are not your fudge style brownies but more of your cake-like style. You can have them plain or enjoy them like we do ala mode (with low-fat vanilla ice cream). They are also great to chop up and toss into some plain vanilla yogurt too!
- 3/4 cup all-purpose flour
- 1/2 teaspoon salt
- 1/2 teaspoon baking powder
- 2 squares (1 oz. each) unsweetened chocolate
- 1/3 cup butter, softened
- 1 cup granulated sugar
- 2 large eggs
- Preheat oven to 350 degrees F.
- In a large mixing bowl sift together the all-purpose flour, salt and baking powder. In a large saucepan over low heat mix together the squares of chocolate with the butter, stirring constantly over low heat until melted and combined. Remove from heat, set aside, let cool for 4 minutes.
- Once mixture has cooled stir in the granulated sugar and large eggs. Beat with an electric mixer for 30 to 40 seconds or by hand. Stir chocolate mixture into the flour mixture until all ingredients are well combined.
- Lightly dust a 10″ square baking dish with all-purpose flour or spray with non-stick cooking spray. Pour brownie batter into baking dish in an even layer. Place dish into the oven and bake for 25 to 30 minutes or until center is done. Remove and let cool. Cut into squares and store brownies in an airtight container.
Additional Tips: Brownies freeze very well once prepared. You will want to let them cool completely and cut them into squares. Wrap each square in plastic freezer wrap and then place all of the wrapped squares into a freezer zip close storage bag. When you want to thaw some out, just grab what you need and thaw at room temperature for an hour or two.
I will often bake double batches and freeze some for later use. I then can grab some and toss into hubby’s lunch box or into grand daughter’s school lunchbox. By the time lunchtime rolls around, they are thawed out and ready for them to enjoy. Great time saver!
* This post contains affiliate links. If you make a purchase, we may or may not receive a small commission which helps to support this site.
